Piano tunes make our minds better. The melody of the piano can give you peace of mind when you are sad or it can double your joy when you are happy.
With the introduction of many applications, you don’t need a grand piano to play some basic tunes.
This is why I’m going to show you how to make a Piano game in Scratch today.

What if I tell you that making a Piano game is more interesting and enjoyable than playing the Piano!
Yes, you are reading it right!
Before we get ahead let’s get to know a little bit about the Scratch platform.
What is Scratch Programming?
Scratch is a free Block-based programming language and an online community where we can create our own interactive stories, games, and animations.
So, you don’t have to write any coding here, you just need to drag and drop the blocks on the workspace
Scratch was developed by the Lifelong Kindergarten Group at MIT. It is a suitable platform for school students to learn coding.
We are going to use Scratch 3.0 to make our piano game. We can also download the offline application of Scratch 3.0 and use it.
Here are the steps to making a Piano Game in Scratch
When you go to Scratch you will see the text “Create”. Just click on “Create”

After clicking “Create”, you are redirected to Scratch Main Workplace.
This is where you have to design your piano and make the piano with the help of coding.
Here you will see two screens. The screen where a cat (default sprite) is standing, is your designing screen, and next to it you will see a blank screen where you have to code.
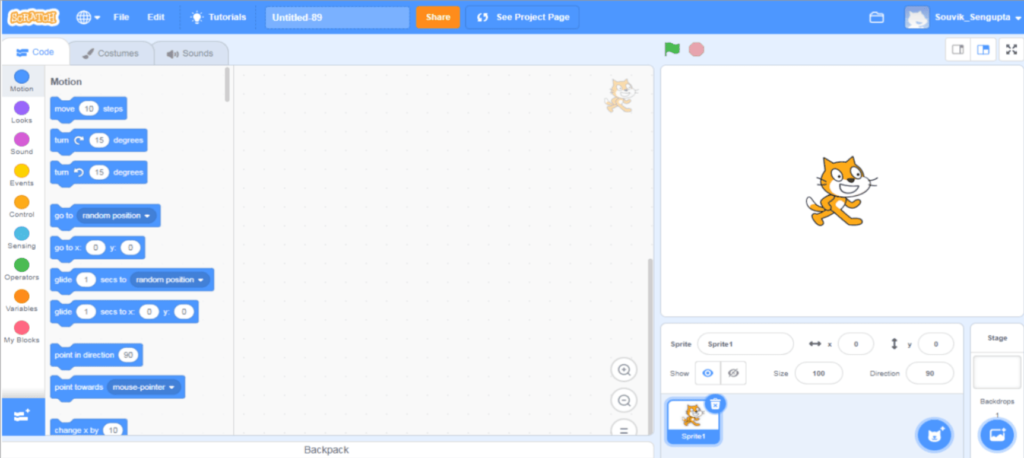
Now just delete the Cat, move your mouse over the sprite and select the “paint”. When you click on “paint”, you will get a place to draw your piano.
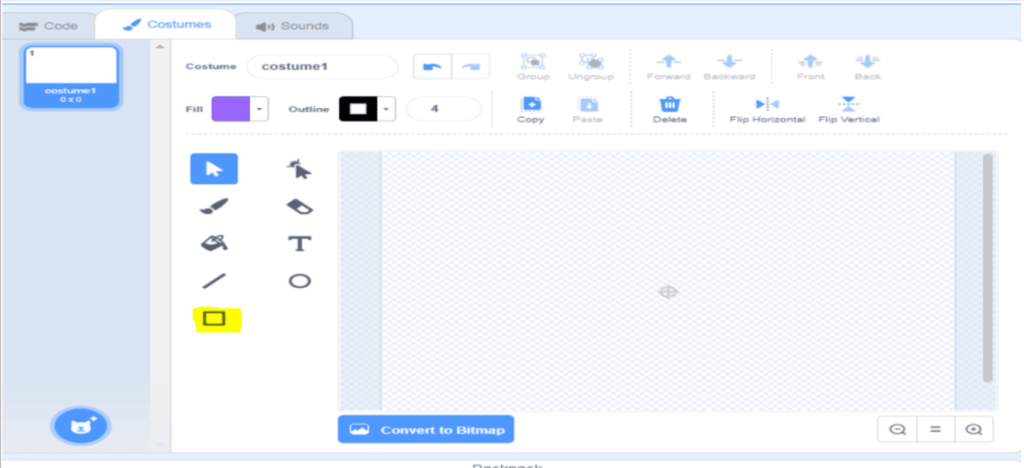
You can design the piano using only two square blocks (indicated in yellow), after which you can color it using the “Fill” option.
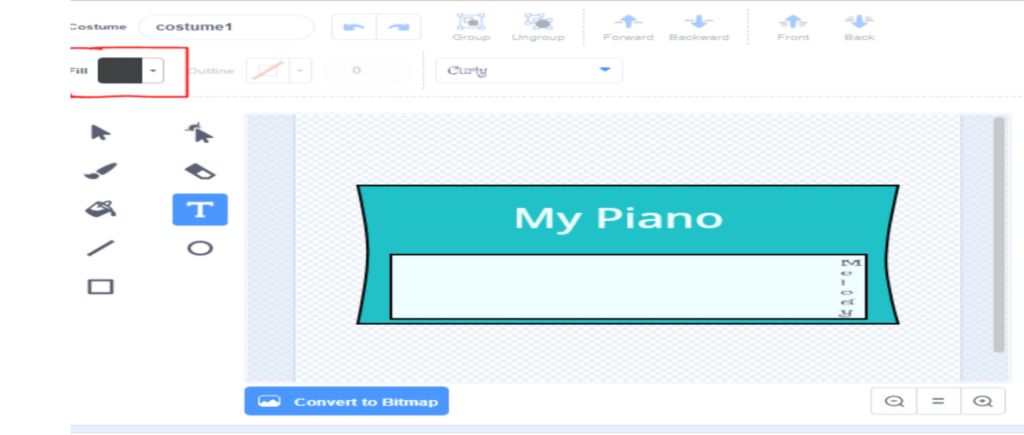
You can see, my piano board has ”My Piano” written on it.
You can also go to the “T”( T for Text) option and give your piano a name.
Once your piano board is complete, return to sprite and draw the piano buttons one by one using the same method (a square block).
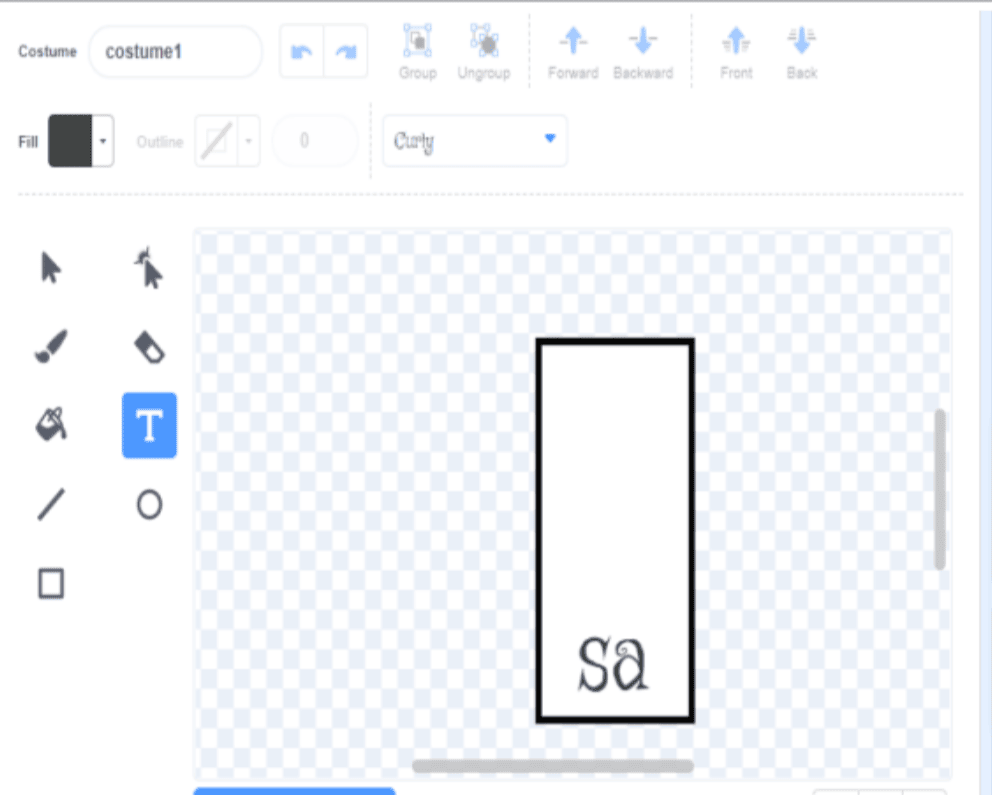
We need to add two types of buttons: white and black because as many already know piano has these two types of buttons.
The music has seven tunes, therefore you’ll need to add seven white buttons.
You may also draw Black Buttons in the same way (by using black color).
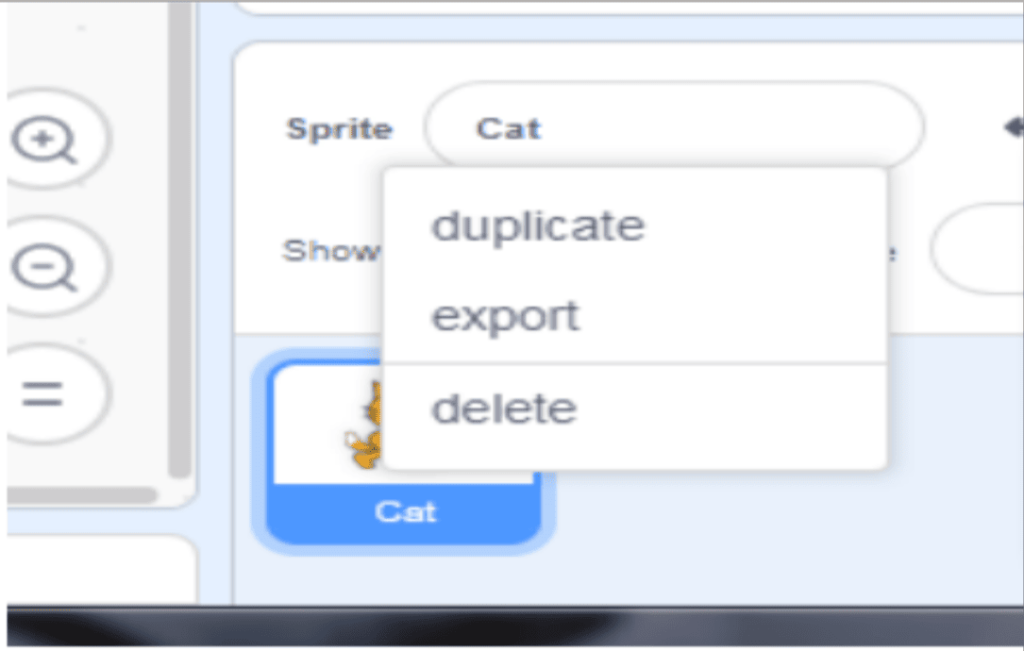
Note: You don’t have to create the buttons seven times; you can draw once and duplicate (right-click on the sprite box and select duplicate) six times.
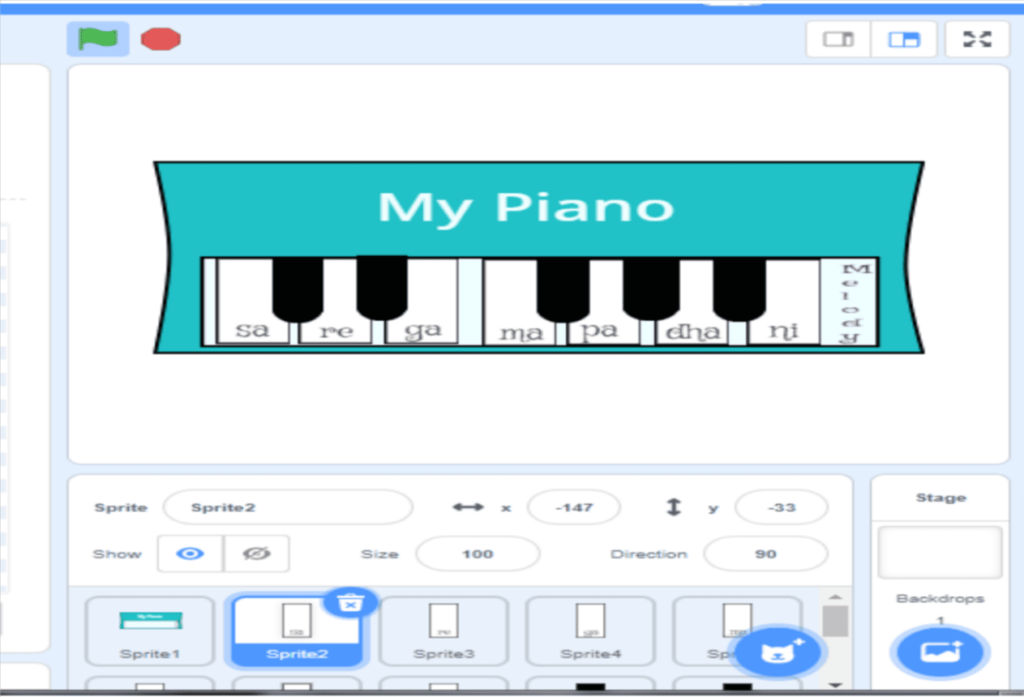
When you have finished drawing all the buttons, you need to arrange the buttons one by one on the piano board.
There is a “Backdrops” option next to “Sprite.” From there, you can select any piano background.
The piano provides the melody. So, to construct a piano, we must include a music function. To do so, we must first click on the Extension icon.
When you click on the extension icon (yellow marked icon) then the below window will open in front of you. Now you need to click on the Music extension (underlined in red).

Click on the “Music” button to select this extension.
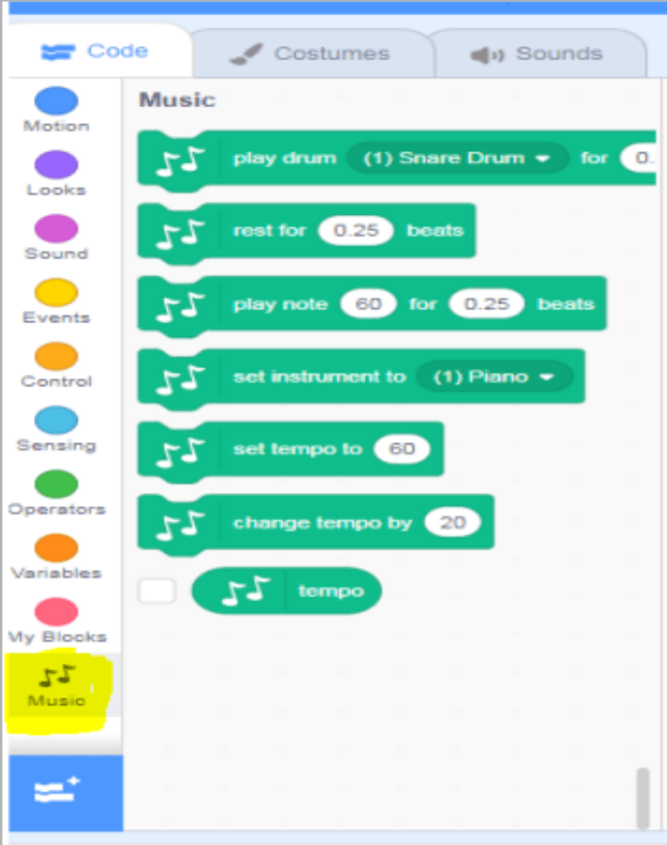
When this extension is added it will appear in the block panel on the very end (marked in yellow) as shown in the image.
Coding the Piano Game
Now it’s time to code; Scratch’s coding is Block-Based, therefore all codes are already available in blocks (click on the yellow code).
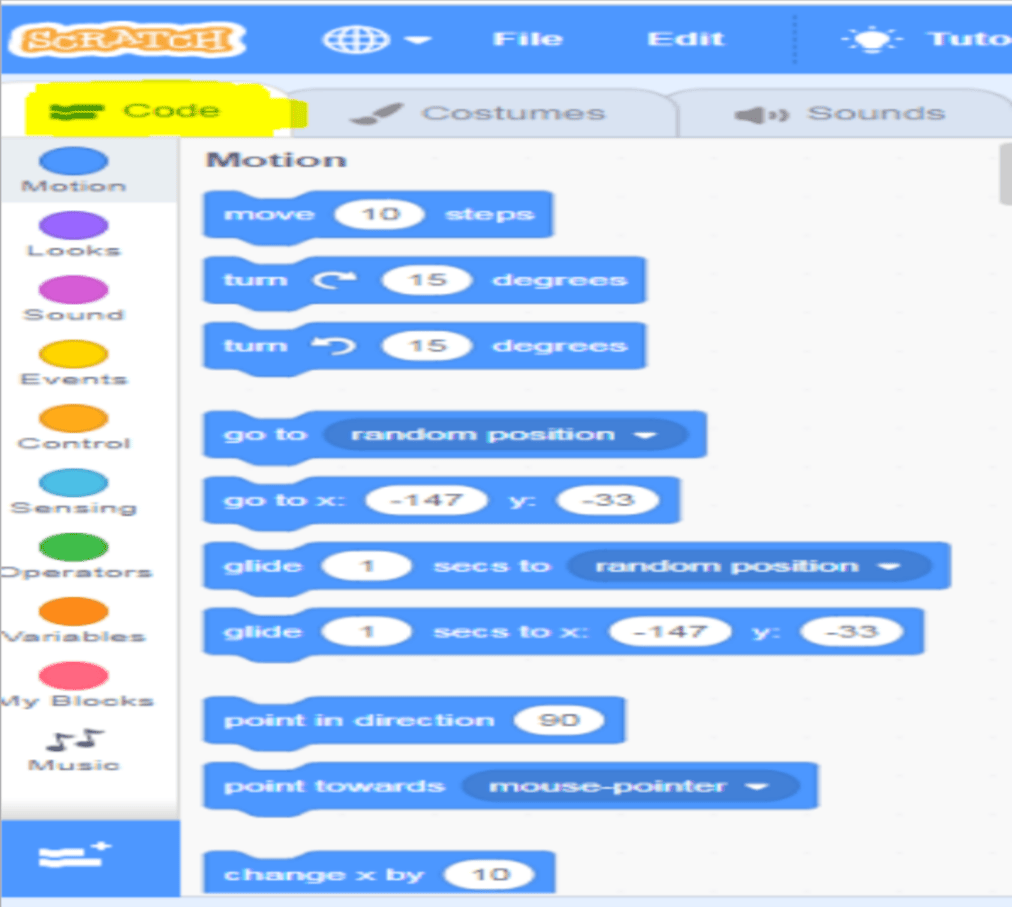
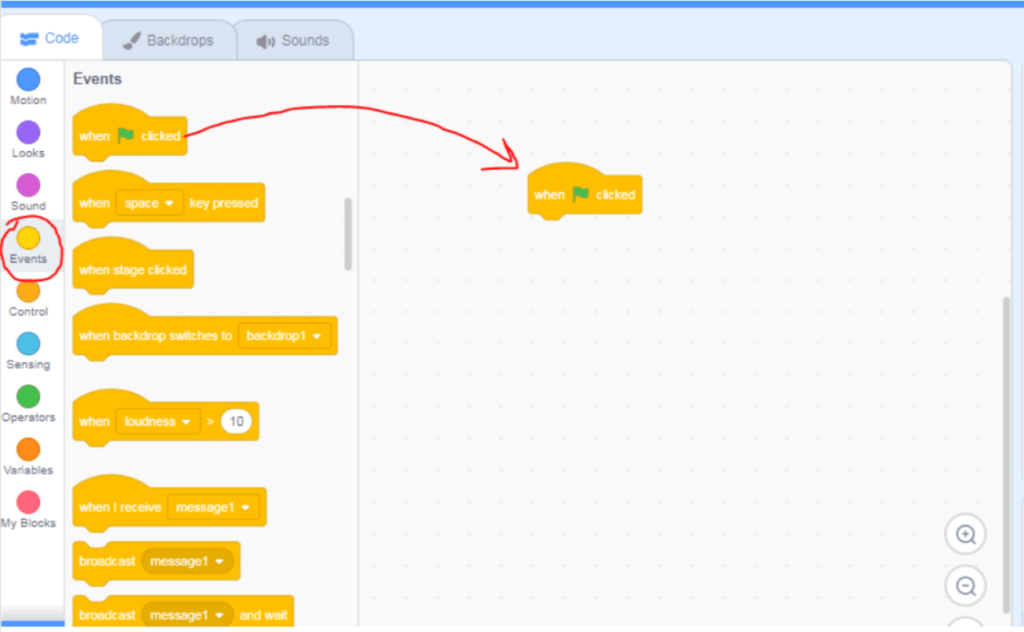
Let’s start coding!
First, we will do code for the Piano Board and then for the Piano Buttons.
Here, goes the whole coding for “Piano Board”
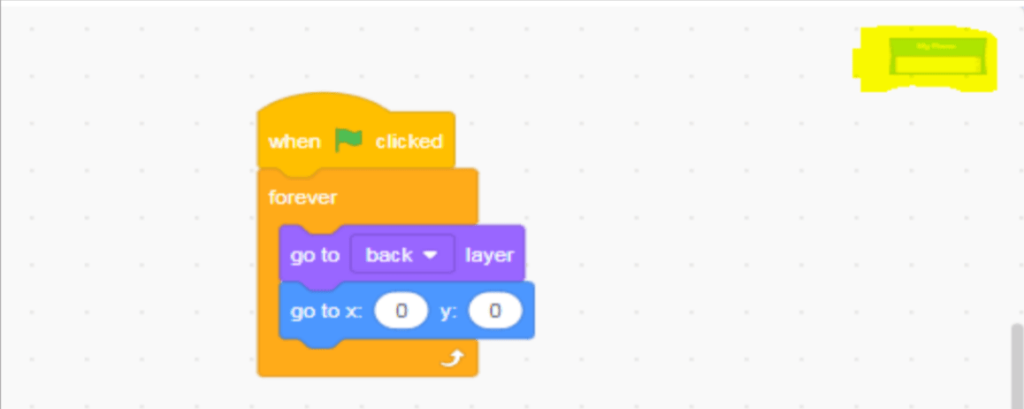
Code Explanation: When the green flag clicked, every time (that’s why it’s inside the forever block) the piano board would go right in the middle of the screen (that’s why go to x,y are 0,0 respectively) and go to the back layer.
The code is written in such a way (as shown in the image) above because the piano button will be set in the front layer.
Code For White Buttons: Before writing the code you have to select the first white button.
Then go to the “Events” block and drag “when flag clicked” then go to the “control” section and pick the “Forever” block.
After that, you need to go to the “Motion” block and drag “go to x(),y().
Then you need to go “Music” extension section and drag “set instruments to (1) piano”
For the second part of the white button code, you need to go to the “Events” section and drag “when this sprite clicked”.
After that go to the “Music” extension block and pick play note 60 for 0.25 beats.
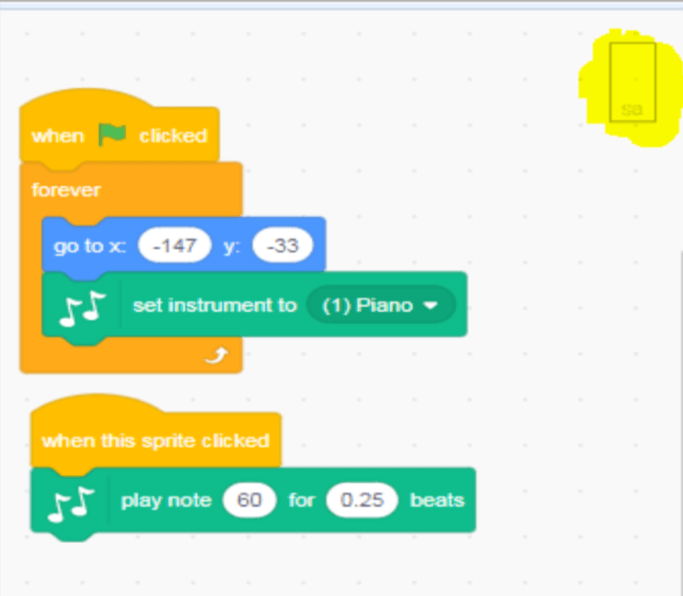
Code Explanation: When the green flag clicked. This white button goes to a specific location (that’s why x,y are -147,-33 respectively).
Then we added a piano instrument to the button, which makes a piano sound when you press it.
The second section of the code is constructed in such a way that when you press this button, the piano’s 60th note will be played.
Code for the second White Button: First select the 2nd white button. See the 2nd white button code given in the image below carefully and compare it with the first white button’s code
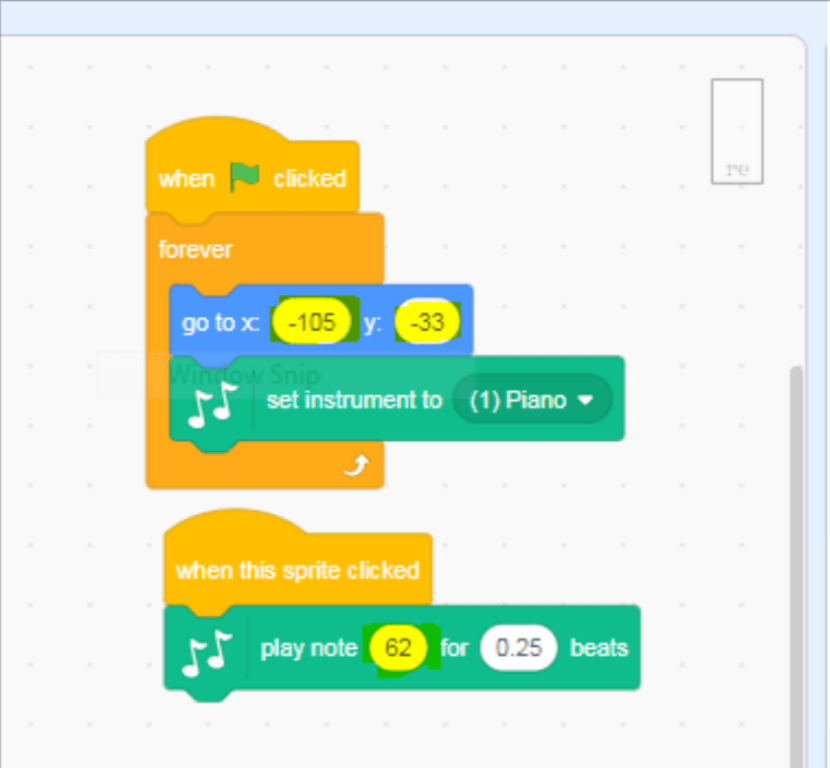
Look, everything is the same; only the button’s position has moved, hence the X and Y values are different.
In addition, the piano play note has been modified from 60 to 62.
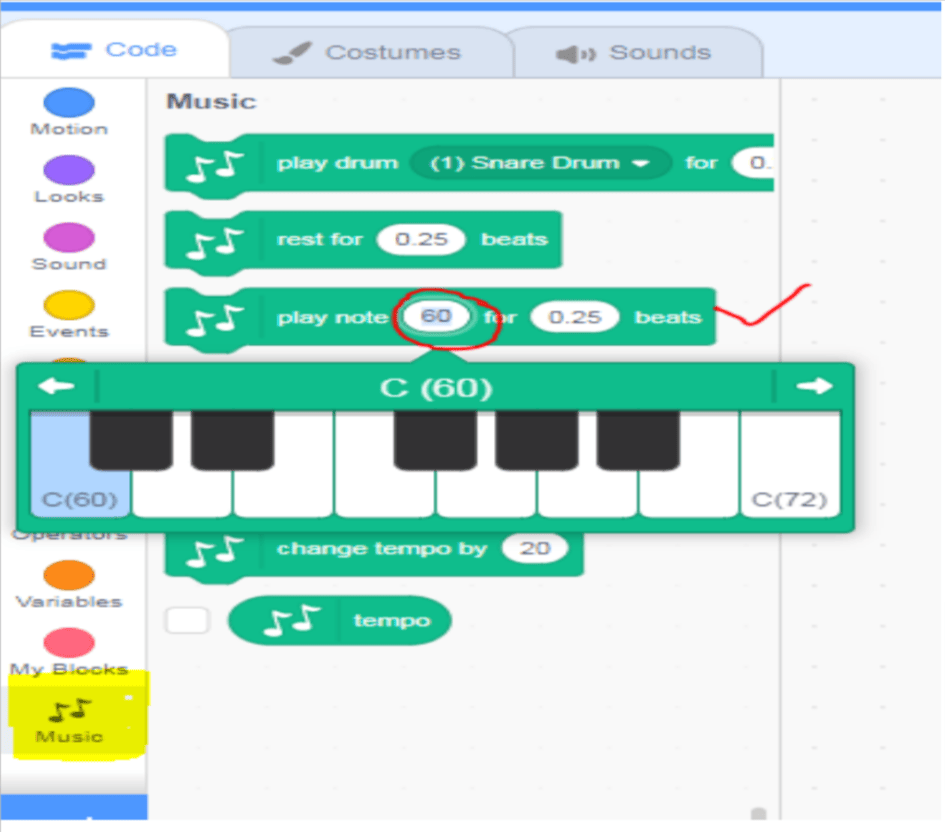
The remaining five white buttons must be coded in the same manner. Here’s how to change a piano note: Go to the “code” section first. Click on “Music” (yellow highlighted), then click on the red circle where you can see C(60) through C(72) notes.
Code For Black Button: The code for the black and white buttons is the same. Simply click the black button to begin coding.
To begin, drag “when flag clicked” to the “Events” block, then go to the “Control” section and select the “Forever” Block.
Then you need to go to the “Music” extension section and drag “set instruments to (1) piano”.
After that, you need to go to the “Motion” block and drag go to x(),y().
Black buttons are placed at the front layer. That’s why you need to go to the “Looks” section and drag the “go to the front layer” block.
For the second part of the black button code, you need to go to the “Events” section and drag “when this sprite clicked”.
After that go to the “Music” extension block and pick play note 66 for 0.25 beats.
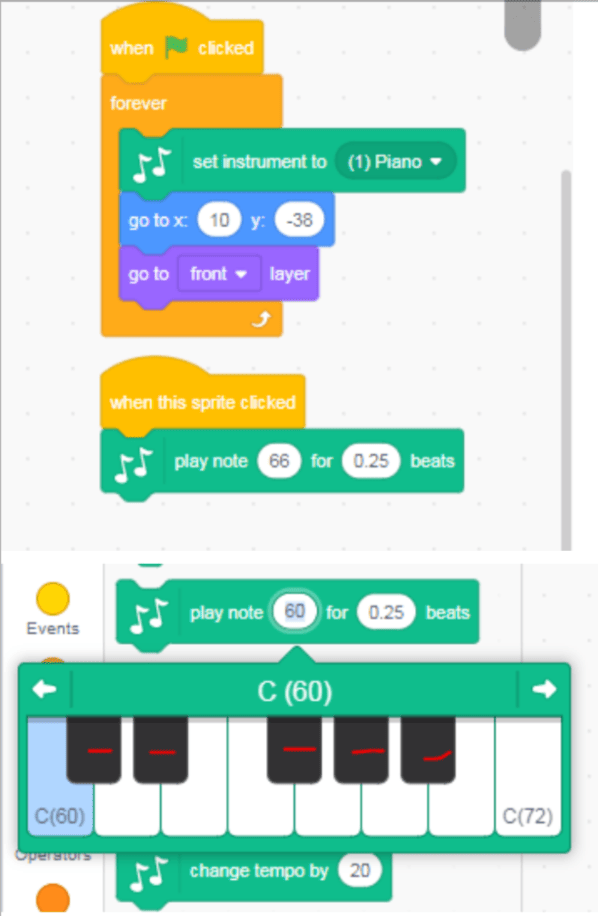
Note: the black button piano note is mentioned in the block.
Select the black piano note for the back button (61, 63,66,68,70 notes will be used for black buttons).
This is how you code the rest of the black buttons on your piano.
Now is the time to make others happy by playing your own Piano.
Conclusion
Now share the project with your friends so they may create a piano game of their own. To share the project, click the orange Share button.
Also, copy the URL and share it with your relatives and friends.
I hope you enjoyed this blog; feel free to tweak or remix the project as you see fit. The following is a link to the entire project:
Click here to see the completed project
Learn Scratch at BrightChamps with its specially designed curriculum that makes learning programming easy for students in Grade 1-12.
BrightChamps offers interactive online coding classes for kids, equipping them with essential programming knowledge and problem-solving skills. We also provides engaging and educational computer games for kids, offering a fun way to learn and explore various subject
BrightChamps also teaches a variety of other programs that help kids build a foundation in computer programming through activities, interactive lessons, and other means.

