Everyone can have fun playing the game “Roblox.” If you are using this platform for a while, you may be wondering how to publish your own Roblox game for the first time on the platform. You may make your own Roblox game and post it on the website using the information in this article.
Before diving into the blog, You can check out the video.
Table of contents
What Exactly is Roblox?
Here’s a summary of what’s happening in case you arrived at this page without knowing what Roblox is or if a family member asked you to help them.
A game production platform called Roblox made its debut in 2006. It enables individuals from all around the world to create their games using a simple engine, which they can then distribute to other players.
These games can include turn-based RPGs, first-person shooters, and platformers.
Software Required to Create Your First Roblox Game
You should already have an account if you or a family member are Roblox participants. If you don’t have one, go to the Roblox website and fill out the form to get one.
After that, you’ll need to install special software to construct your game.
Once logged in, go to the Roblox home page and click the Create button at the top of the screen. To download the Roblox creation program, go to the new website and select Start Creating, then download Studio.
Once the application has been downloaded, run it and install the program by following the simple on-screen instructions.
Drag and drop the software to a location on your hard drive if you’re using a Mac. Everything you need to get going is now in your hands.
You may begin by simply logging into your Roblox account using the Studio software.
How Do You Make A Game On Roblox
Now that you have your program, you may start creating your game right away. Of course, as with many things, it’s not quite that simple. Depending on the kind of game you want to create, your first steps will vary.
One of the finest benefits of Roblox Studio is the large variety of game templates included. These templates are ideal for laying a firm foundation on which to build. If this is your first time creating a game, start with something simple.
As your first game, we propose making an obstacle course, often known as an Obby.
These kinds of games are not only quite common in Roblox, but they are also rather easy to make, with or without a template.
To begin, launch Roblox Studio and choose either Baseplate or Obby, depending on how you want to begin.
Baseplate provides a completely blank slate with simply a spawning place and solid ground, whereas Obby includes the beginning of an obstacle course to get you started.
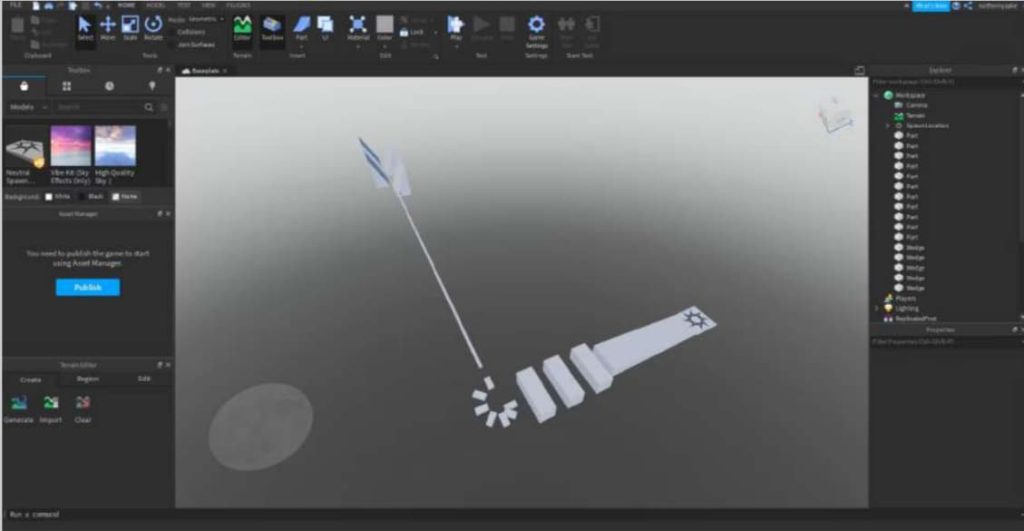
In any event, making your game will follow a pretty similar method. Remember to open the Workspace drop-down box on the right of the screen, pick Baseplate, and then hit the Delete key if you started with a baseplate.
The purpose of an obstacle course is for players to die if they fail in any way.
How to Use Roblox Studio
When you begin a new game, the first thing you must do is figure out how to control the camera. W, A, S, and D will advance, backward, left, and right the camera, respectively.
Additionally, you may move your camera by holding down the right mouse button while dragging it, and you can go up and down by hitting E for up and Q for down.
Your obstacle course needs obstacles, to begin with, which you can create by using the toolbar at the top of the screen. Under the Parts header, click the arrow.
This will provide a list of various forms that you can generate.
You may utilise these various shapes to begin building barriers. For example, a series of stepping stones that players must hop upon without falling is a wonderful place to start.
However, to construct hurdles, you must first understand how to manipulate pieces.
With your spawning part chosen, you can use the toolbar to move, scale, and rotate your objects on the screen.
The move command allows you to modify the location of your item, the scale command allows you to adjust its size, and the rotate command allows you to change its orientation.
Using these tools, you should be able to construct your first obstacles using simple forms. You must stop your barriers from falling from the sky after everything is in place.
Select your obstacles, then click the Anchor symbol in the Edit area of the toolbar. Remember that you can test your game by hitting the Play button in the toolbar at the top of your screen.
To make things easier, you can also right-click on any objects you want identical duplicates of and select Duplicate.
You should be able to develop something similar to the levels shown above using just the guidelines we’ve provided.
Improving the Visuals of Your Roblox Game
Once you’ve developed the essentials of an obstacle course, you’ll need to make it seem nicer before sharing it with the rest of the world. There are several approaches you may take.
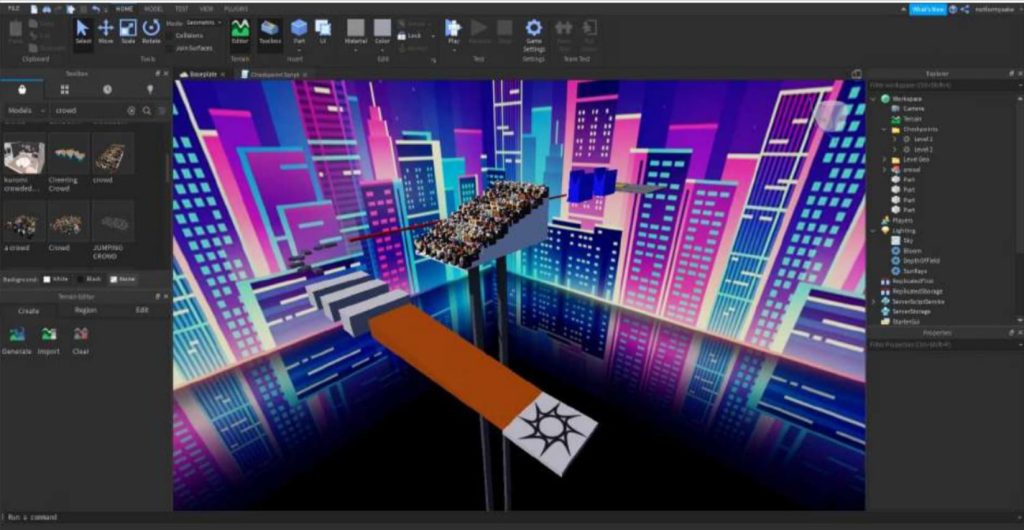
You may select objects and skyboxes from a library of pre-made items using the Toolbox option. You may customise your new game with everything from trees to spectators. If the Toolbox isn’t visible, click the Toolbox icon under the Insert header to bring it up.
Once the toolbox is open, you may discover objects by typing a search term into the search field and pressing Enter.
Then, simply click on the desired object, and it will appear in your game. Then, much like with your level barriers, you may alter them.
Additionally, you may make your components more attractive by choosing the Edit option from the toolbar. Select the area whose appearance you want to change.
By selecting the arrow next to the Material heading, you may choose the material from which your part will be made. The same action may be taken from the Colour menu to change its colour.
After your game, you may add notes to thank participants for participating. Make a flat item to serve as a sign and ensure that it is anchored.
Next, choose the new item you created in the Explorer window on the right side of the screen and click the white + sign that appears when you hover over it.
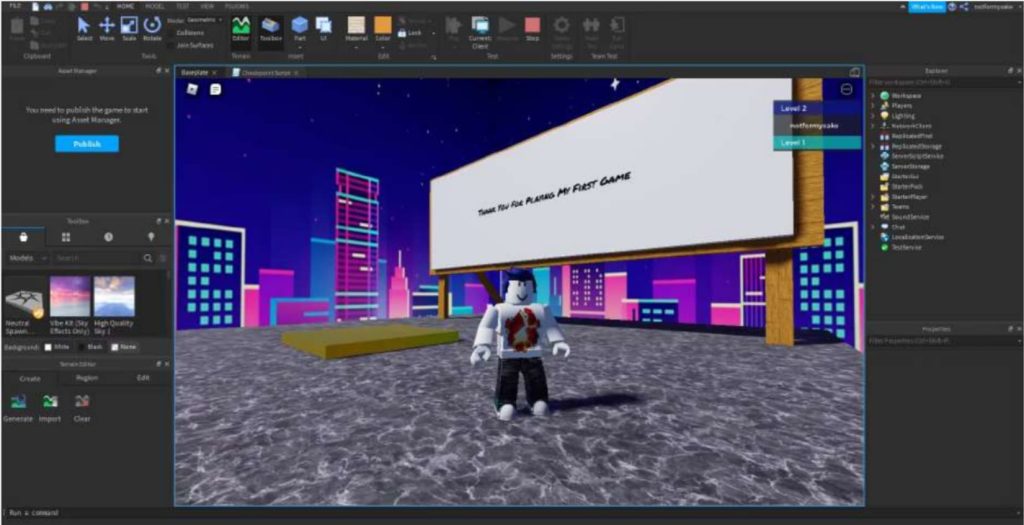
Pick SurfaceGui from the drop-down menu that opens, then click the white + sign on the newly formed SurfaceGui and select Text Label. Modify the options under the Text header in the Text Label Properties windows to change the size, colour, font, and text of your label.
If your label does not display, check the Properties box for the SurfaceGui you created. Try each option under the Face heading to see whether the label displays.
This heading determines which side of the item your label will be displayed on.
The final step is to publish your game. Navigate to File > Save to Roblox As, and then choose to create a new game.
Give your game a description and a name here to let folks know what it’s about. When you’re finished, click Create, and your game will be online immediately.
What Should You Do Next With Your Roblox Game Creation?
Everything you need to create in your Roblox game is now in your control. Practice makes perfect, so keep practicing if you want to keep becoming better.
You’ll grow better at Roblox Studio the more you use it.
Before you can begin creating more difficult games, you must get familiar with the engine’s programming language, Lua. This language is really simple to learn, and you may have the fundamentals down in just a few days of practice.
With your Lua skills, you’ll be able to create practically any type of game you want.
If you want to get very technical, you may create your pieces from scratch using 3D modeling software like Blender.
If you encounter difficulties, you may seek support from a number of online organizations that are devoted to discussing the development of Roblox games.
Conclusion
With this instruction, you should be well on your way to becoming a master of Roblox game creation.
We’ve gone through the fundamentals, from installing the software to designing objects and ensuring they stay in place. Now get out there and code stunning games on Roblox!
BrightChamps provides online robotics courses for kids, which helps to built their career in robotics.
To learn more about Roblox and game development, check out the interesting articles on the BrightCHAMPS blog.

