Do you agree that impressions are important?
Whether it’s your outward appearance or the Scratch project start screen, initial impressions have a big impact on whether or not people stick around to interact with you (or your projects) later on.
After realising this, wouldn’t it be preferable to make a special effort to create a fantastic start screen for your Scratch projects?
I’ll demonstrate how to make a start screen in Scratch with a custom button that you can use in all of your projects in place of the standard Green Flag button.

Simple blocks like Repeat, If/Else, and Broadcast will be used. I promise it won’t take long!
Simply simply, this lesson demonstrates how to use Scratch’s Repeat, If, and Sequence blocks to create an attractive start screen.
Let’s take a quick look at Scratch before we get started.
About Scratch Programming
Scratch is a high-level visual block-based programming language and platform created by the MIT Media Lab to teach coding to children aged 6 to 16.
It was first made public in 2007 and has received several updates since then, the most recent being Scratch 3.0.
Scratch provides limitless creative freedom because, first and foremost, it is completely free to use, and secondly, it is block-based.
Its user interface is also very simple to use. Scratch is used as an educational tool by millions of people worldwide. It lets users create a variety of games, animations, and other creative projects.
Click here to know more about online coding classes for kids.
Create a Start Screen in Scratch using Repeat, If/Else, Broadcast
Now, I invite you to open one of your Scratch projects and start creating with me.
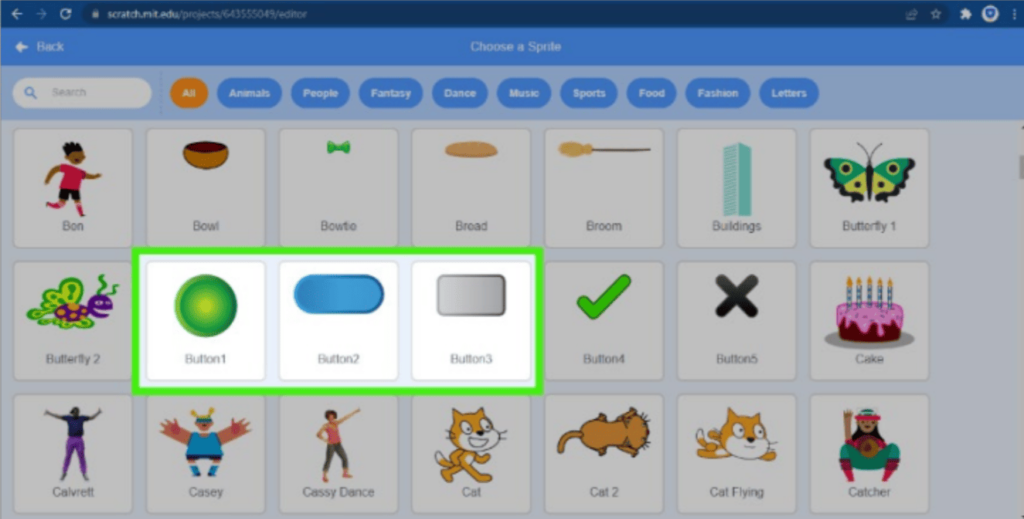
Let’s create the button first. Choose any button sprite you like (you can also draw your button).
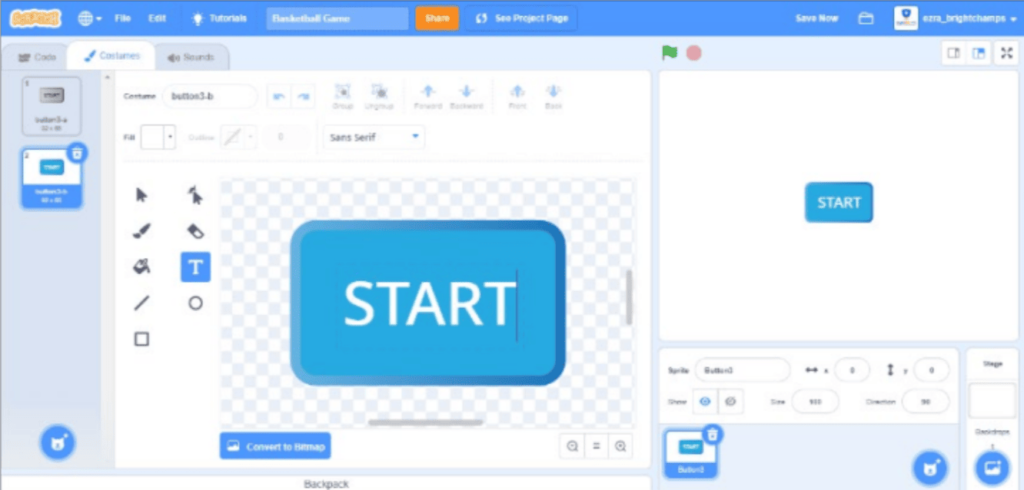
Go to Costumes and type “START” on your button. You need two costumes in different colors.
We want the button to change its color when the cursor hovers over the button.
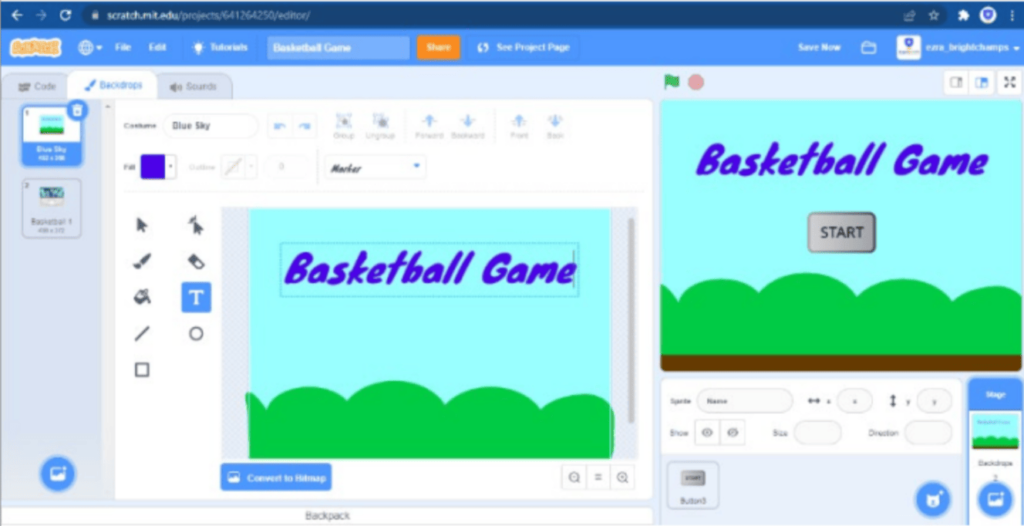
Now, use your creativity to design the start screen backdrop. This first impression will make people engage with your project, so do your best!
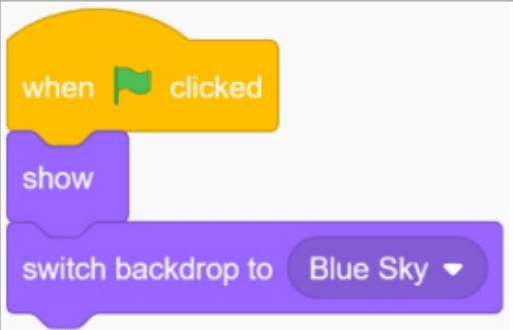
Let’s start to code the button! When Green Flag clicks, show the button and set the start screen backdrop you designed.
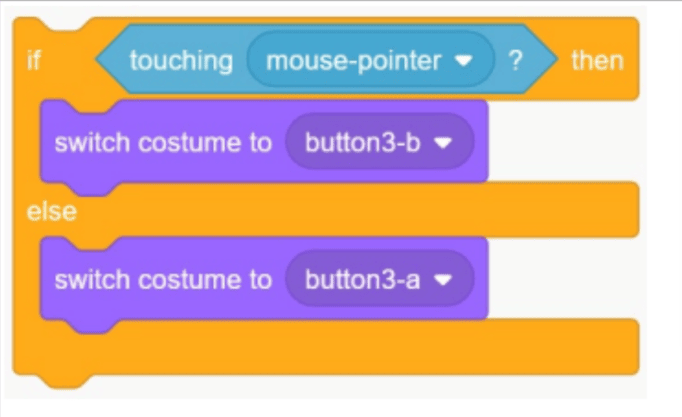
We need this script to make the color-changing effect. If touching the mouse pointer, it will change its costume. Else, the original costume will appear.
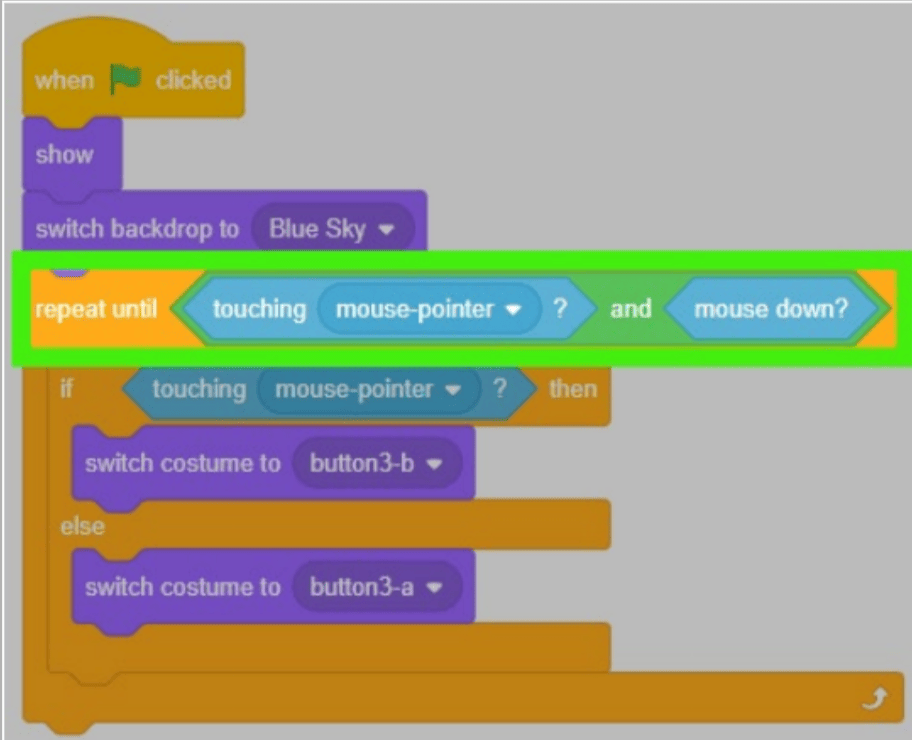
Since that colour-changing effect should be activated until the button is clicked, use the “repeat until” loop and set the condition to “touching mouse-pointer” and “mouse down” (if we click the button, both conditions are true).
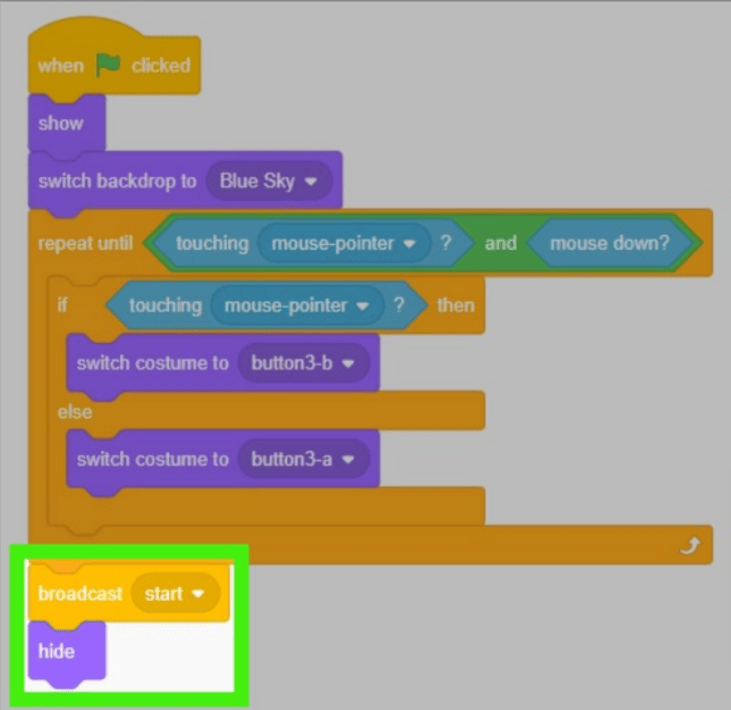
After clicking the button, broadcast “start” and hide the button.
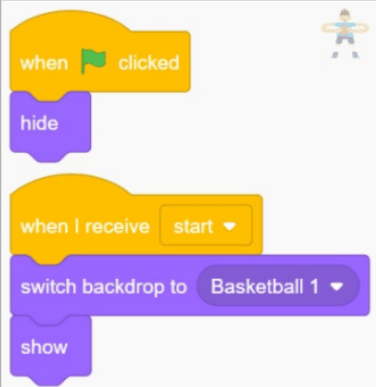
Use the Green Flag button to hide all sprites on the start screen.
To start your game, use the “start” message as an event to change the backdrop and show the sprites! You can see the finished start screen example below.
For better understanding about python coding for kids. Click Here!
Conclusion
It’s so easy to make a start screen in Scratch, right? But it will give your Scratch creations a far more appealing appearance!
These straightforward yet imaginative projects are examples of how the Scratch platform can be used.
Most of the time, we are more enthusiastic about using Scratch to make games, but if we slightly expand our creative horizons, there are a tonne of other things we can do with it that we are either unaware of or unwilling to explore.
So, in order to complete some chores, we turn to third-party software.
Please forward this article to your fellow Scratchers if you liked it.
Learn Scratch at BrightChamps with its specially designed curriculum that makes learning programming easy for students in Grade 1-12.
BrightChamps also teaches a variety of other programs that help kids build a foundation in computer programming through activities, interactive lessons, and other means.

 We are an army of educators and passionate learners from BrightChamps family, committed to providing free learning resources to kids, parents & students.
