
📅 Published: February 16, 2022 🔄 Updated: February 2, 2026
Evolution is one of the many unavoidable aspects of this world.
Since the beginning of time, the human race has been constantly evolving. However, not everyone participates in this evolution, and it is very likely that if you are not an early adapter, you will be left behind.
In this day and age, one of the best things you can do to avoid falling behind is to learn how to code, and platforms like Scratch have made it relatively simple for even children to learn this skill of the future.

What is Scratch?
Scratch is a visual coding (programming language) used to create games, animations, and other programs.
Scratch is ideal for children who want to learn basic programming because the codes are presented in blocks in various colours.
As a result, children will have an easier time remembering the blocks.
One of the simplest projects kids can create on Scratch is a Birthday project.
Learn more about scratch coding for kids.
Create a Birthday Project in Scratch – Step by Step Guide
Follow the steps below to create a birthday project in Scratch
Step 1: Open MIT Scratch
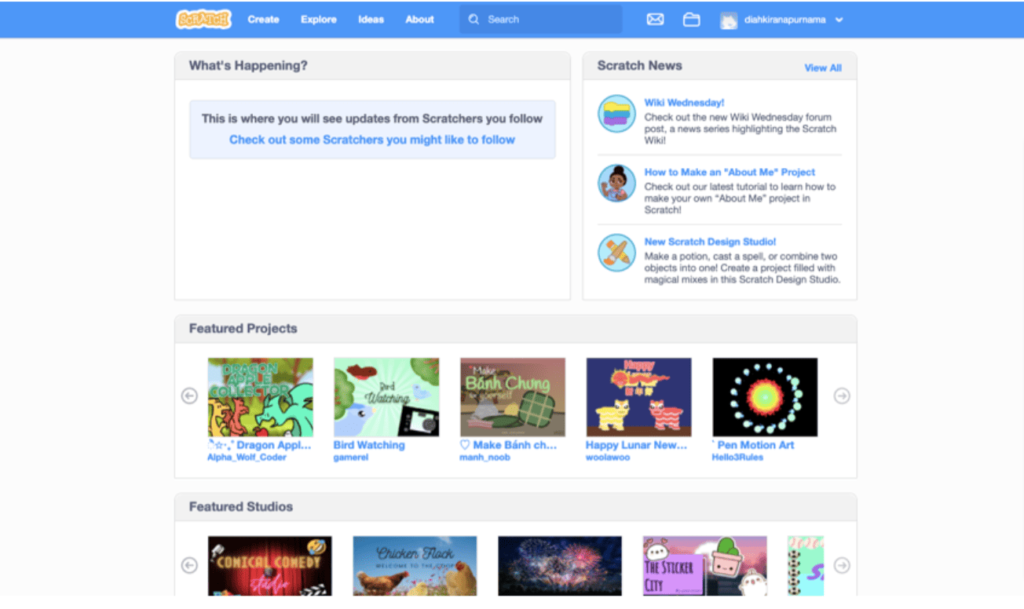
Step 2: Sign in if you already have a Scratch account. Register by clicking Join Scratch in the upper right corner if you don’t already have an account.
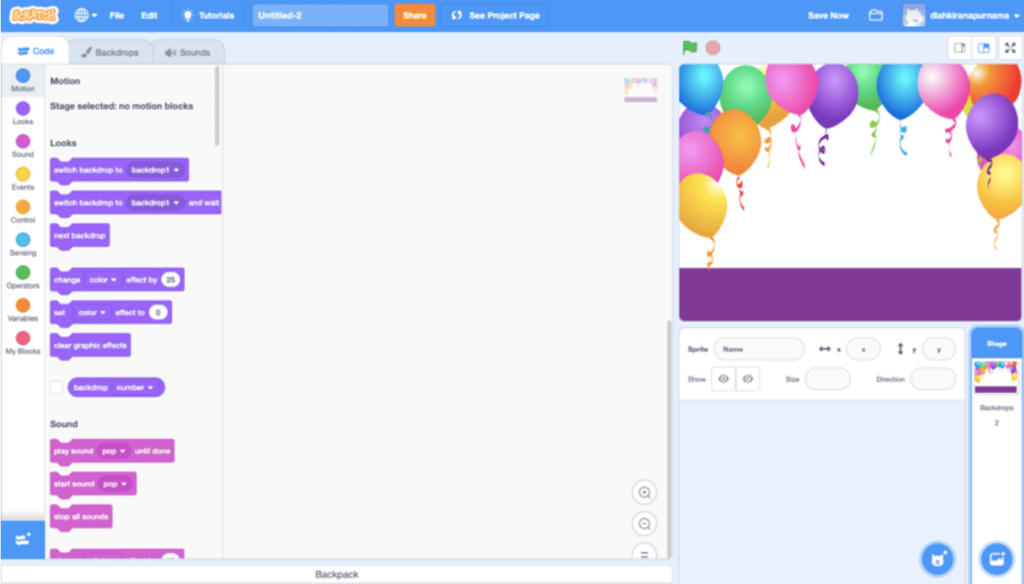
Step 3: Click Create in the upper left corner to create a project.
Then, you will get a display, as shown in Picture 2.
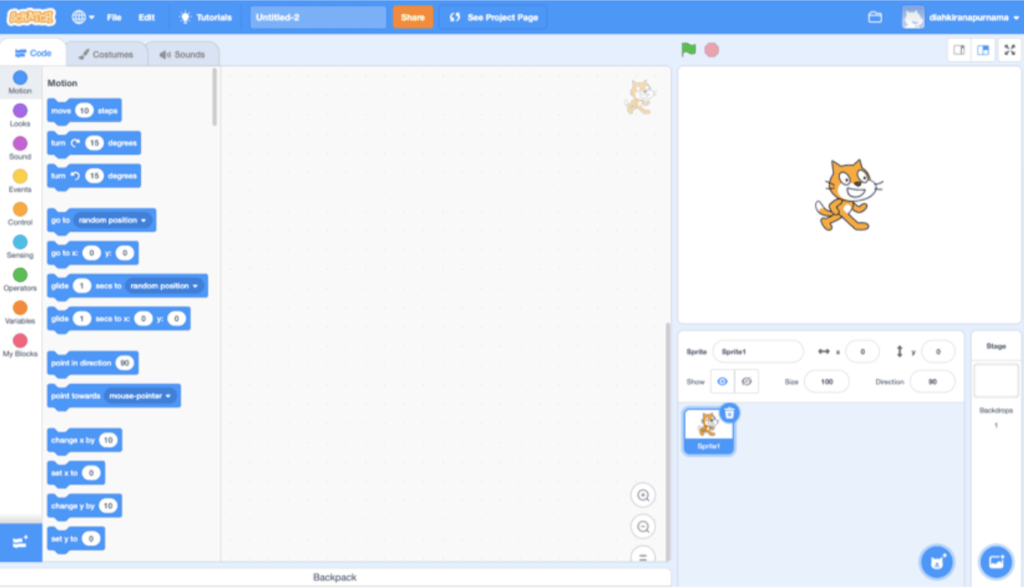
Step 4: Then, on the stage, delete the “cat” sprite because we’ll be making a birthday project. To delete the spite, click the sprite at the bottom, then click Trash near the sprite.
The next step is to select an appropriate backdrop for this birthday project.
Step 5: Click the Background icon in the lower right corner.
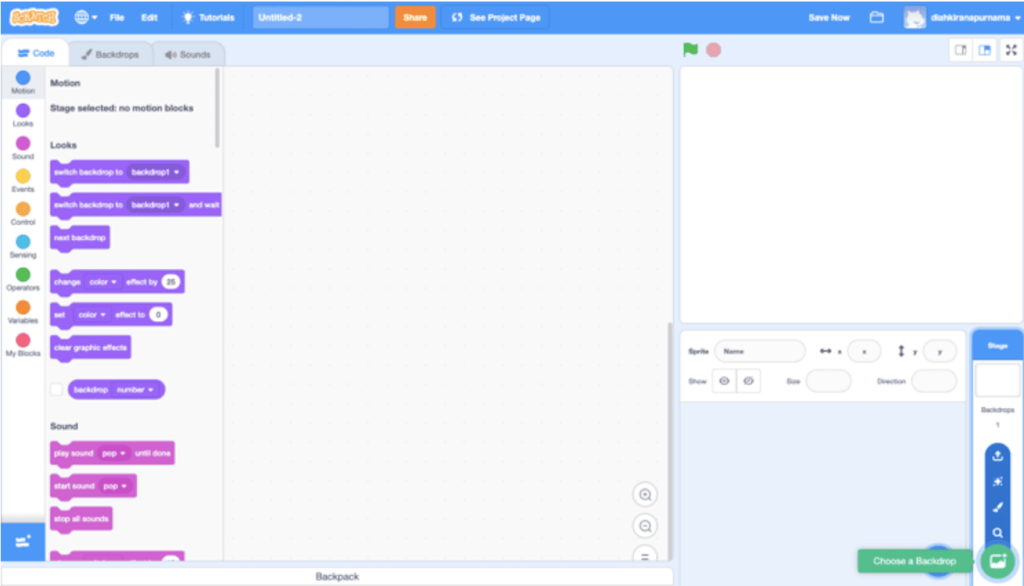
Then, as shown in Figure 6, a display will appear.
Step 6: Locate and click the party backdrop.
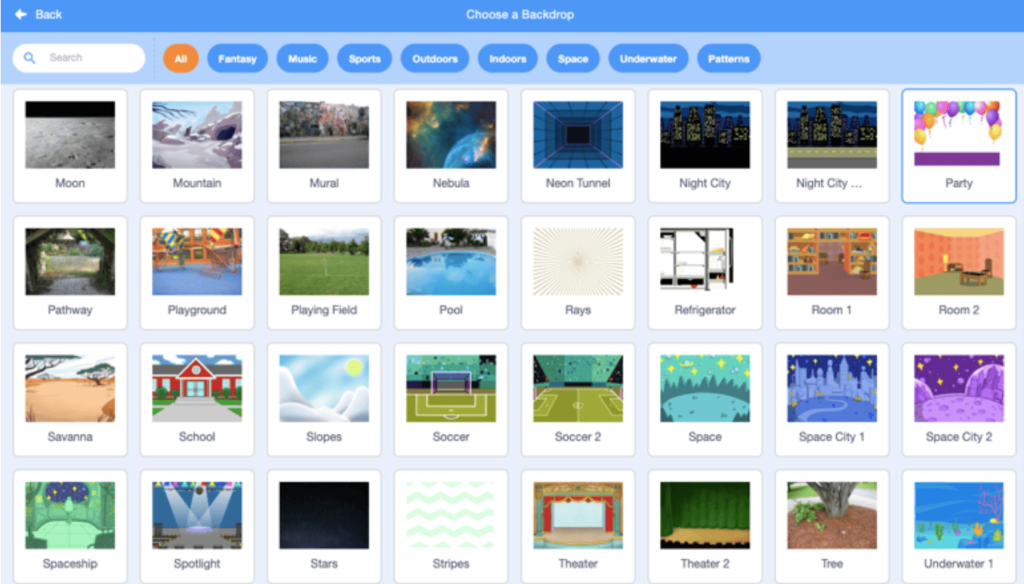
Picture 7 depicts the display of a birthday project backdrop.
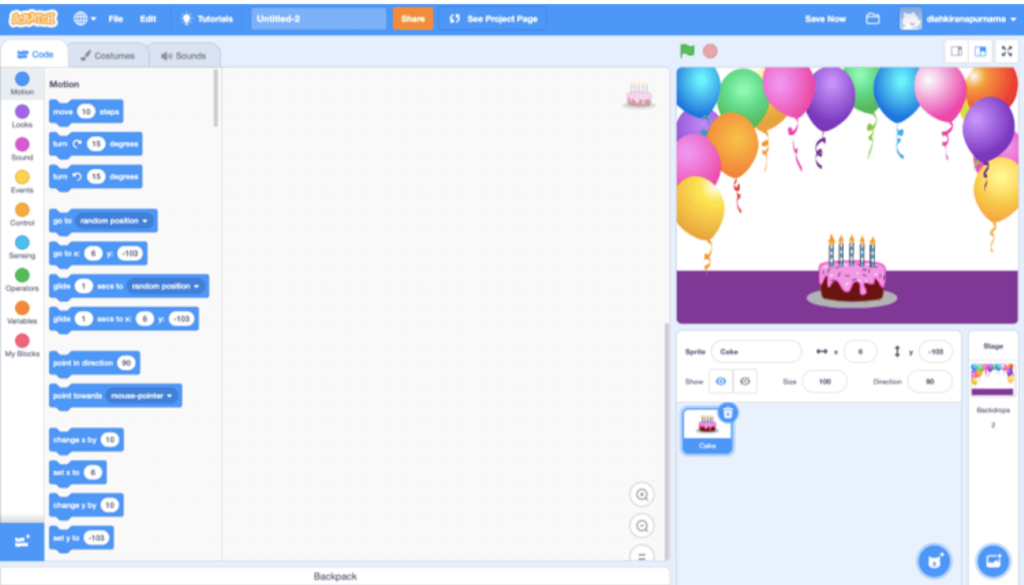
Step 7: To finish the stage, add Cake Sprite. Click on Choose Sprite, then look for cake sprite. If you’ve already found the Cake image, you can select it by clicking on it.
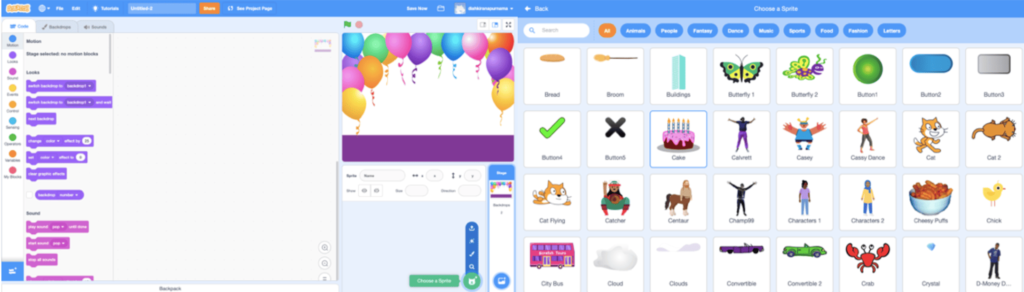
When you click Cake Sprite, the display will look like Picture 9.
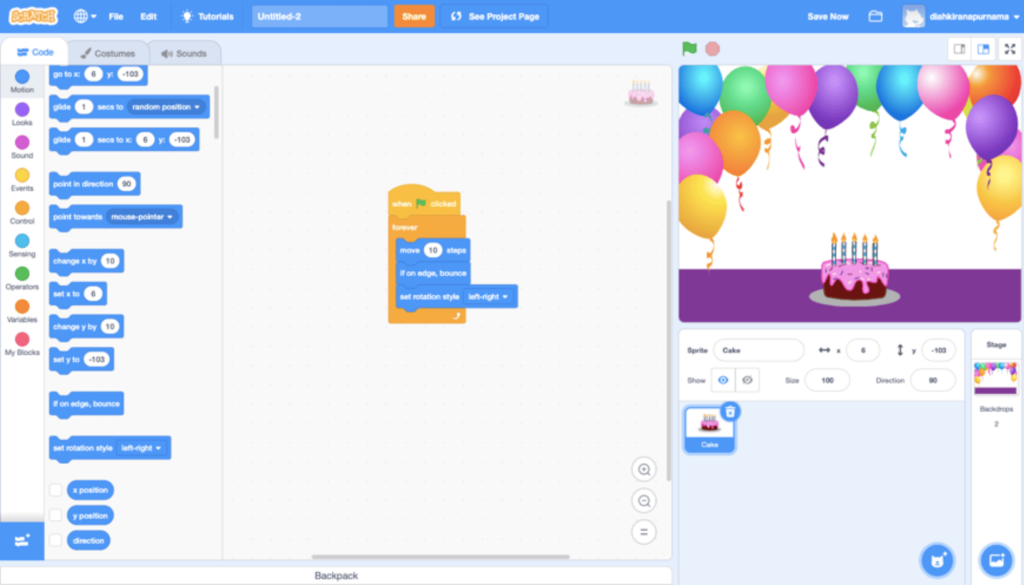
Step 8: Put some blocks together to make a Cake sprite move from left to right. Click the yellow Event button and add the “When Green Flag Clicked” block to the Script Area.
The “When Green Flag Clicked” block’s function is to run the script when the Green Flag is clicked. The Green Flag is on the top left of the stage.
Step 9: Click on the orange coloured Control button and add the “Forever” block to the Script Area after the “When Green Flag Is Clicked” block.
The “Forever” block’s function is to make the sprite repeat the activity.
Step 10: Click the blue button labelled “Motion.” Add “Move()steps” to make the sprite move forward or backwards, depending on the sprite’s direction.
You can change the number; if you want the sprite to move slower, type a number less than 10; if you want it to move faster, type a number greater than 10.
Step 11: In the script area, add the “If on edge, bounce” block. Place this sprite in the “Forever” block.
The “If on edge, bounce” block’s function is to cause the sprite to bounce when it comes into contact with the edge.
Step 12: To change the sprite’s rotation style, add “Set rotation style left-right” to the script area.
This block has three options: all around, left-right, and don’t rotate. The term “all-around” refers to the sprite’s ability to face 360 degrees. It is the default setting.
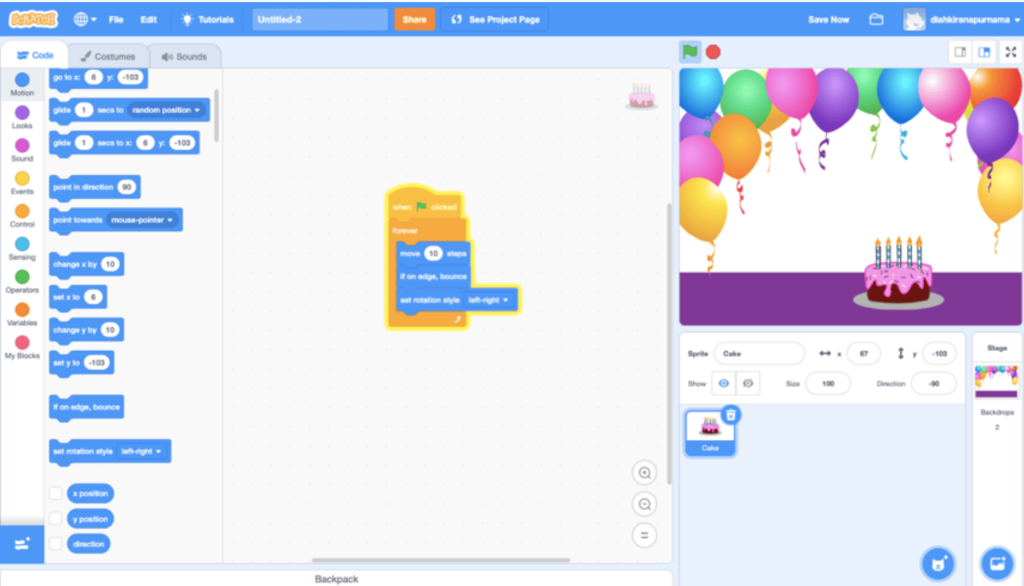
Step 13: To see the outcome, click Green Flag. When you click the “Green Flag,” the border of the blocks turns yellow.
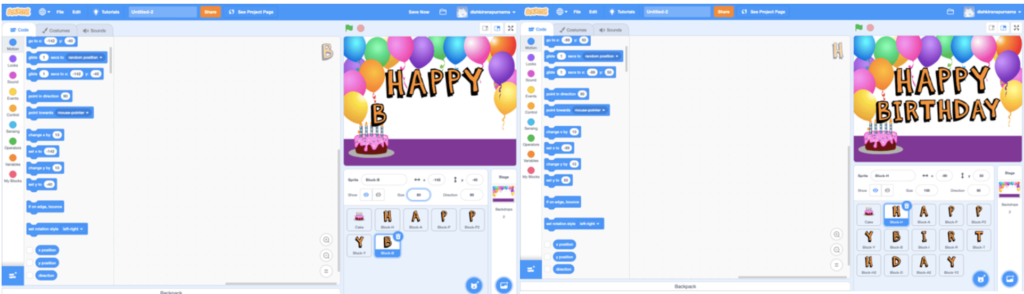
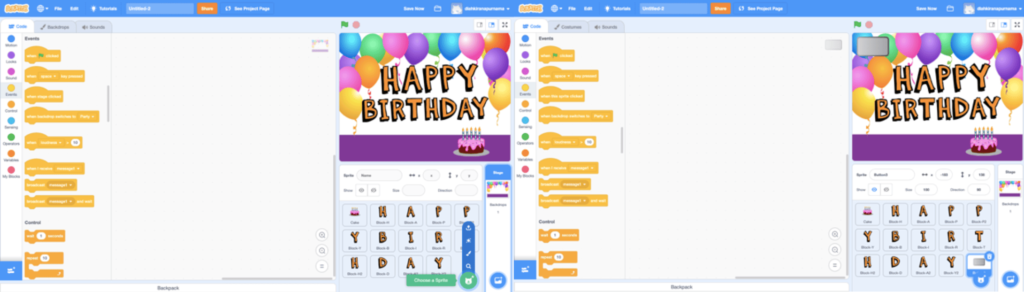
Step 14: Make some HAPPY BIRTHDAY sprites. Select Letter categories after clicking Choose Sprites. Figure 12 shows an example.
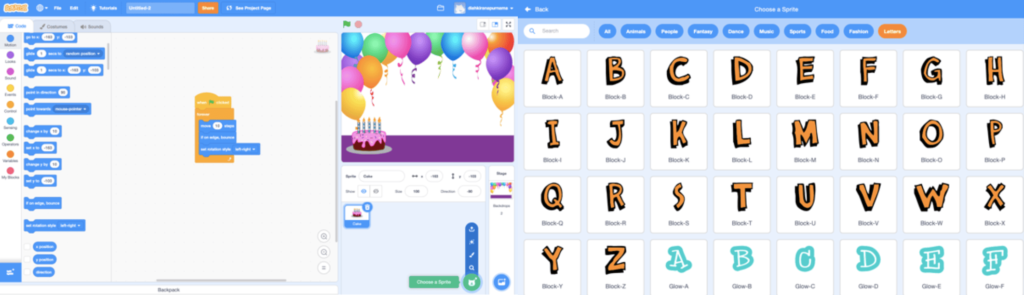
If you want to change the sprite’s size, click on the size number near the direction.
Step 15: Create a Button Sprite. As a result, when the button is pressed, it will switch to the next backdrop and sprites.
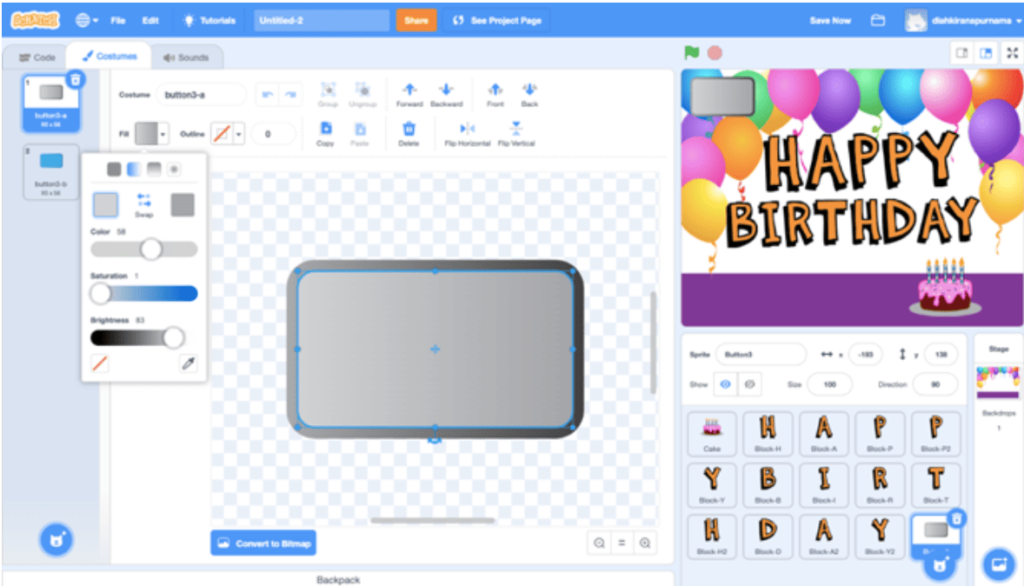
Step 16: To change the Button’s appearance, go to Costumes. If you want to change the colour, click the sprite and fill as shown in Picture 14. If you want to change the border colour, click on the sprite and then the square next to the outline (Picture 15). To add text, click the “T” symbols
Step 17: To add a new backdrop, click on the backdrop and then go to Costumes.
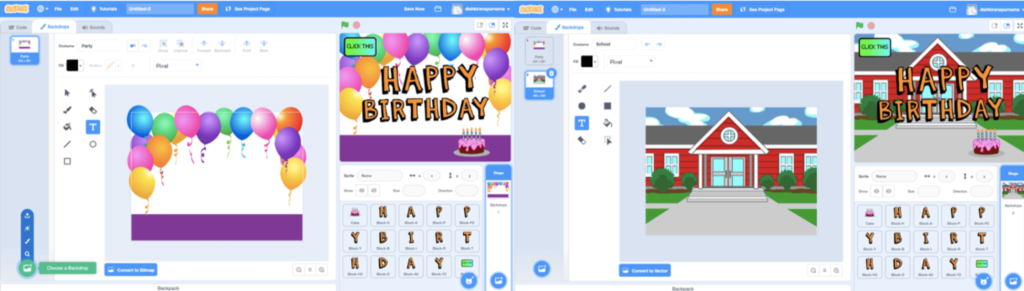
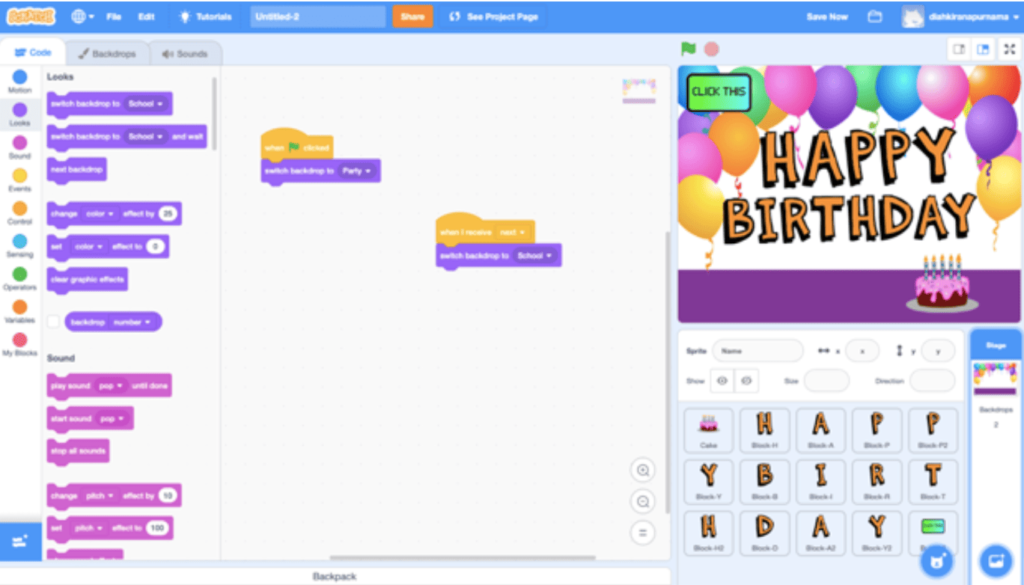
Step 18: Change the backdrop to the first one, then click on Code. Add a When Green Flag Is Clicked block and a Switch Backdrop to() block. See the name of your first backdrop on Costumes and then click on that name in the code.
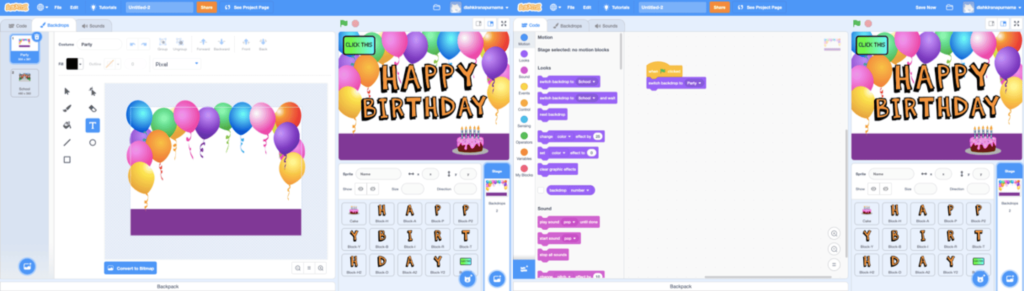
Step 19: To the script area, add the “When this sprite clicked” and “broadcast message 1” blocks. A broadcast is a message sent through the Scratch program that activates scripts with matching hat blocks. Select the arrow. Choose a New message, type the message’s name and click OK.
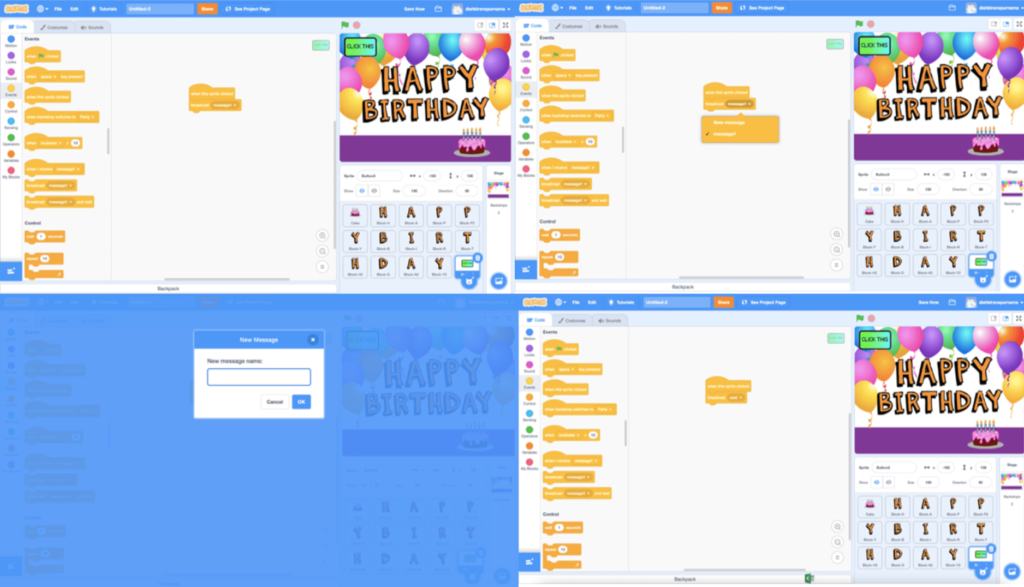
Step 20: Drag and drop the “When I receive()” block and “Switch backdrop to()” block to the Script Area in the backdrop. As a result, when the button sends the broadcast, the backdrop receives the message and switches to the other backdrop.
Step 21: Drag and drop the “When I receive()” and “Hide” blocks to the Script Area from the letter, button, and sprites. As a result, when we press the button, the letter, button, and cake will not appear in any other backdrop. Also, in the script area, drag and drop the “When Green Flag Clicked” block and “Show” to make the letter, button, and cake sprites appear when the green flag is clicked.
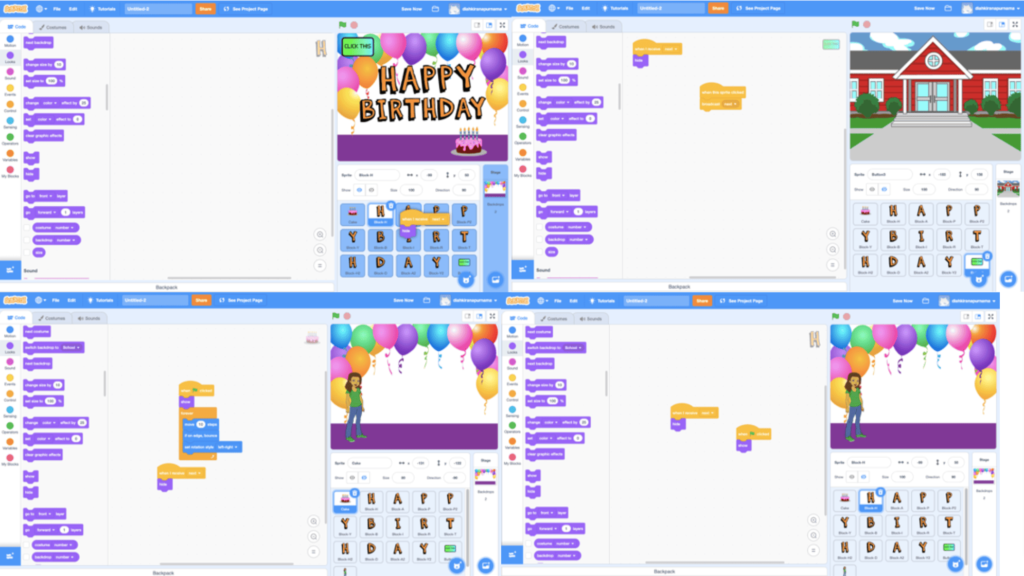
Step 22: Create new sprites for the remaining backdrops.

Step 23: To make this sprite hide, place the blocks “When Green Flag Clicked” and “Hide” in the script area. Then, in the script area, add the “When I receive()” block, “Show” block, and “Say()for()seconds” block to make the sprite appear and the words appear on stage. Sprite can type anything in this block and choose when the block appears on stage.
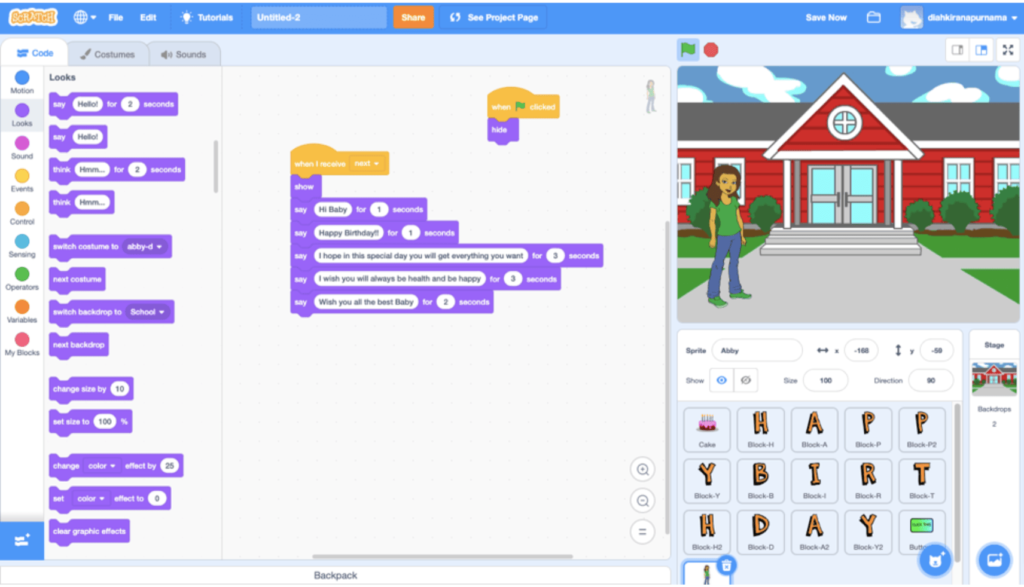
Step 24: To make this sprite hide, place the blocks “When Green Flag Clicked” and “Hide” in the script area. Then, in the script area, add the “When I receive()” block, “Show” block, and “Say()for()seconds” block to make the sprite appear and the words appear on stage. Sprite can type anything in this block and choose when the block appears on stage.
Step 25: Go to Sounds near Costumes in the upper left corner to record your sound. Click the Add Sound button in the bottom left corner, then select Record.
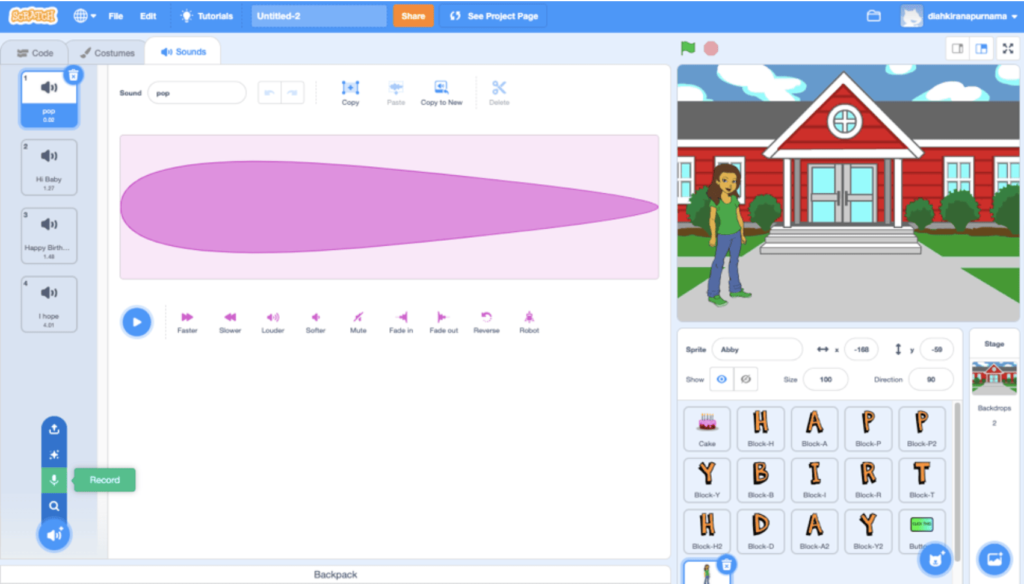
Step 26: To allow recording, click Allow. Then press the Record button. If you’ve already started recording, click Stop.
Step 27: Select the best part of your sound and then press the Save button. If you need to re-record something, click Re-recording.
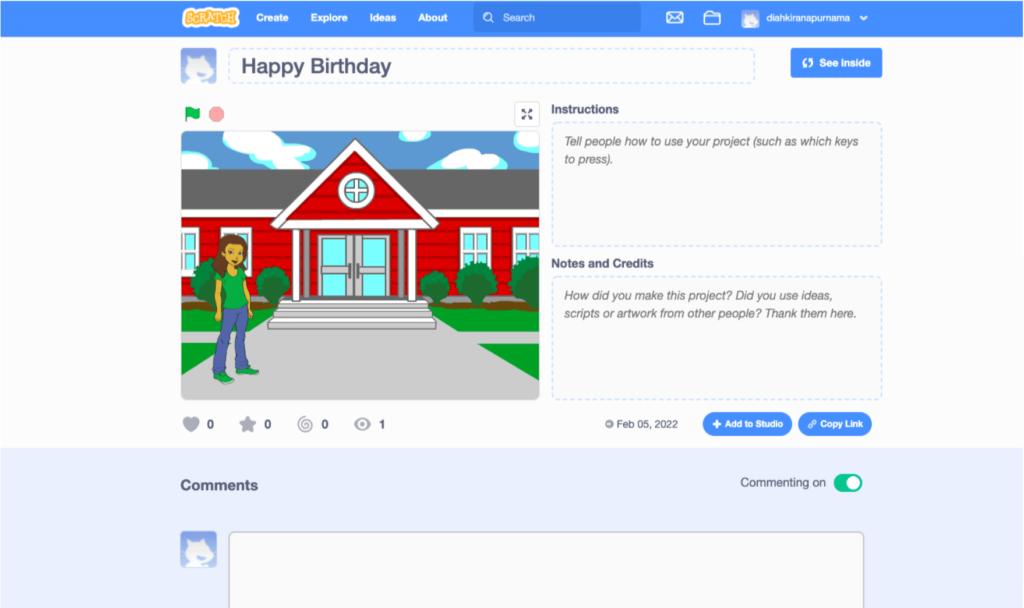
Step 28: A Birthday Party Project has been completed. You can share your birthday party project with everyone by clicking share at the top.
Conclusion
To see your finished project, click the green flag and then the button sprites. Instructions, notes, and credits can be included on the project page.
Surprise your friends and family with your creativity and awesome coding skills with a Birthday project developed on Scratch. To learn more about Scratch programming and Scratch projects, check out the fun blogs on the BrightCHAMPS blog page.
Learn Scratch at BrightChamps with its specially designed curriculum that makes learning programming easy for students in Grade 1-12. BrightChamps also teaches a variety of other programmes that help kids build a foundation in computer programming through activities, assignments, and other means.
Do visit coding games for kids free to know about the free coding games.