When it comes to 3D gaming, Roblox is one of the most well-known platforms, and when it comes to 3D game creation platforms, Roblox unquestionably tops the list.
Without prior experience in game production or understanding the difficulties involved, it is an amazing platform that enables users to create games based on their imaginations.
However, as you advance in your Roblox experience, it becomes more crucial than ever to comprehend some parts of the platform because doing so will facilitate and speed up the production of your games.
It will also assist you in comprehending the overall process and the technicalities involved.
In this blog, we discuss one such important aspect: Roblox plugins.
Table of contents
What are Plugins in Roblox?
Plugins in Roblox studio are a piece of software used to supplement any software’s existing customisation features.
Plugins increase the number of tools available in the development of game designs and assist developers in quickly completing their game design by downloading necessary plugins into their program.
Plugins also add modularity to software development. Roblox Studio also allows developers to create Plugins.
So let’s go ahead and see how we can create one in the Roblox studio.
How to Create a plugin in Roblox Studio
Steps to Create Plugin in Roblox studio.
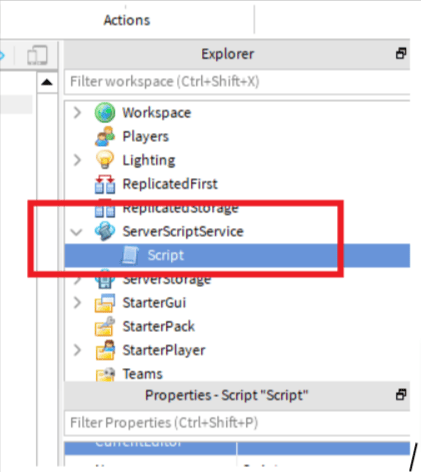
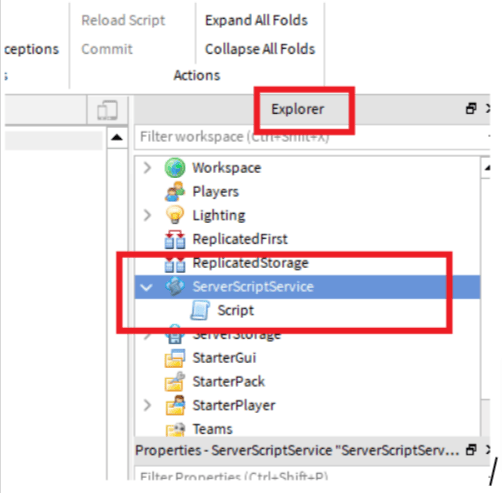
Step 1: Open the View menu, navigate to Explorer, then right-click on the Server script service and select script, which opens a script window with the default text.
Step 2: Write the LUA script
LUA Script to make Neon Light tubes as Plugins in Roblox studio
— Create a new toolbar section titled “Custom Script Tools”
local toolbar = plugin:CreateToolbar(“Custom Block Tools”)
— Add a toolbar button named “Neon LightTube”and it adds description to the button along with Image
local Button1 = toolbar:CreateButton(“Neon Light Tube”, “Create an Neon light tube”, “rbxassetid://8955209737”)
local Camera=workspace.CurrentCamera
— Function for the button, Hereby, we are adding Customization to the parts provided in the studio, making it easy while develop the games.
Button1.click:connect(function()
local part=Instance.new(“Part”,workspace)
part.Material=Enum.Material.Neon
part.Anchored=true
part.BrickColor=BrickColor.new(“Buttermilk”)
part.Shape=Enum.PartType.Cylinder
part.Size=Vector3.new(261, 39.2, 4937)
part.Orientation=Vector3.new(0,0,-90)
–Adjusting CFrame of part to Currentcamera CFrame
part.CFrame=Camera.CFrame+(Camera.CFrame.LookVector*5)
part.Orientation=Vector3.new(0,0,-90)
—
end)
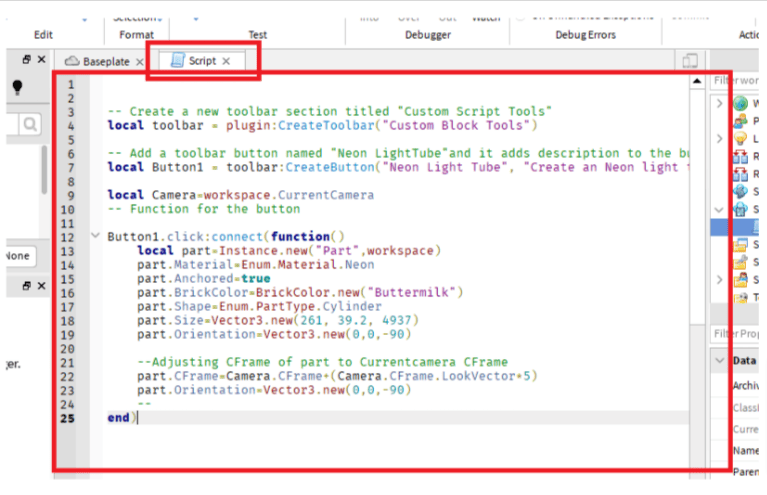
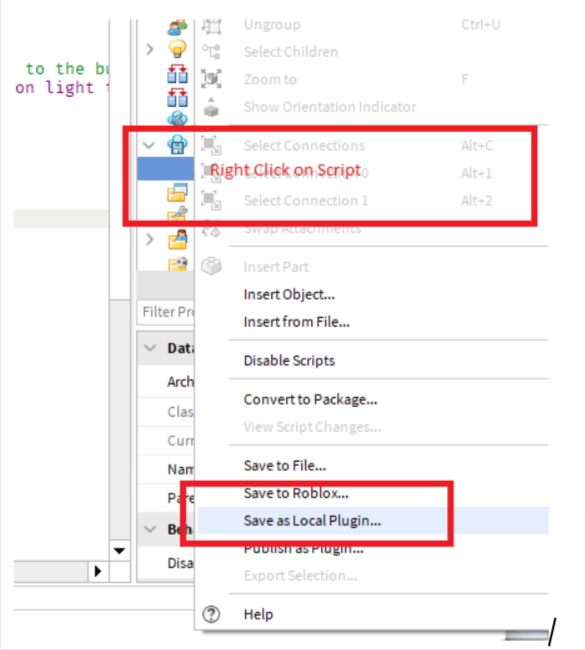
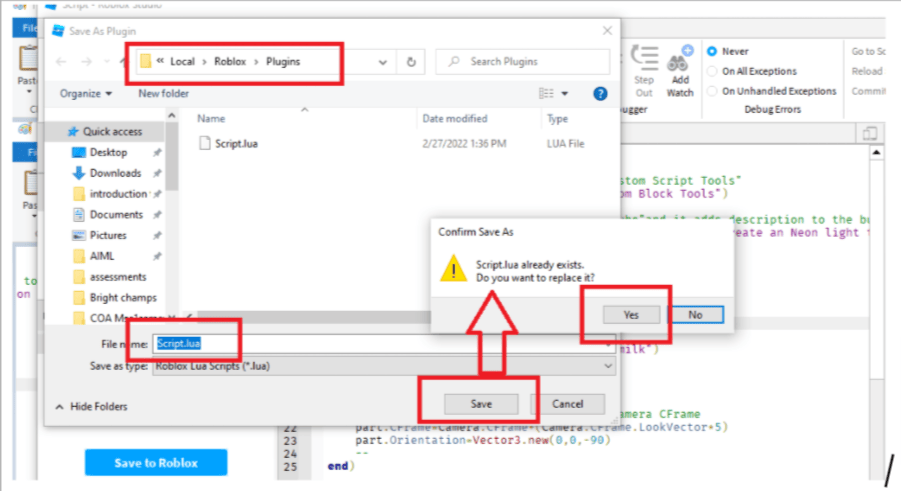
Step 3: Save the script as a plugin by right-clicking the script option in the Explorer window
Step 4: Click the plugin that was added to your plugin toolbar and drag it to the workspace as needed.
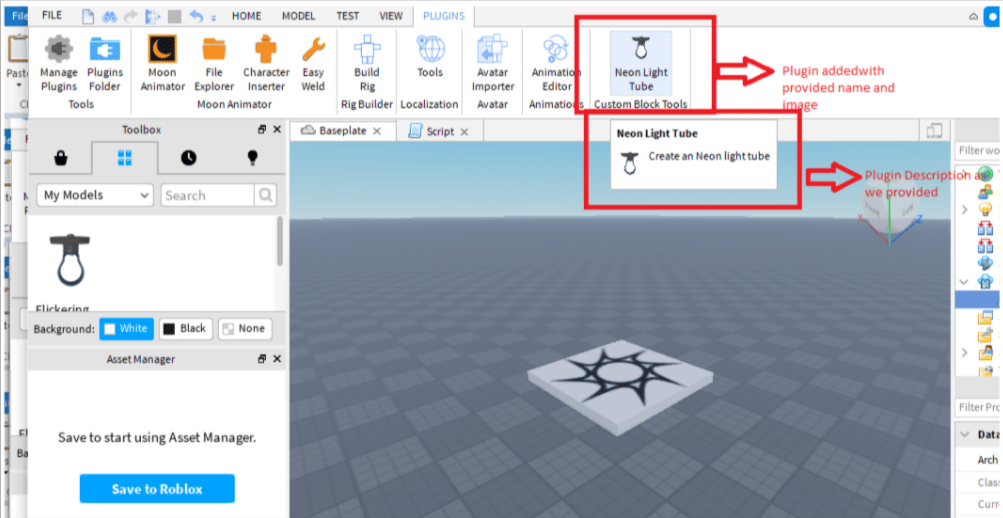
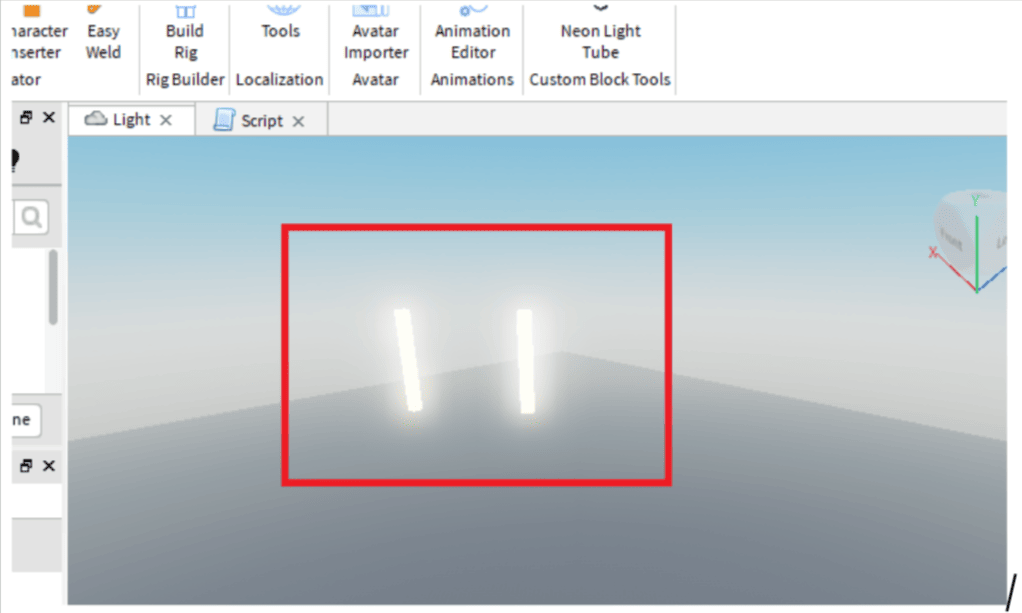
Step 5: Right-click on the script in the Explorer window again and select Publish as Plugin to allow others to use your plugin.
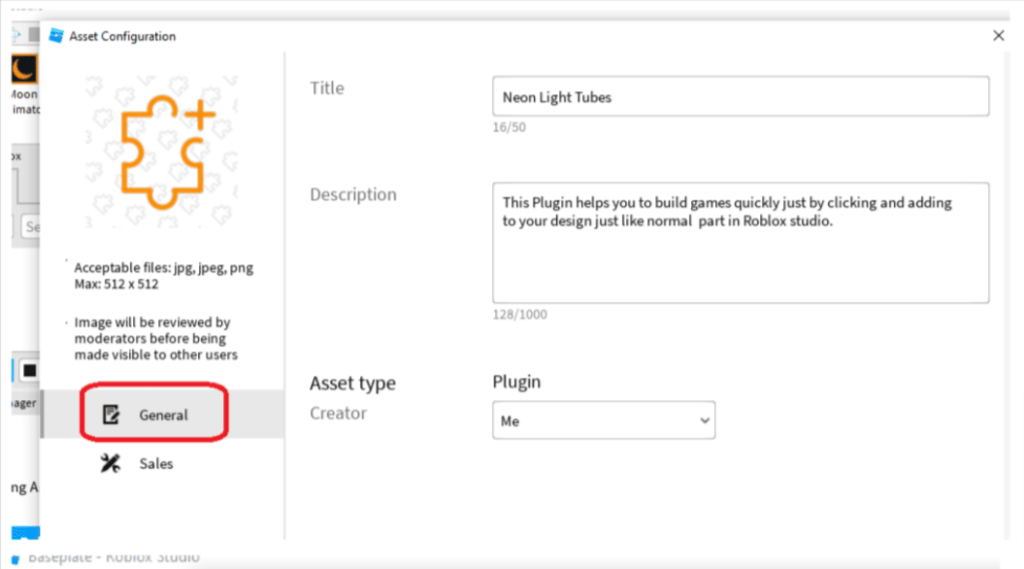
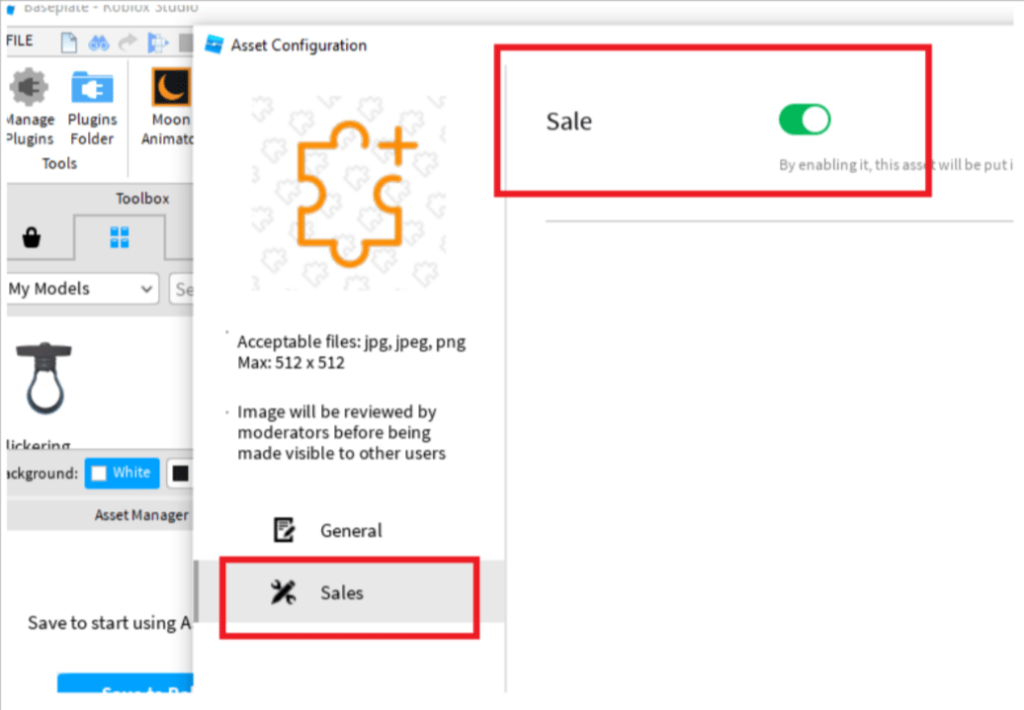
If you are not interested in creating your plugin, Roblox Studio offers the option of using plugins developed by other developers.
Below are the steps on how to use those plugins
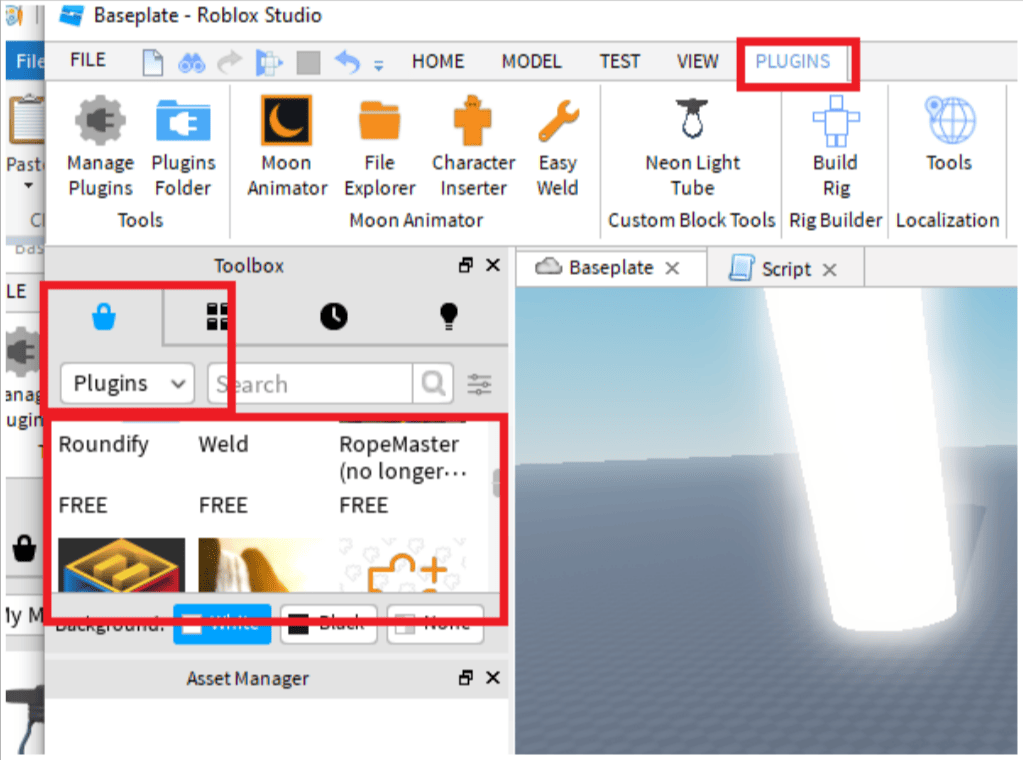
Step 1: Go to Plugin.
Step 2: In the Toolbox, select the marketplace and click on plugins from the dropdown menu.
Step 3: Select any available plugins in that menu and install them for your studio.
Tips: Steps to get the Image URL to apply it in the script for the Plugin tool in Roblox
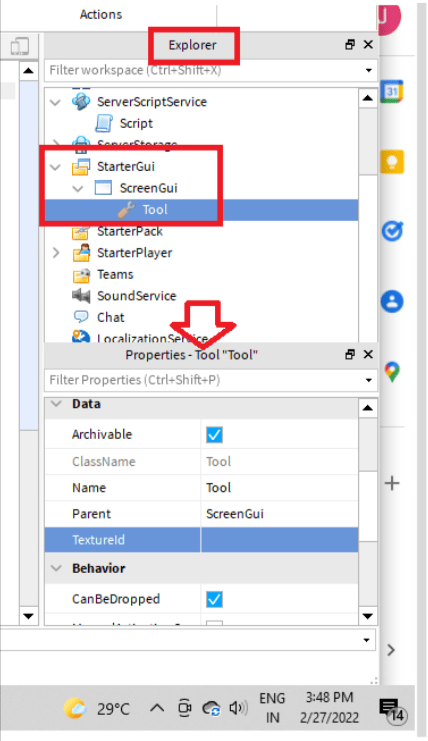
Step 1: Go to Starter GUI in Explorer
Step 2: Then select Screen GUI
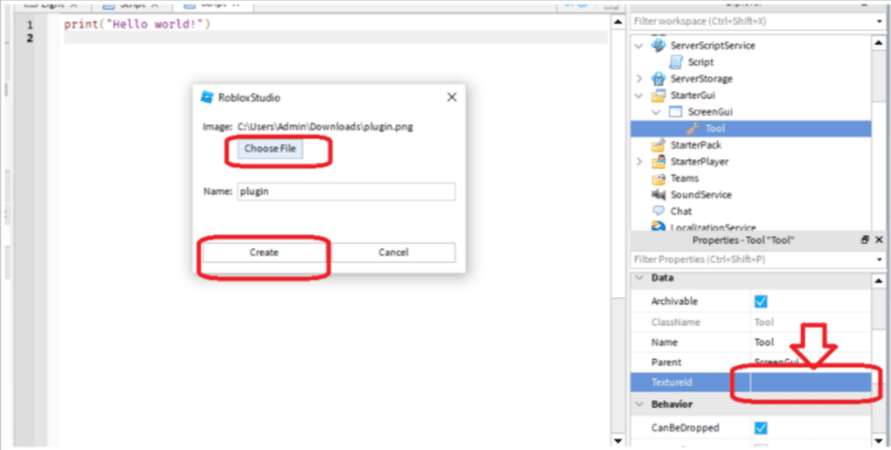
Step 3: Properties section and select Textured
Step 4: Add an image from your computer and create
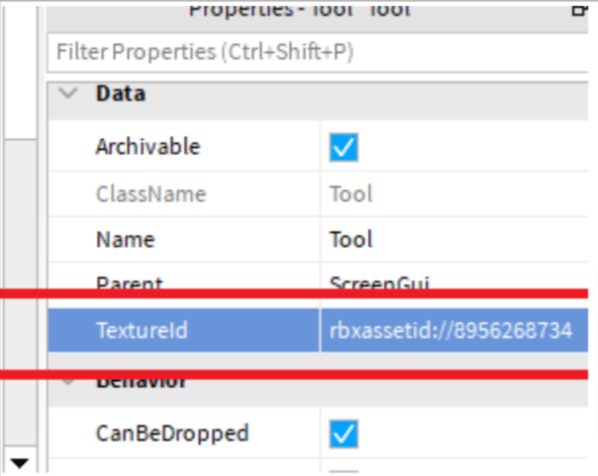
Step 5: Copy the URL of that image and use it in your script while creating the button.
In some cases, right-clicking images in the toolbox marketplace will give you an image URL.
Conclusion
Anyone looking to create 3D games will find Roblox to be an absolutely fantastic platform.
With the help of technologies like plugins in roblox studio, the entire game production process may be made easier, faster, and more flexible.
Additional technical support, such as this, allows your creativity to shine without spending more than the required hours on a single element.

Learn to create fun games in Roblox at BrightChamps with its specially designed curriculum, which makes learning game development and coding simple for students in Grades 1-12.
BrightChamps provides programming classes for kids to improve their programming skills.
BrightChamps also teaches a variety of other programs that assist children in developing a foundation in computer programming through activities, interactive lessons, and other means. To get your hands on more such articles, educational content, and free resources on coding for kids, robotics courses for kids, game development, etc., check out the BrightCHAMPS Blog Page now!

