
📅 Published: February 26, 2022 🔄 Updated: February 2, 2026
Welcome to this beginner’s guide on how to get started with screens and navigation in Thunkable! In today’s world, where technology plays a vital role in our daily lives, learning to create mobile applications has become an essential skill. Thunkable is a platform that allows you to create mobile apps without the need for extensive coding knowledge. However, starting with Thunkable can be overwhelming for beginners. This guide aims to help you navigate through the process of creating screens and implementing navigation in your Thunkable project.
Whether you’re an aspiring app developer or just getting started with Thunkable, this guide will provide you with the essential knowledge you need to get started with screens and navigation in Thunkable. So let’s get started!
Table of contents
What is Thunkable?
Thunkable is a mobile app development platform designed for beginners or those who do not know how to code. You can use this platform to develop and deploy applications on Google’s Play store, Apple’s App Store, and other platforms without writing a single line of code.
Its drag-and-drop function makes it easy for anyone to develop the app they desire. It was created at the Massachusetts Institute of Technology using the MIT App Inventor platform, a free app development platform that teaches anyone how to code apps.
How to Get Started in Thunkable
Before you begin, you must first create an account on Thunkable; if you already have an account, you need to log in.
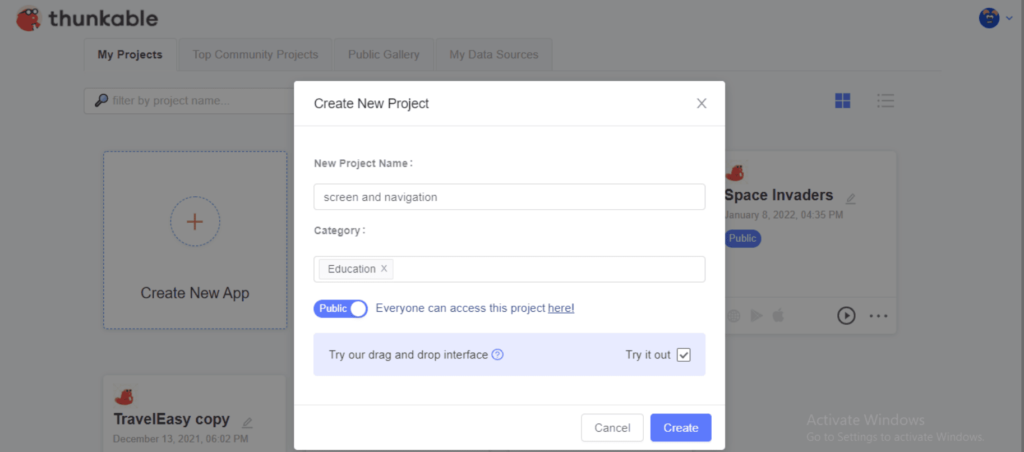
After you’ve signed up or logged in, the screen should look like the one below.
After that, click on create an app and begin with your app name, then select the categories, and don’t forget to check the “try it out” box
Let’s summarize the above in steps,
Step 1: Create an account i.e. Sign up (If you already have a Thunkable account Login)
Step 2: Click on Create an app
Step 3: Name your app
Step 4: Select a Category
Step 5: Click on Create
Note: Don’t forget to check the “Try it out” box.
How to Get Started with Screens & Navigation in Thunkable
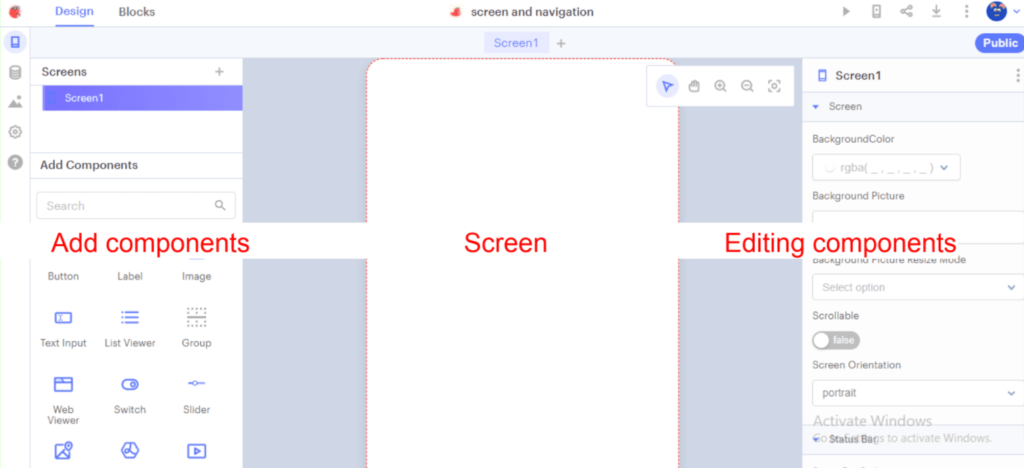
After we created the project name and got ready for app development, the platform will allow you to edit a lot of things there, but for today’s blog, we will only understand how to create screens and how to navigate the screen.
So let’s dive right into the steps!
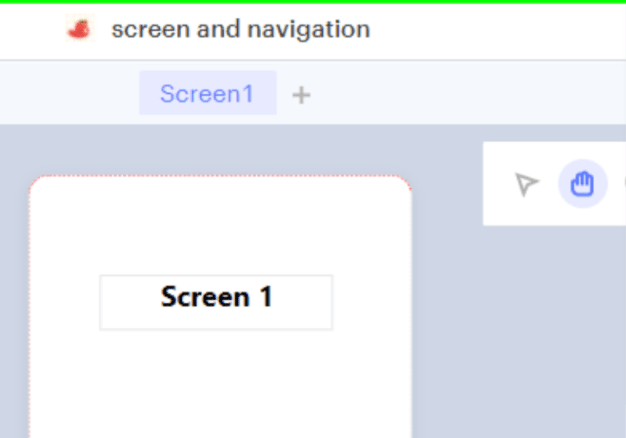
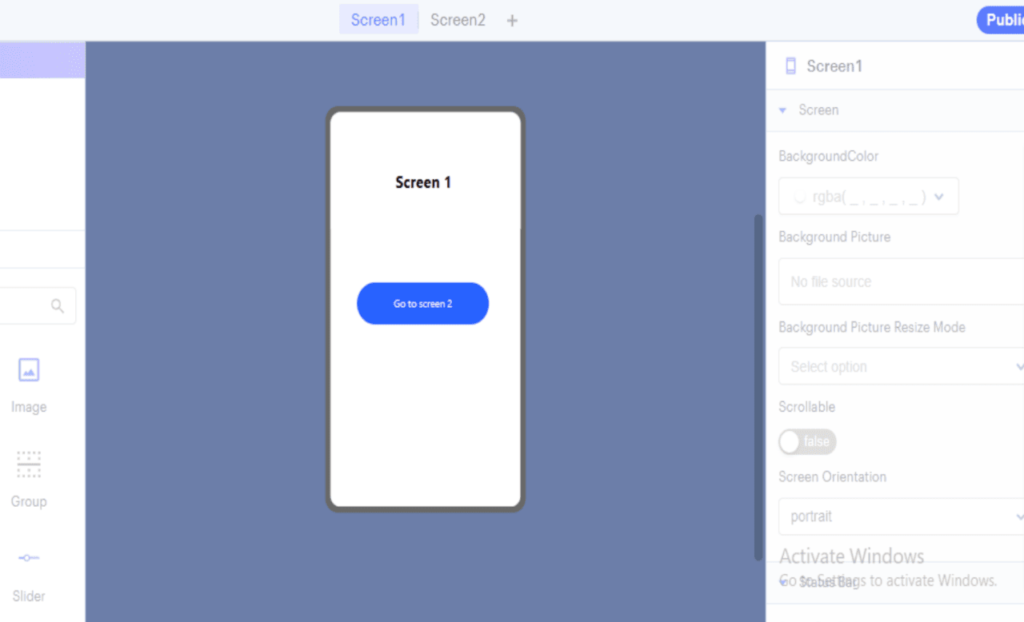
Screen 1
To begin, on Screen 1, we will add a label component, that will allow us to write text on the screen and can be obtained from the add components menu.
Let’s look at the steps to edit Screen 1.
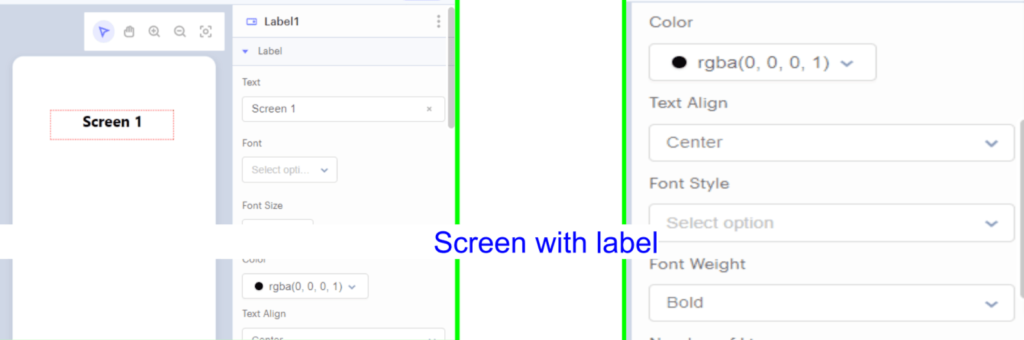
Step 1: Simply select the label and drag it to the screen. After adding a label to the screen, we will change its text from the right menu to your preference, which we call the editing components.
We can also change the size of it by changing the font size. If necessary, adjust the text alignment and the font-weight by making the text to bold.
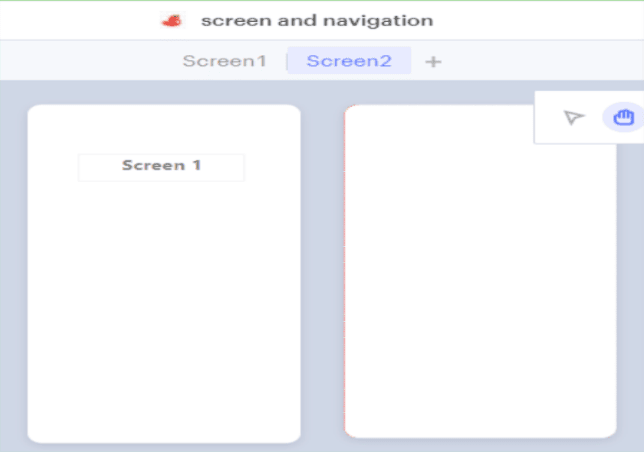
Step 2: Now, we’ll add screen 2 by clicking on the + sign just to the right of screen 1 on the top middle of the Thunkable window. Take a look at the image below for reference.
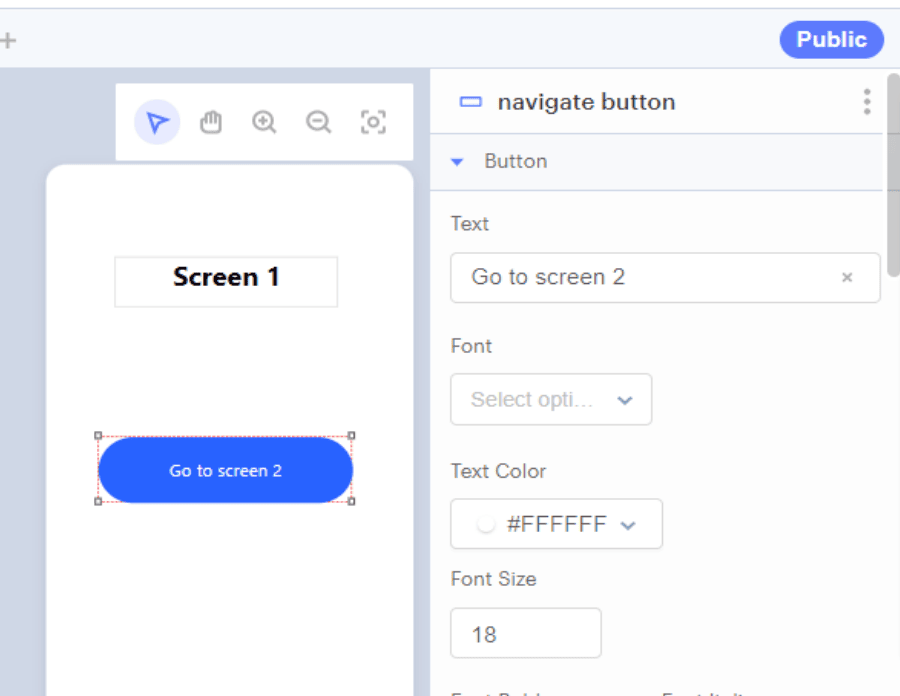
Step 3: Now we will drag and drop the button from the add components menu on screen 1 and adjust it to our needs by pulling it from the selection square box. We can also change the text of the button and rename it from the right menu.
We have completed the editing of Screen 1. Let’s do it now for screen 2.
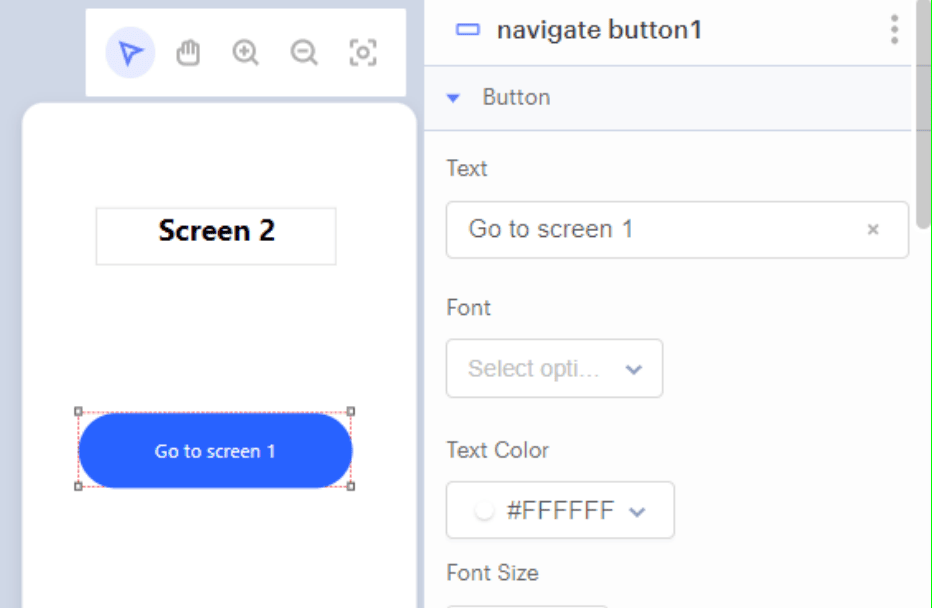
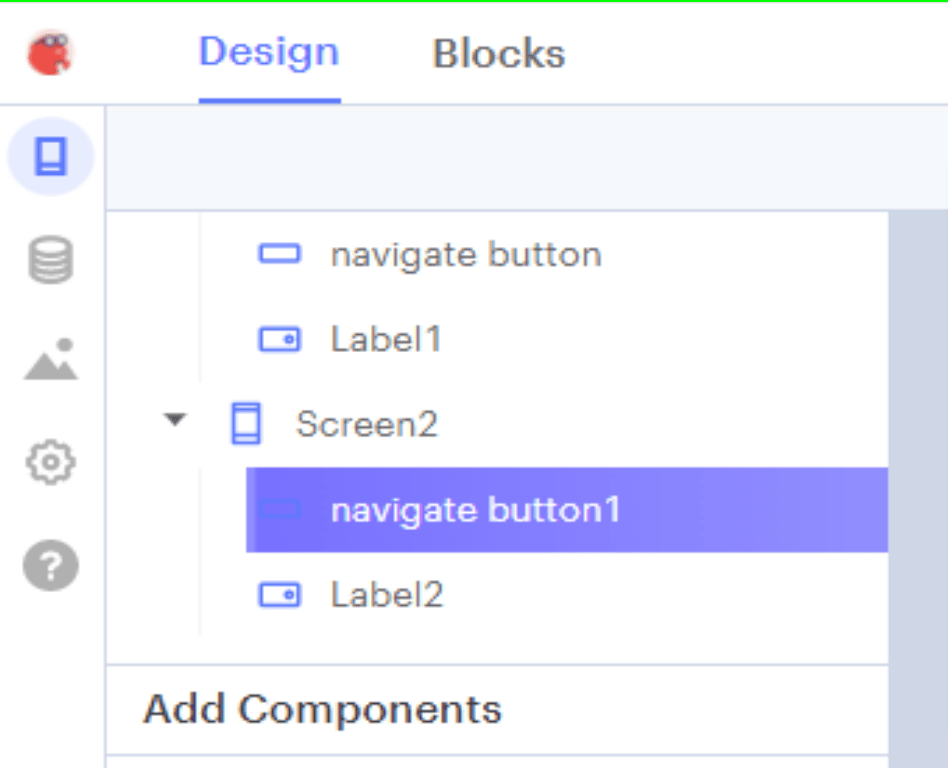
Screen 2
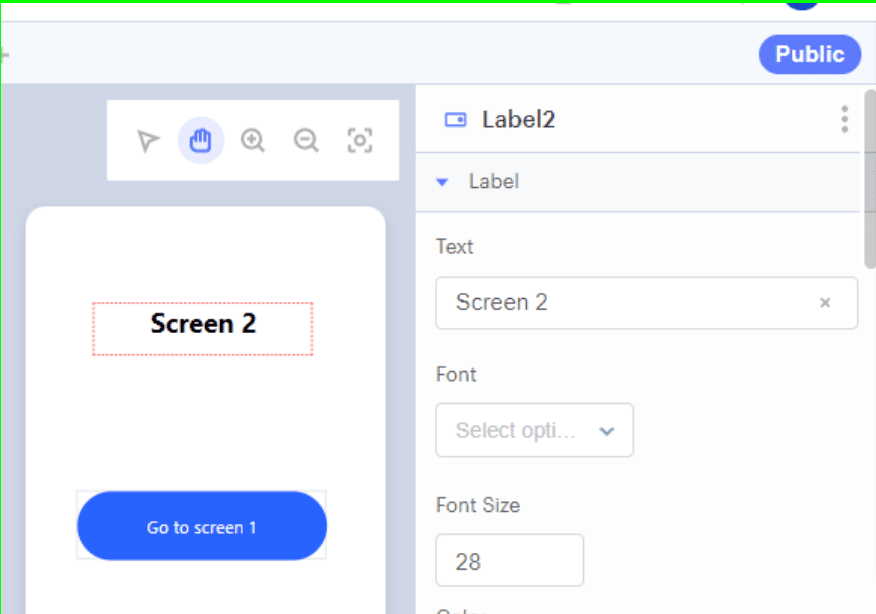
We will edit screen 2 in the same way that we edited screen 1. Repeat the preceding steps to add a label and a button to screen 2.
Now that we’ve finished editing screens 1 and 2, it’s time to learn how to code and how the screen navigation works.
Codes for Screen 1
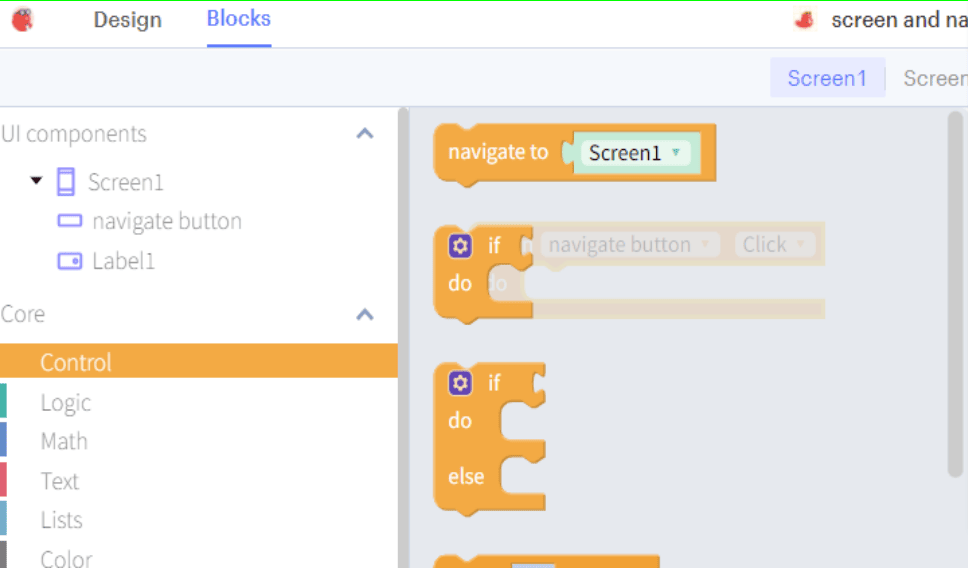
To code for the screens we’ve created, we’ll go to the block at the top of the right menu, just beside the design.
Let’s go ahead step by step.
Step 1: Select screen 1.
Note: Please ensure that you have selected screen 1 because the coding will take place on-screen.
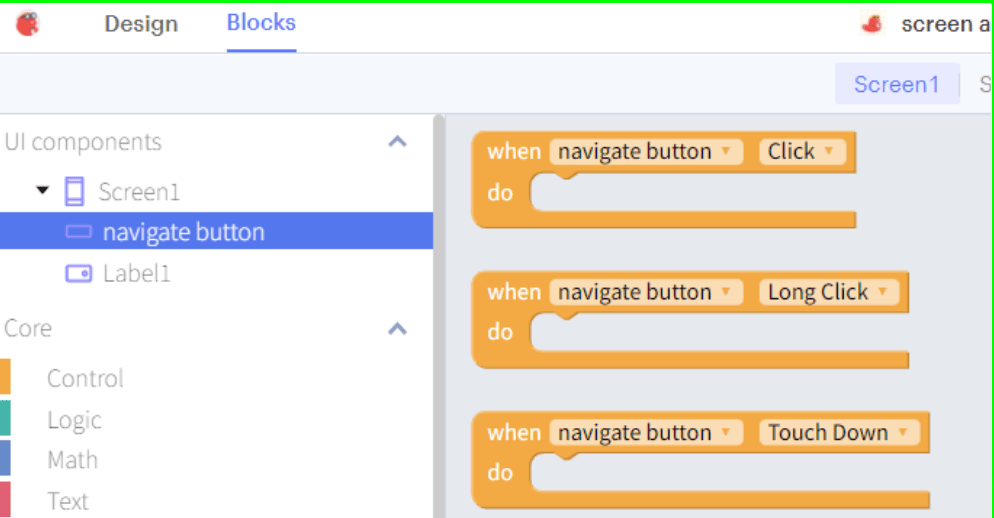
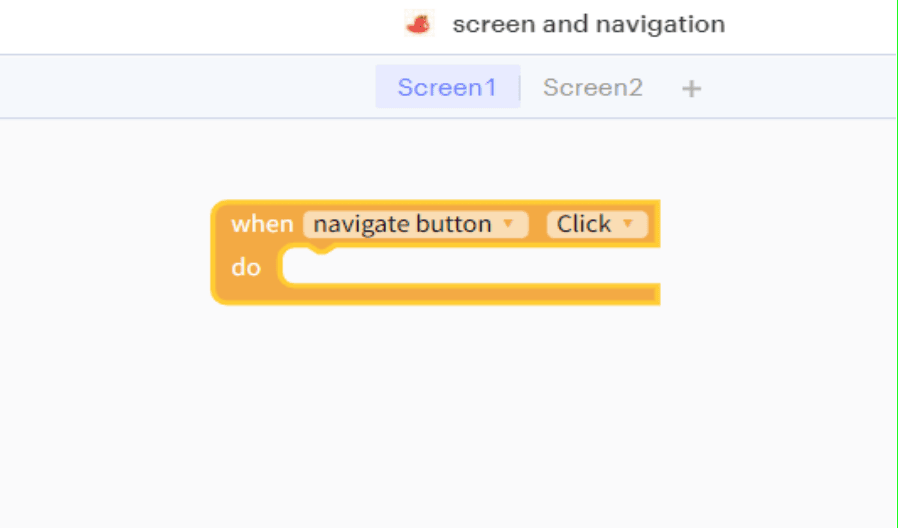
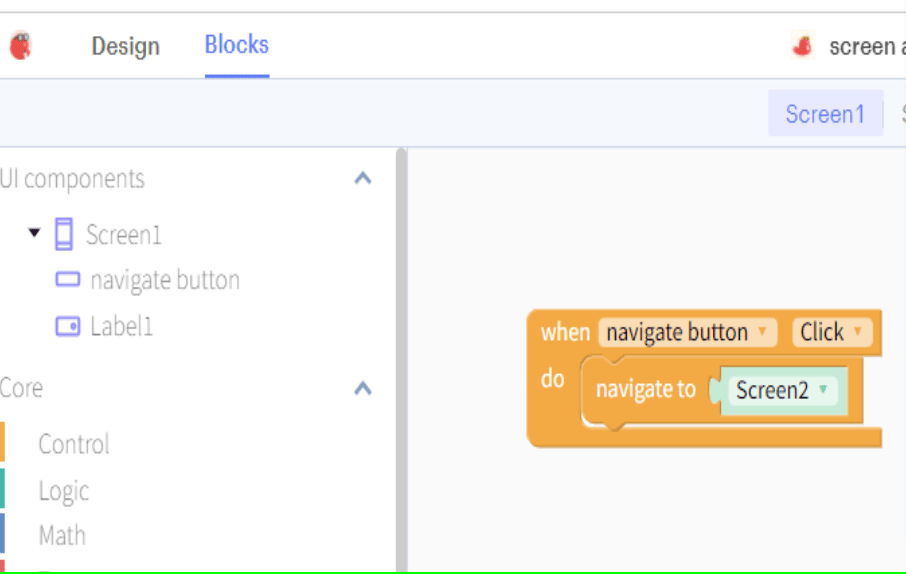
Step 2: Go to the Button (v navigate button) at the right menu, and another menu will open. Select and drag the block on the coding area that says when the button (navigate button) is clicked.
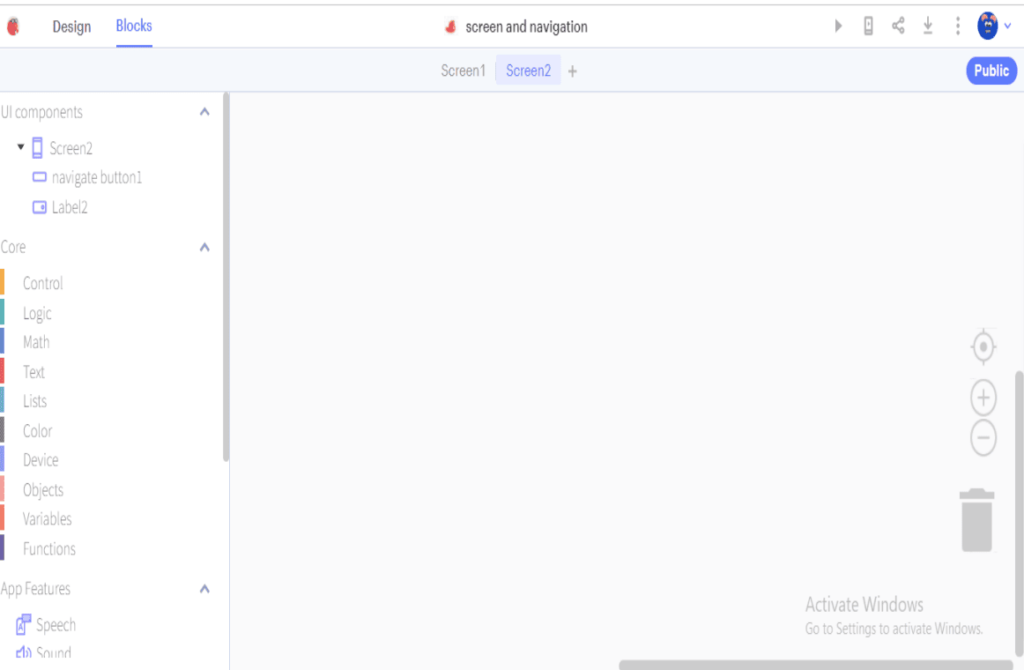
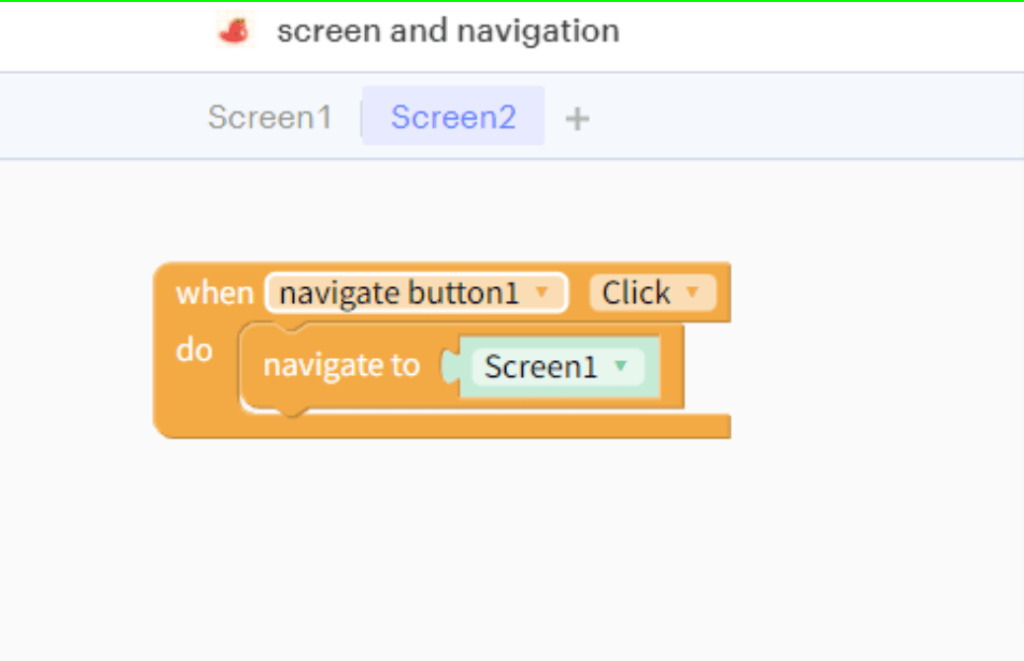
Codes for Screen 2
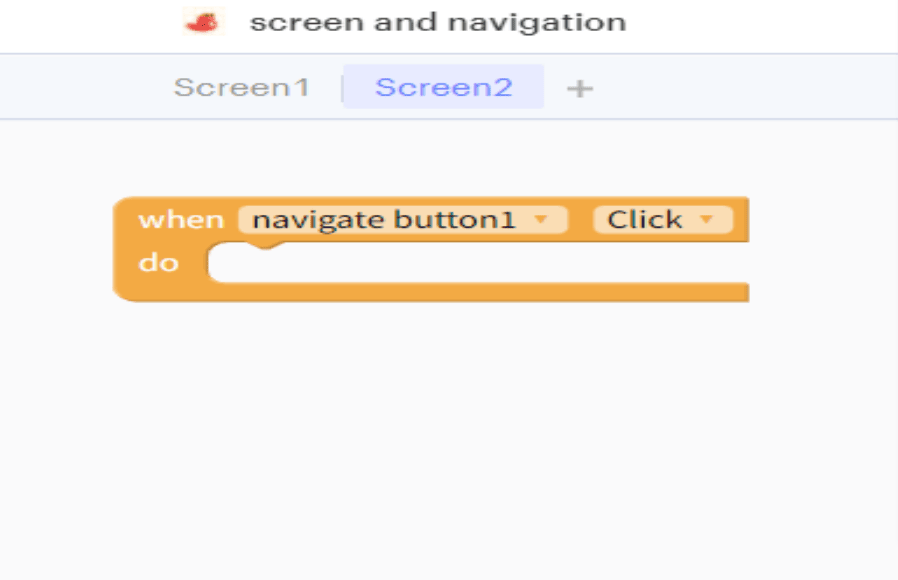
We will complete the code for screen 2 similar to how we did for screen 1. You must select screen 2 to code on screen 2.
Step 1: When the button (navigate button1) clicks, drag out the block.
Step 2: Now, from the control panel, drag out the navigate block and change it to navigate to the screen.
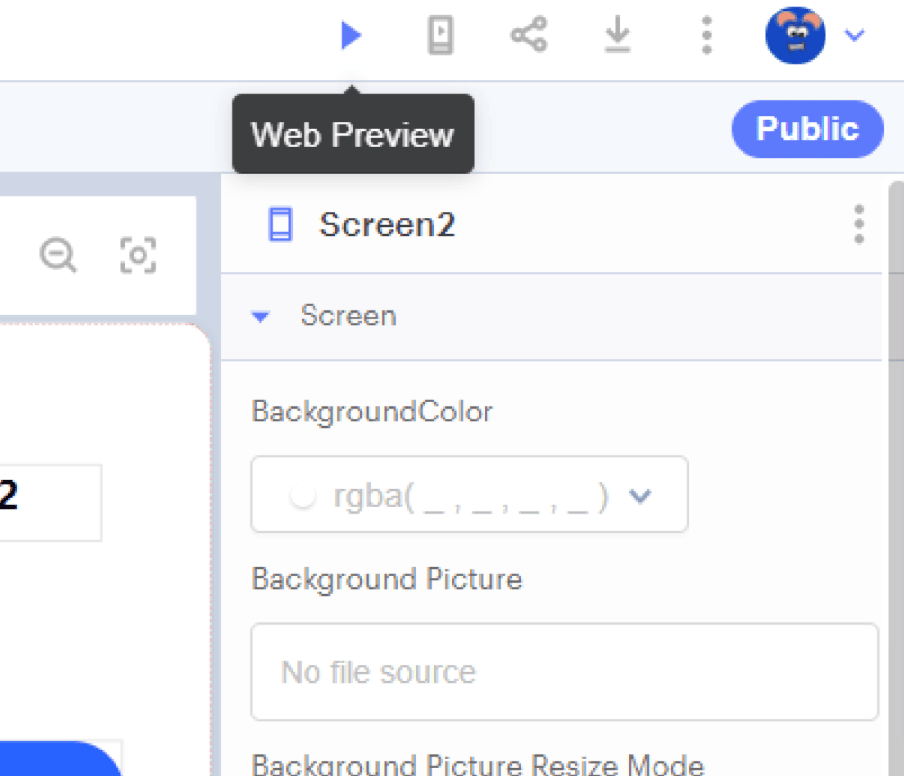
Hurray! Now that we’ve completed the design and coding portions of your app development, it’s time to put it to the test.
To begin the test, click on the Web preview button, which looks like a play button on the left side of the top.
Conclusion
Thunkable makes it easy for non-coders, those without a computer science background, and children to get started with coding.
The fact that even young children can create their mobile apps is both exciting and futuristic. Once you’ve mastered the fundamentals, such as the ones listed above, you’ll be a pro in no time.
If you’re interested in introducing your children to the world of technology, consider enrolling them in coding classes for kids using BrightChamp’s intuitive platform.
To get your hands on more educational and free resources on coding for kids, robotics for kids, financial education for kids, etc., do check out the BrightCHAMPS Page now!
So what are you waiting for? Hop on and start with your coding journey.

Learn Block-Based Coding at BrightChamps with its specially designed curriculum that makes learning programming easy for students in Grades 1-12. BrightChamps also teaches a variety of other programs that help kids build a foundation in computer programming through activities, assignments, and other means.
Frequently Asked Questions (FAQs)
No, you do not need to have extensive coding knowledge to use Thunkable. Thunkable offers a drag-and-drop interface that allows you to create mobile apps without writing code. However, having some basic programming knowledge can be helpful in creating more complex applications.
Screens are the individual pages that make up your mobile app. You can design each screen individually, and they can be linked together to create a navigation system for your app.
To create a new screen in Thunkable, click on the “Create new screen” button in the screen section of the Thunkable platform. You can then choose from a variety of screen templates or create a blank screen to customize from scratch.