
Are you interested in game development and coding? Have you ever wanted to create your own game from scratch? Scratch is a beginner-friendly programming language that can help you bring your ideas to life. In this quick tutorial, we will guide you through the process of creating a simple flying game in Scratch. You’ll learn the basics of programming, and have the opportunity to customize your game with your own graphics and sound effects. By the end of this tutorial, you’ll have a game that you can share with others and be proud of. So, let’s take off and get started on creating your very own flying game in Scratch!
The main goal in this game is to help the flying cat catch as many gold coins as possible by pressing the up, down, left, and right key arrows on your keyboard. The coins will continue to shift positions at random.
Whether you’re a beginner or an experienced Scratch user, this tutorial is designed to help you create an exciting and challenging game that you can share with your friends and family. So, let’s get started!
Before diving into the blog, You can check out the video.
Table of contents
Scratch Flying Game Prerequisites
- Character Positions
When creating a scratch program, keep in mind that the X and Y axis can be used to easily manipulate characters’ positions.
An X-axis or X position is the horizontal line responsible for the character’s position on the screen i.e whether the character will be moving to the right or the left.
It is also important to understand that when you are shifting the character to the left you are decreasing their X-axis, yet if you move a character to the right you are increasing their X-axis.
Similarly, the Y-axis or Y position is a vertical line responsible for the character’s position on the screen. Moving the character further up a screen increases their Y-axis and moving the character further down a screen decreases their Y-axis.
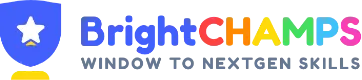
Here’s a diagram to help you understand it more clearly!
The yellow lines denote the Y-axis, while the blue lines denote the X-axis.
- Variables
A variable is a one-of-a-kind identifier created by the programmer i.e. you. Variables can contain anything you want, such as a score, a life, or even a name.
A variable can be text, numbers, or even images. It has an infinite number of possibilities, and the variables are extremely simple to change and create.
For more information about coding game for kids. Click here!
Now let’s start building this game

Steps to Create A Flying Game In Scratch
Step 1: Design Scratch Game
Let’s start by setting up your scratch design to make an appealing game.
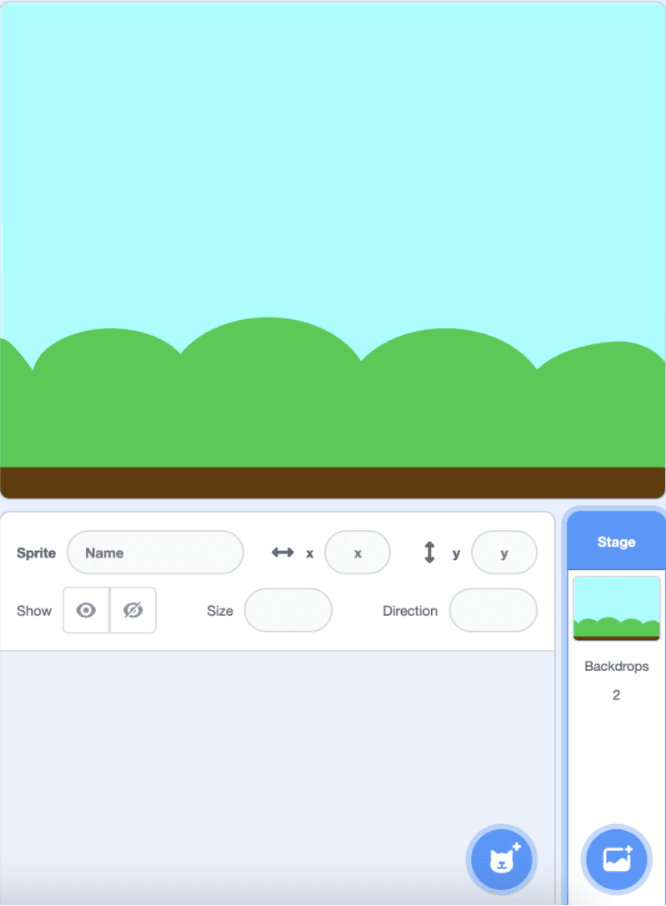
First, click on “create” in Scratch, and you’ll be on a window like the one shown in the image below.

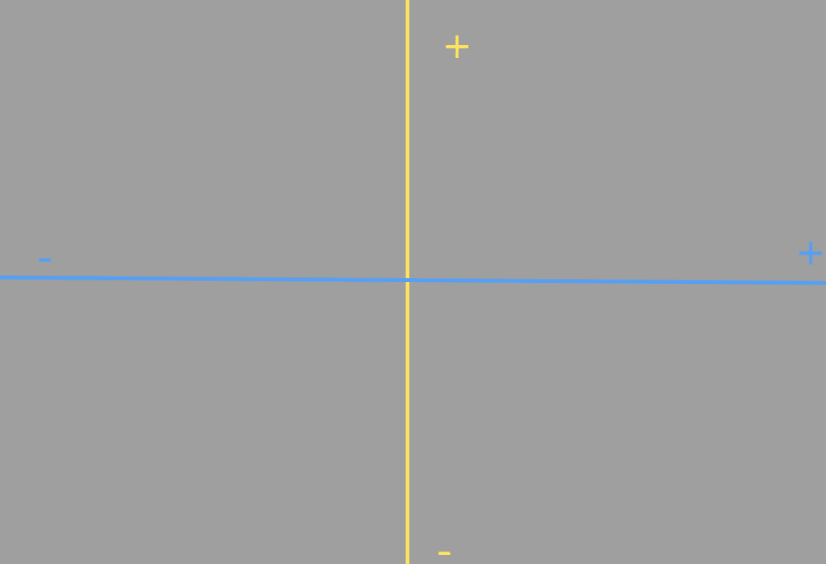
Then, in the lower right corner of the screen, beneath the stage, click the blue button to bring up a screen full of options for a background for your game, as shown in the image below.
You can choose any background you want, but for this game, I’m using Blue Sky.
Once you’ve chosen your background, it will be visible on the game’s screen right away. Let us now add all of the characters you’ll need.
The amazing thing about scratch is that it gives the creators complete control over the appearance of the game; you can choose from over 100 scratch-provided characters or draw and upload your own.
For this game, we will use three Scratch characters and upload one of our own.
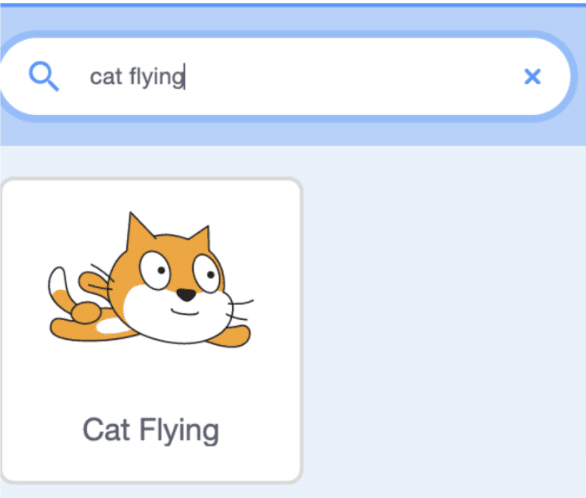
The first character we’ll need is a flying cat, who we’ll control in this game with the arrow keys on our keyboard.
Simply click on the blue button with a Cat icon next to the background button to add a character. Then search “cat flying.”
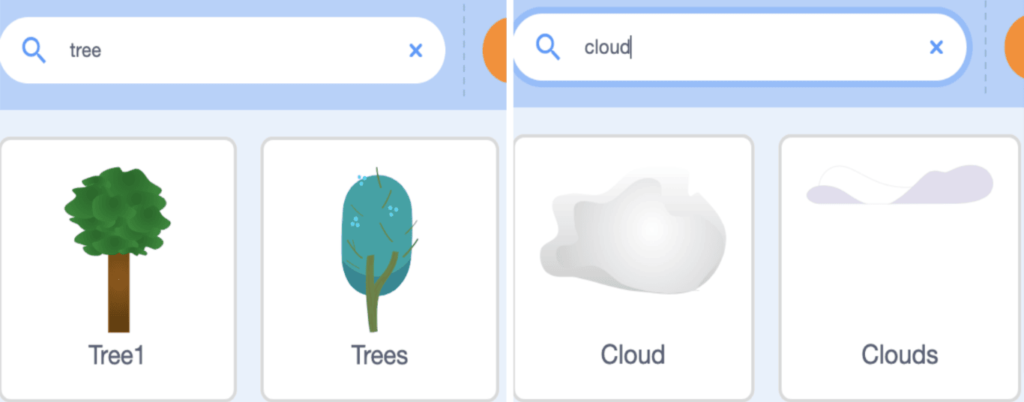
The second and third character that we need to add is a tree and a cloud to give our game a more lively appearance. Scratch has a couple of options to choose from.
Here I went with “Tree1” and “Clouds.”
Finally, we must add a coin!
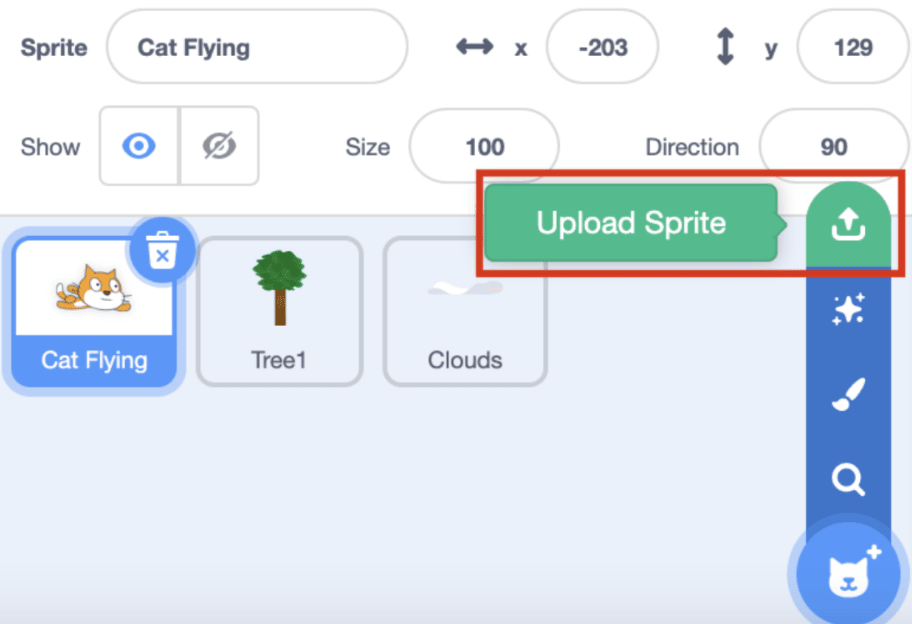
This coin represents the character that our flying cat must collect to improve its score. Simply choose a free coin image from the internet and upload it.
Hover over the blue sprite button and click on the upload icon, then find the image that you just downloaded.
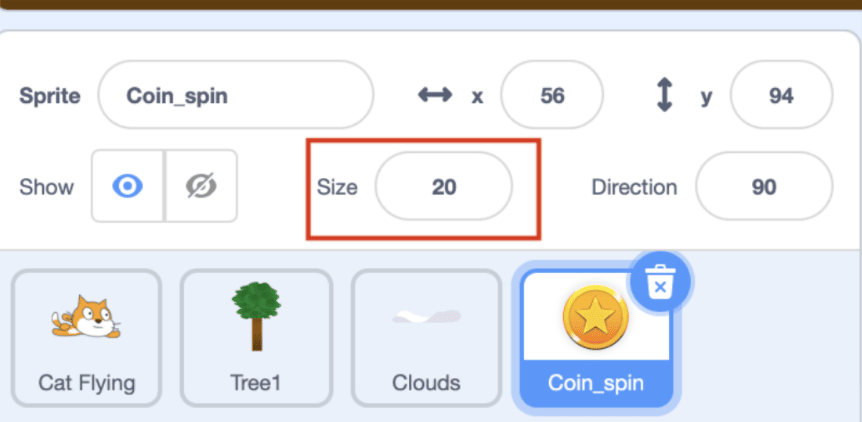
If the coin image is too large after uploading it, change its size to 20 by clicking on the coin where you’ll find the size editing option.
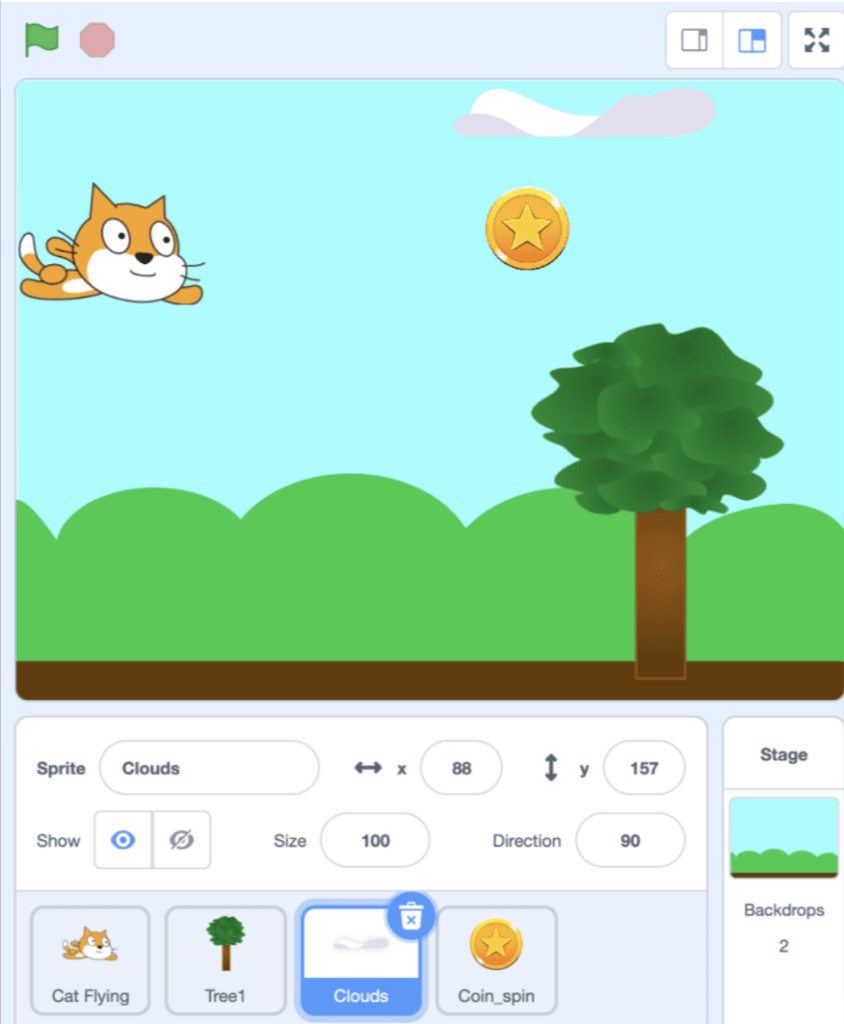
That’s all there is to it! Your design is complete and should now resemble the image below.
Step 2: Programming the Game
1) Flying Cat Code
Now we’ll program the cat’s movements, such as whether we want it to move up, down, left, or right by manipulating its X and Y coordinates.
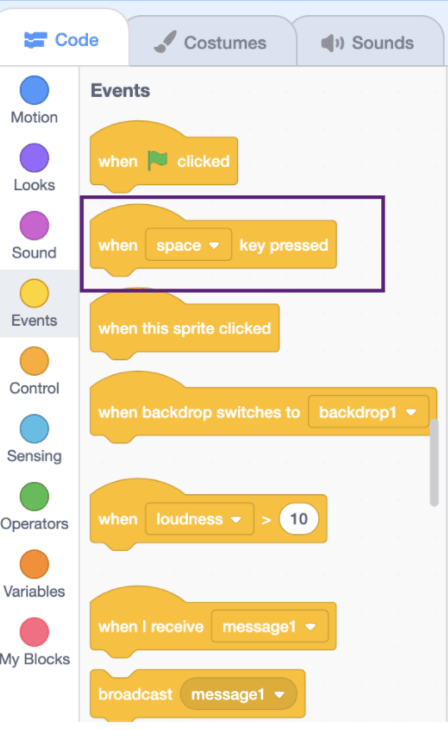
- To begin, go to the yellow “Event” code on the left side of your screen and select the “when space key pressed” code block. This is the second code block on your events code and will be used frequently, so keep an eye out for it.
We can easily modify the space key to any other key we want to code. So drag it and then put it in the center of the screen!
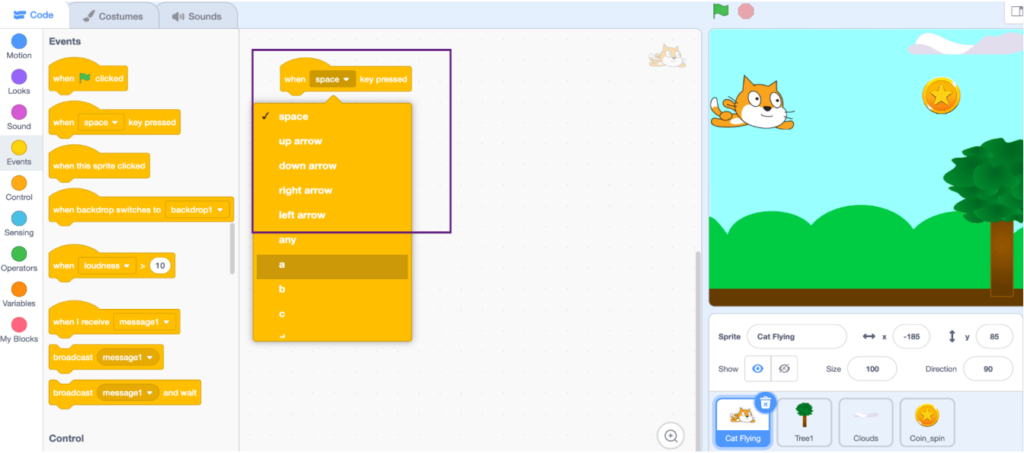
- Then select the “up arrow” to indicate that whatever code you connect to this event block will be the action generated when you press their respective keys.
Now let’s go to the motion block in the top left corner of the screen.
- Then use the code block “change y by.” If you recall, the Y-axis changes the vertical (up and down) position of the characters.
- Connect this motion block to the previously added yellow event block.
It should look like the image below.
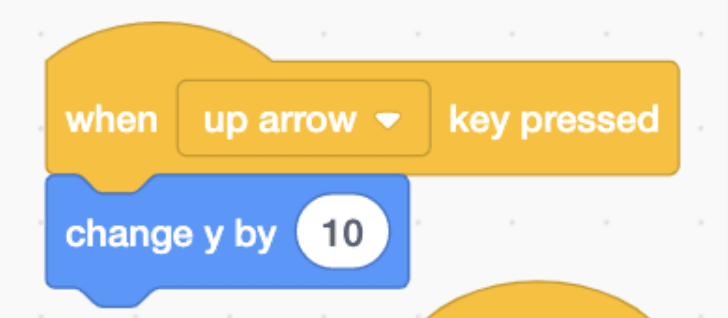
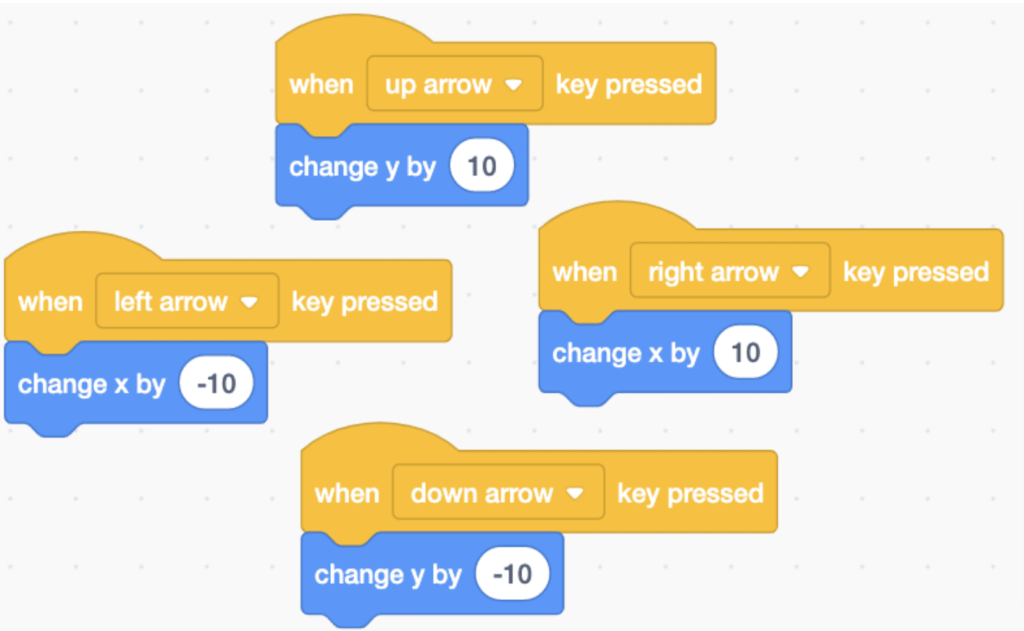
Now, using your up arrow, you should be able to see that the cat can now fly up. Let us now add the remaining movements to help our code go in any direction.
2) Coin Code
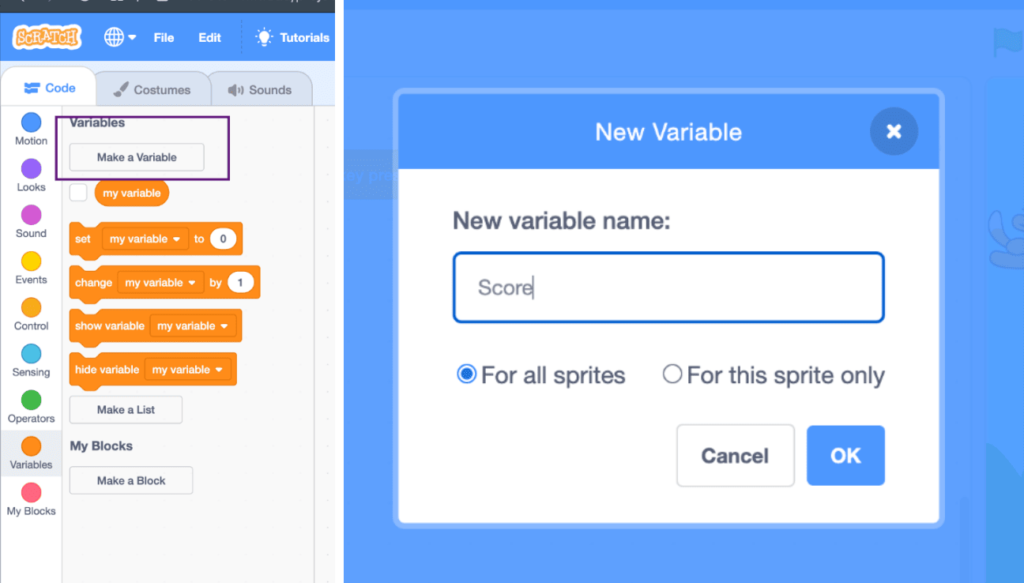
The first step is to create a Variable. On the left side of the screen, click the “variable” block and select Create a variable.
Then name your variable “score” or “coins,” or whatever you want.
Now let’s start coding!
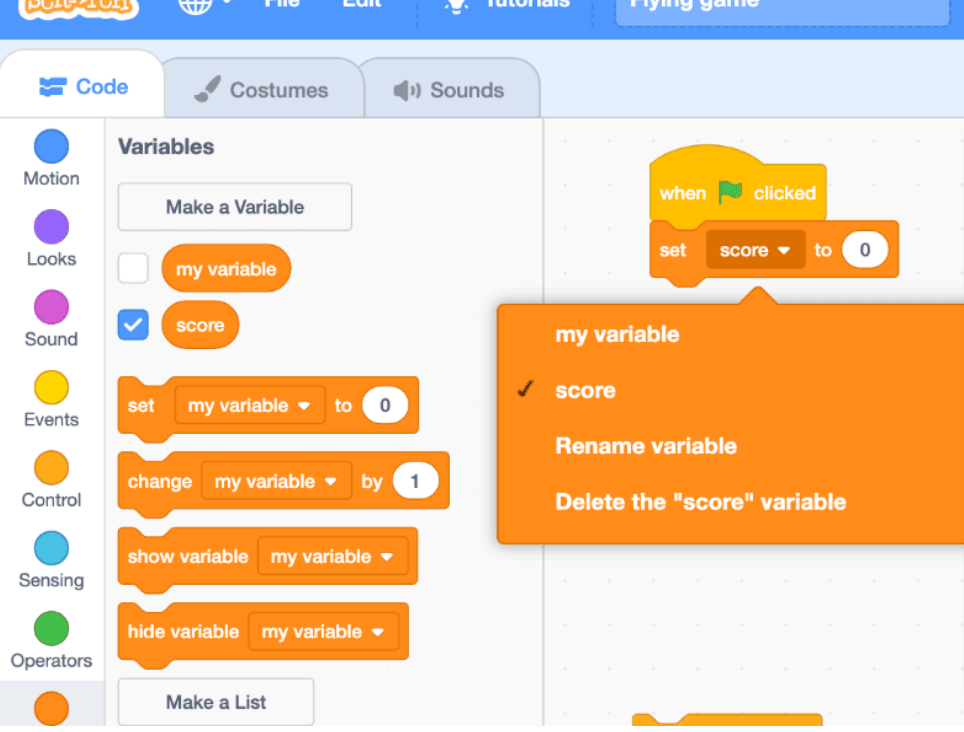
Take the “set my variable to 0” code and click on the “my variable” to change it to the variable that you just created.
Here, I chose “score” because it is the variable I had just created.
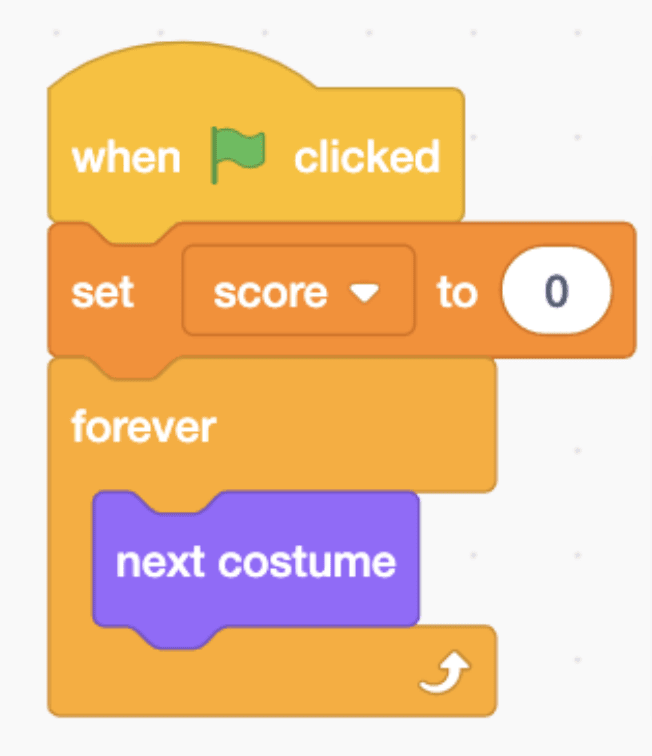
Now go to the “Control” code block, which is light orange, and take a “Forever” code block, which means that the code inside it will be read indefinitely. Of course, until the game is over.
Inside this code block, go to the purple “Looks” code block and take a “next costume” code; this allows us to change the animation of the coin so that it continues to rotate.
After you’ve finished, your code should look like the one shown in the image, and you can now click on the green flag to see how beautiful our coin is flipping through.
Now, let’s add some more code to make it more interactive.
Take another “when green flag clicked” event block but why do we need two different “when green flag clicked” event blocks?
This is done so that we can be more specific in our code, stating that one is simply added to focus on the appearance, whereas the other is added to focus on its actions.
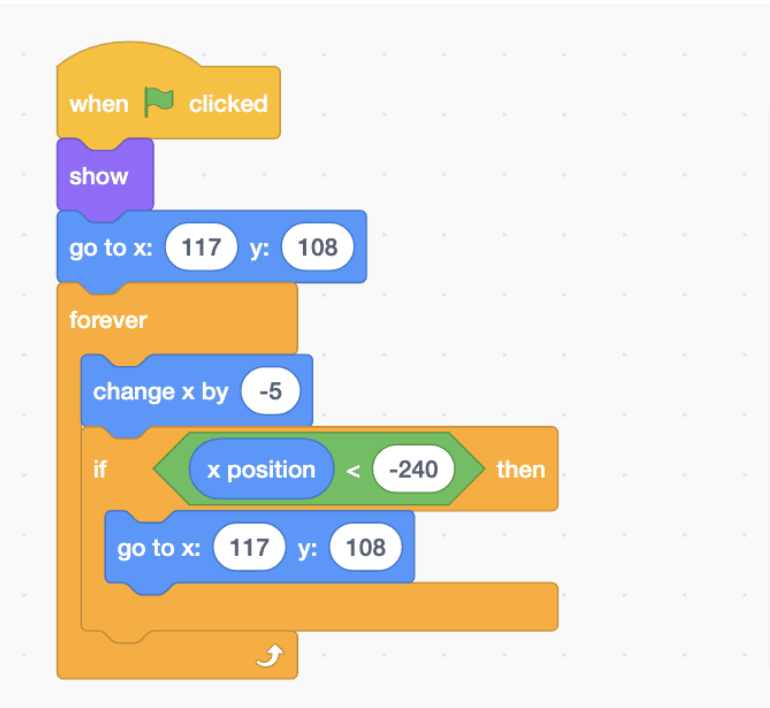
- The first thing you need to do is add a “Show” code block, which can be found in the purple “Looks” block code.
- Then, from the blue “motion” block code, add a “go to X and Y” code, changing the X to 117 and the Y to 108. This establishes the coin’s initial positions.
- Then, from the “control” code block, add a “forever” block beneath the X and Y.
- Now, inside the forever code block, add a “change x by 10” and replace the 10 with a -5 to create the illusion that the coin is magically moving to the left side of the screen.
- Add an “if” code found in the “control” code block beneath this code.
- This is included so that when our coin moves to the left and eventually disappears from the screen, it will return to us.
- Then, from the “operator” code block, insert a less than sign into the if block, then insert an “x position” code from the “motion” code block into the left side of the operator block, and finally, type “-240” into the right side of the operator block.
This means that once the coin has an X value less than -240 (which is off the screen), we will make it appear on the screen again by inserting a “go-to X and Y” code with X as 117 and Y as 108.
Right now, your code should look something like the one in the image below.
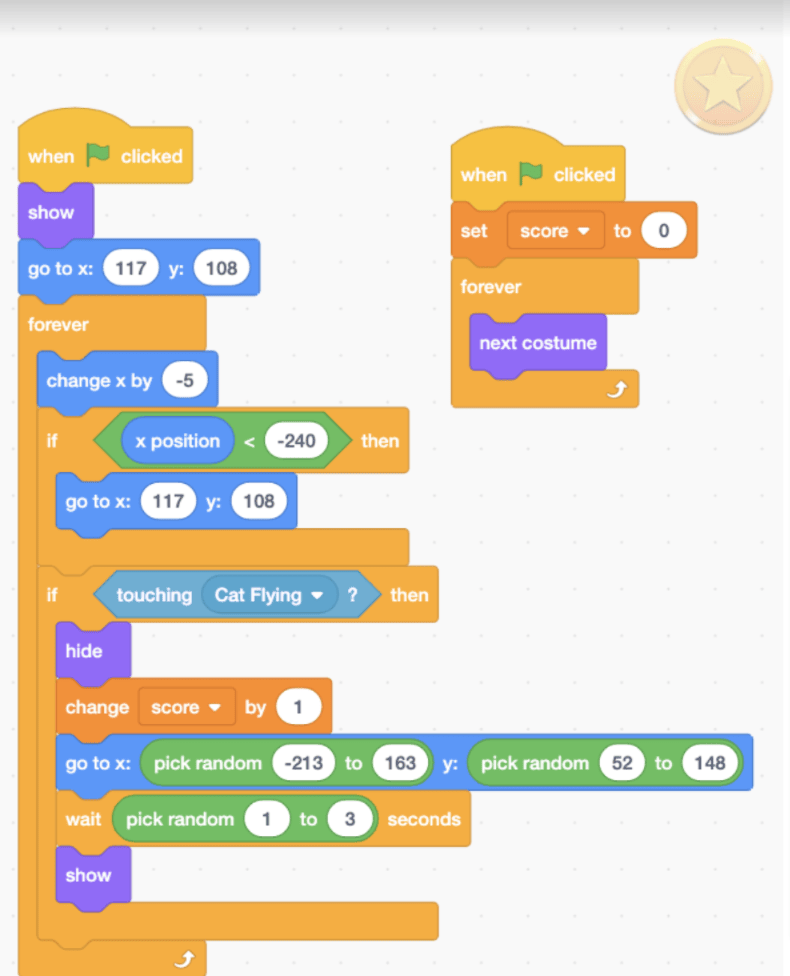
Now beneath this “if” code, add another “if” to state that if the cat touches our coin, we must add a score and the coin must disappear and reappear in a different and random position so that our game isn’t too predictable.
In this “if” code, add a “touching mouse pointer” code from the “sensors” code block and change it to “touching cat flying” place this code inside the if argument, then add a “hide” code from the “looks” code block inside it, then add a “change score by 1” code from the “variable” code block then take a “go-to X and Y” code and place a “pick random from 1 to 10” in both.
This instructs our coin to keep changing its X and Y coordinates, making it difficult to predict where our coin will appear next.
- Then, from the “control” code block, add a “wait” code and put another “pick random from 1 to 10” within the wait code, changing the numbers to 1 to 3 so that we don’t know when or where our next coin will appear.
- Finally, at the bottom, add a “show” from the “looks” code block! Your code should now look something like the one in the image below.
3) Trees and Clouds
The codes for the tree and clouds are very similar; the only difference is the direction in which they move as well as their location, as the tree is at the bottom of the screen and the cloud is at the top.
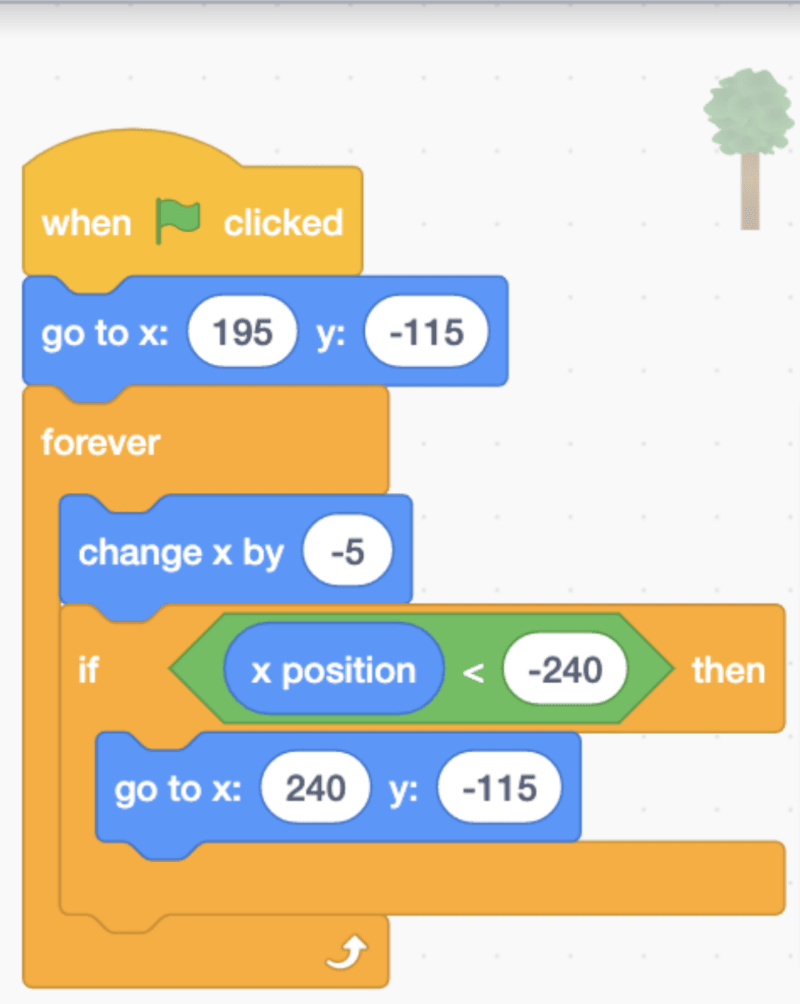
First, let’s code the Tree, starting with the “when green flag clicked” event block as usual.
- Now, add a “go to X and Y” code block and change its X to 195 and its Y to -115, then place a “Forever” code block and inside it, add a “change x by -5” code block, which tells our tree to keep moving to the left of the screen.
- Take an “if” code block and place it in the “if” block so that if the Trees position starts disappearing from the screen, it can reappear by changing the X-axis once more.
- Then take a Less than Sign from the “operator” code block and place it in the “if” block, then take an “x position” code from the “motion” code block and put it on the left side of the operator block.
- Finally, type “-240” on the right side Put a “go to X and Y” code inside this if code and change its X to 195 and its Y to -115 again. Your tree code should now look like the one shown in the image below.
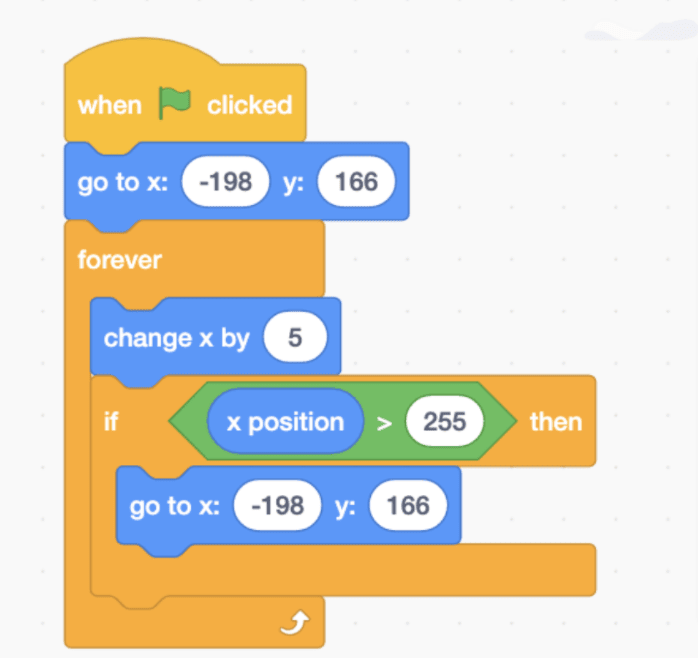
Finally, this will be the last “when green flag clicked” event block.
- Add a “go-to X and Y” code block and change its X to -198 and its Y to 166, then place a “Forever” code block and inside this add a “change x by 5” which tells our clouds to keep moving to the right of the screen.
- Take an “if” code block, then a Greater than Sign from the “operator” code block, then an “x position” code from the “motion” code block, and place it in the left side of the operator block, and type “255” in the right side of the operator block.
- Put a “go-to X and Y” code inside this if code and change its X to -198 and its Y to 166 again. Your cloud code should now look like the one in the image below.
Go ahead and click on the green flag to play your game, and you can continue coding it to customize further.
For more information about online robotics classes for kids. Click here!
Conclusion
Congratulations! If you’ve made it this far, you’re now a certified game developer! In conclusion, creating a flying game in Scratch can be a fun and rewarding project for anyone interested in coding and game development. By following the steps outlined in this tutorial, you can learn the basics of Scratch programming and use them to create a simple but engaging game that you can customize to your liking.
Whether you’re a beginner or an experienced programmer, the possibilities for creating your own unique flying game in Scratch are endless. So why not give it a try and see where your creativity takes you? With a little bit of patience and practice, you may just be able to take your game to new heights!
Learn Scratch at BrightChamps with its specially designed curriculum that makes learning programming easy for students in Grade 1-12. BrightChamps also teaches a variety of other programs that help kids build a foundation in computer programming through activities, interactive lessons, and other means.
Frequently Asked Questions (FAQs)
No, you don’t need any prior coding experience. Scratch is designed to be a beginner-friendly programming language, and this tutorial is meant for beginners who are new to coding.
Yes, you can customize the game in any way you want. Once you have the basic mechanics of the game down, you can add your own graphics, sound effects, and additional features to make the game your own.
The time it takes to create a flying game in Scratch depends on your level of experience and how complex you want your game to be. However, with this tutorial, you should be able to create a simple flying game in a few hours.