

Minecraft is a game all about creativity, exploration, and building. One of the essential tools you have at your disposal is the anvil. The anvil is used for various things, from crafting and repairing items to creating unique block shapes. They are also used to combine enchantments. This article will tell you everything about anvils in Minecraft, from how to make and use them to how to repair them and maximize their versatility.
Where Can We Find an Anvil in Minecraft?
Anvils can be found in villages, or three blocks of iron and four iron ingots can be used to make one.
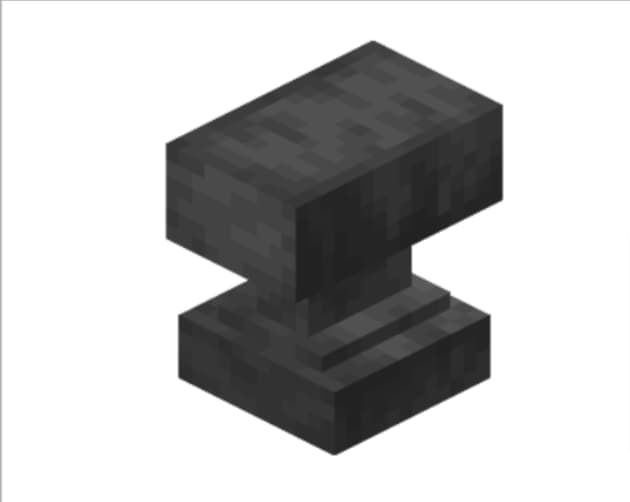
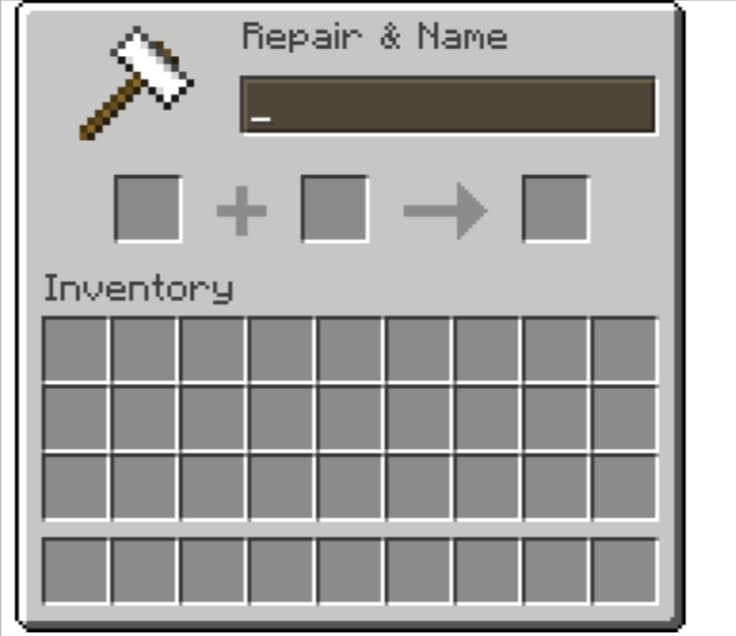
An anvil appears as a square-shaped block with a hole in the top when it is placed. A block is just barely bigger than the hole. When water flows over an anvil, it makes cobblestones around the edge of the hole. It also emits a sound akin to the metal being struck. When you right-click on an anvil, a GUI with two input slots and one output slot will appear. The item that needs to be repaired or renamed goes in the first input slot, and the material that will be used in that process goes in the second. The outcome of the repair or rename process is shown in the output slot. Understanding the workings of an anvil in Minecraft not only adds to the gaming experience but also provides a platform for goal setting, as players aim to enhance and customize their tools and equipment through strategic repairs and upgrades.
Later, we’ll go into more detail about how to “repair and rename” an anvil in Minecraft. We’d like to now explain how to assemble an anvil in Minecraft.
Easy Way to Make an Anvil Minecraft
Any pickaxe can be used to mine anvils. They drop nothing if mined without a pickaxe. Naturally, the woodland mansion’s “forge room” generates a damaged anvil. Here are some easy steps you can follow to make an anvil in Minecraft without exploring. This quick and straightforward guide will show you how to craft an anvil in just a few minutes. To make an anvil in Minecraft, you’ll need the following:
- 1 iron ingot
- 1 block of obsidian
- 1 block of TNT
- A furnace
First, smelt your iron ingot in the furnace to create iron blocks. Then, place the obsidian block on top of the TNT block and right-click it with your iron blocks. This will cause the TNT to detonate and destroy the obsidian, creating a hole in the ground. Finally, right-click the spot with your iron blocks to develop your anvil.
Anvil Minecraft Usage
Anvils are useful objects in Minecraft that may be utilized for a variety of tasks, as was previously mentioned. Anvils are frequently used in the following ways in the game:
Repairing tools and armor: An anvil can be used to repair tools and armor that have been damaged. Place the damaged item on the anvil, and then use another iron ingot or block of iron to hammer it back into shape.
An anvil can also be used to rename things. This can be useful for labeling tools and armor, or for giving friendly names to mobs you’ve tamed. To rename an item, place it on the anvil and use a name tag.
Enchantment combining: Anvils can combine enchantments from two items onto a single item. For example, you could combine the Sharpness and Fire Aspect enchantments from two swords onto a single blade. To do this, place both items to be enchanted on the anvil and then use an enchanted book with the desired enchantment(s) to combine them.
Stay tuned on this page for a helpful guide on how to repair an anvil’s Minecraft! Stay tuned on this page for a useful guide on how to repair an anvil’s Minecraft!
How to Repair an Anvil Minecraft
We will learn more about this topic in this section about repairing an anvil in Minecraft. Anvils have two modes to help you repair items:
A player can use a grindstone to repair items by combining two identical items. With an anvil, the target keeps its spells and can get new ones from the items that are sacrificed.
Players can also use the same materials that were used to make an item to fix a single thing. One material can improve 25% of an item’s maximum durability. A chest plate, for example, if fixed with four materials, would cost only half as much as it does to buy a chest plate (eight materials).
On the other hand, this may not make much sense for tools or weapons; two diamonds would be used to repair a shovel (two diamonds total) while repairing one shovel with four diamonds would take out too much of the diamond (four diamonds instead of two). Still, it may be worth making the more expensive upgrade if enchantments are hard to get.
Because items like armor may be mended and given new names at the player’s choosing using an anvil, there’s no need to be concerned about minor scratches to them thanks to this functionality.
But in creative mode, any repair, enchanting, or renaming process is possible, no matter how skilled the player is. Additionally, the cost of tools is always fluctuating. With each repair, the counter will keep going up by two until it reaches the usual cap of 39 levels. This “product” cannot be removed from the anvil, and no repair cost is indicated until it exceeds the limit of signed 32-bit integers. Additionally, tools in this state cannot be renamed or enchanted. Additionally, you must be aware that anvils are unaffected by use.
We are all aware that repairing equipment or objects is frequently employed to address physical issues.
However, here are some items that your anvil can’t repair, like bows, shears, or chainmail. But don’t worry, there are other ways to fix them! For example, if you need a new bowstring because your broken one doesn’t work, find some leather and cut it into long strips. Thread the string through the notches in the bow limbs. Tie off the ends with another ribbon of leather; this is called “sinew.” You can also buy “bow strings,” which come ready to attach but cost more. Turtle shells can be repaired with scutes and elytra with phantom membranes.
When you repair an item with another matching tool, the item’s durability will increase. Adding a bowstring to a bow, scissors to a shear, or a matching material to a pickaxe can make them last longer. But if you need matching items for repairs, other solutions exist. For example, natural materials like vines and spider silk can also be used as temporary repairs. Exploring these repair mechanisms not only contributes to the personal development of Minecraft players but also adds a layer of creativity and resourcefulness to their gameplay.
Items have a durability percentage, and it’s only as high as 100%. When an object reaches that limit, there is no discount.
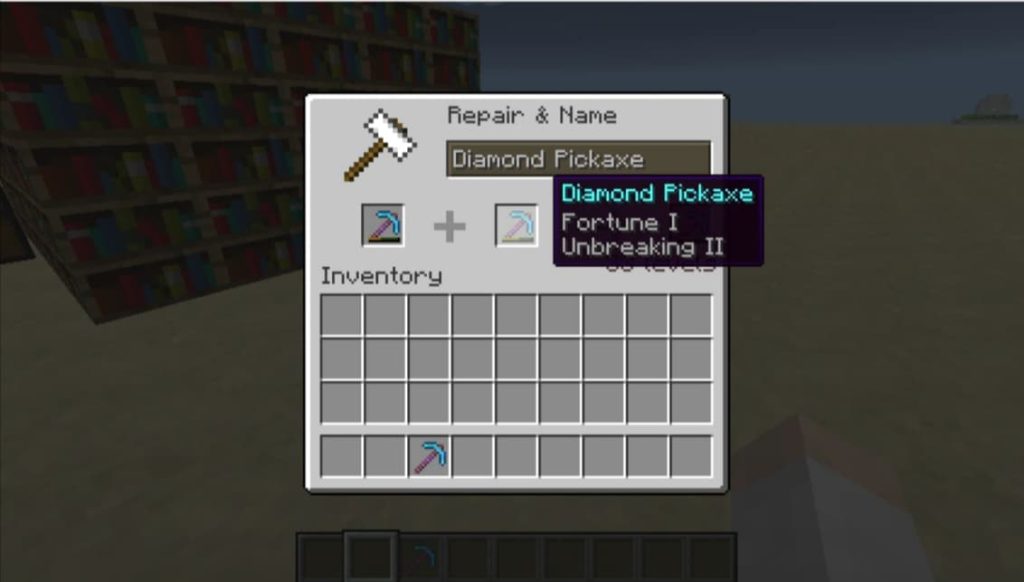
When two things are put together, the anvil can move enchantments from the sacrifice to the thing that is being put together. This can produce synergistic effects if both entities are identical or add additional benefits when they’re not. For example, a Sharpness II sword and a pickaxe that’s been enchanted with Unbreaking can be combined to make a Sharpness III sword.
But even if they don’t have identical effects, you might still be able to connect them if one of them doesn’t have any conflicting properties. However, because of how items are repaired at the anvil when combined, some enchantments cannot be connected, regardless of whether they’re in conflict or not. Understanding these intricacies can be like delving into learning resources, unraveling the complexities of Minecraft enchantments and enhancing your knowledge of the game’s mechanics.
It costs more to move high-level enchantments and rename items, and the anvil can only handle up to 39 levels of enchantments. (This limit is not present in Creative mode.)
The more times you repair armor or tools, the higher the experience cost becomes. For example, when they first get damaged (1 level), it would cost a minimum of one experience point. If you were to repair both armor and tools for the first time (2 levels), it would cost at least two experience points.
Conclusion
Repairing items in Minecraft is simple: place the damaged item and the material you want to use for repairs into the appropriate slots and click the “Repair” button. The rest will be taken care of by the game, which will use the necessary materials and put a fixed version of the item into the output slot. Remember that not all items can be improved; only tools, armor, and weapons can be fixed using this method.
Items can also be renamed using an anvil; place the item you want to rename into the first input slot and type out the new name you want it to have into the text box below. Again, clicking “Repair” will finalize the process and consume the necessary materials. However, like all things in Minecraft, anvils can be damaged and repaired periodically. Check out the most recent blogs on the BrightCHAMPS blog page to learn more about Anvil in Minecraft.
Elevate your child’s learning journey with BrightChamps, the leading EdTech company offering a transformative blend of robotics, financial education, and coding courses.
To get your hands on more such articles, educational content, and free resources on budgeting for kids, financial literacy for kids, game development, etc., check out the BrightCHAMPS Blog Page now!
TIPS!
Here’s a quick guide on how to repair an anvil in Minecraft:
- First, you’ll need to gather the necessary materials. You’ll need three iron ingots and four blocks of obsidian.
- Open your crafting table and arrange the ingredients as shown in the image below.
- Put the materials in the right order, then right-click on the crafting table to make your fixed anvil.