Scratch is a fun, easy-to-learn, and interactive programming language designed for kids and beginners to learn coding concepts in a playful and engaging way. It allows users to create their own interactive stories, games, animations, and even music projects. While Scratch provides many built-in features like sprites, sounds, and backgrounds, sometimes you may want to add videos to your Scratch project to enhance the visual experience.
Adding videos to your Scratch project can bring your ideas to life, making your projects even more exciting and engaging. In this blog, we will show you step-by-step how to add videos to your Scratch projects using different methods and tools.
Whether you’re a teacher looking to incorporate multimedia projects into your classroom, a parent helping your child with a school project, or a beginner programmer looking to add some pizzazz to your Scratch creation, this guide will walk you through the process of adding videos to your Scratch projects with ease. So, let’s dive in and learn how to make your Scratch projects even more awesome with videos!
Table of contents
What is Scratch?
Scratch is a visual block-based programming language created by the media lab at the Massachusetts Institute of Technology.
It is now well-known throughout the world and is primarily used for after-school programs and upskilling children by teaching them the fundamentals of computer programming.
Scratch can be used in over 70 languages, and the platform is one of the most popular in the world due to its ease of use. It had over 43 million users worldwide in 2021.
According to unity statistics on Scratch’s official website as of December 2021, there were over 100 million monthly website visits, 92 million projects shared by over 82 million users, and 638 million total projects create.
How to Add Videos to Scratch Projects?
Many people may wonder how to add videos to a Scratch project when they are creating one because Scratch only allows them to add images and sounds.
But that doesn’t mean there aren’t other options; let’s learn how to add videos to your Scratch project.
The steps for adding video to your scratch projects are provided below.
Step 1: Choose the video to import
We can look for the videos we want on YouTube or in a collection of personal videos in a variety of video formats.
Step 2: Convert the video to GIF format
We must convert the video to GIF format. Open CloudConvert, select the current video format in the convert section and select GIF format for the top section.
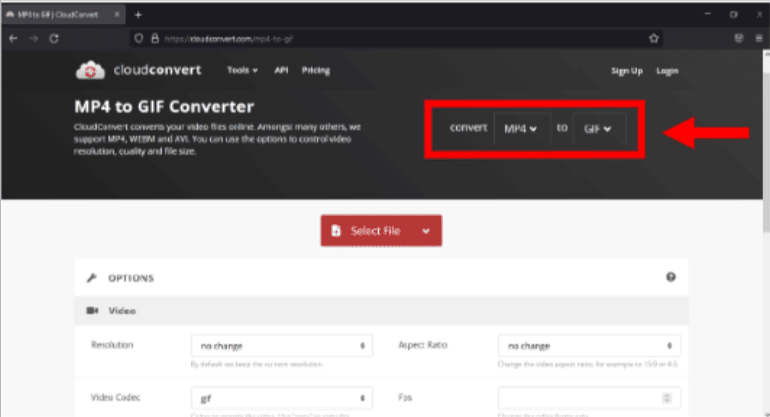
Once the video has been successfully changed to “GIF” format, we convert the same video, to “.mp3” format.

That way, there will be two files, “.gif” and “.mp3”.

Step 3: Enter the Scratch project
Open Scratch and use the “Upload Sprite” menu to upload videos that have been converted to “.gif.”
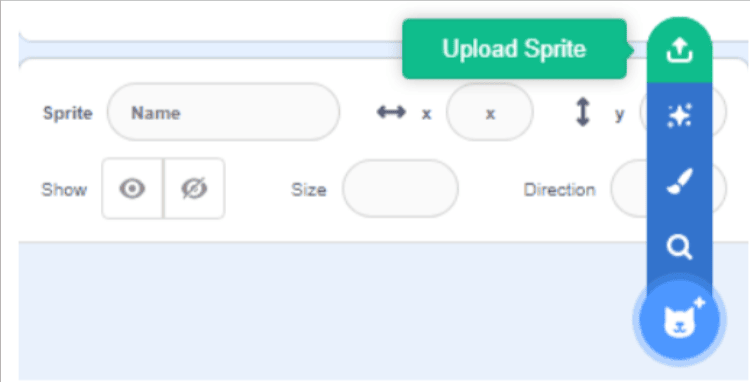
As a result, it will be detected in a variety of costumes, as shown in the images below:
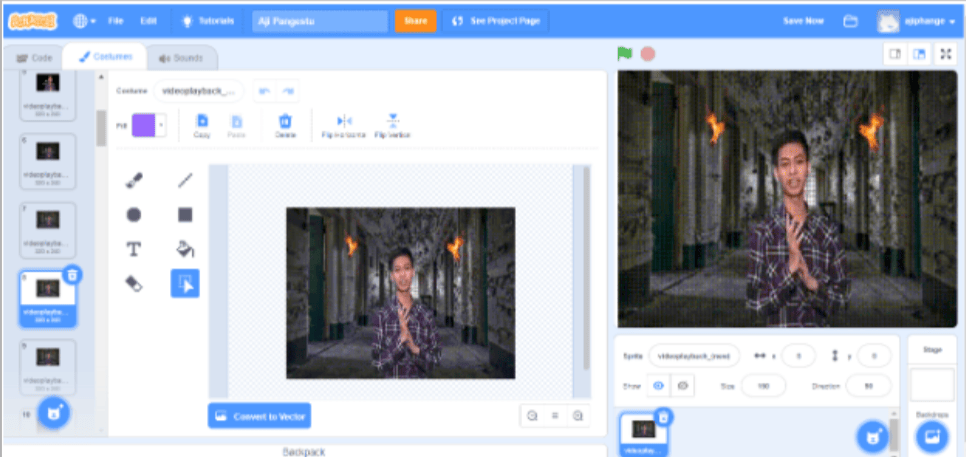
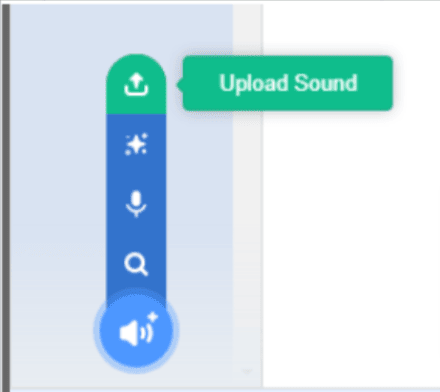
Following that, we upload the generated sound in “.mp3” format.
Then, arrange the following commands so that the image “GIF” and sound “.mp3” are combined.
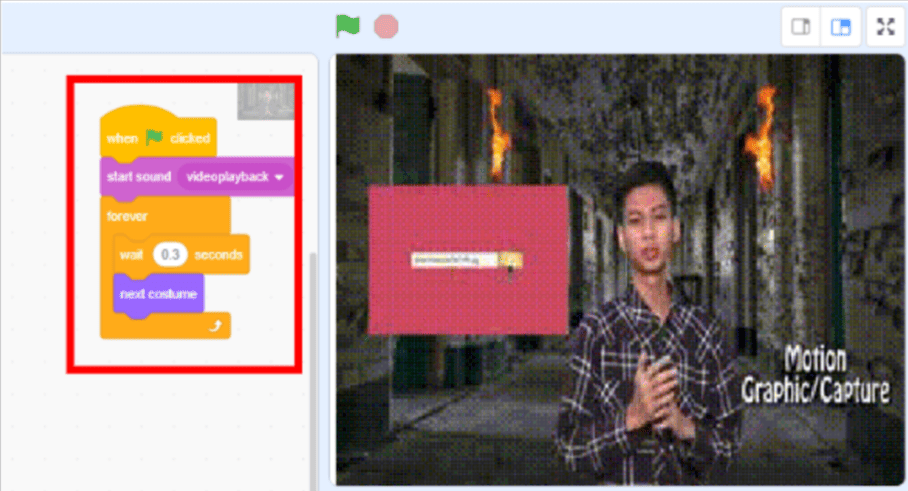
This is how to incorporate a video into a Scratch project.
By following the steps above, we have indirectly created a solution for creating videos in the Scratch project by reusing existing blocks of code.
Even though there is no video import feature in Scratch, we must still think creatively when creating scratch projects.
Conclusion
In conclusion, adding videos to your Scratch projects can take your creations to the next level, making them more engaging and exciting. By following the steps outlined in this guide, you can easily add videos to your Scratch projects using different methods and tools. Whether you choose to upload a video file from your computer, use the YouTube player extension, or even create your own custom video player using HTML, there are plenty of options available to suit your needs.
Remember to consider copyright laws and use videos responsibly in your projects. With the skills and knowledge gained from this guide, you can now confidently create multimedia projects in Scratch that showcase your creativity and imagination. We also present html for kids in a way that is both approachable and entertaining, allowing them to grasp the fundamentals of web development with ease. So, go ahead and experiment with different videos and see how they can add a new dimension to your Scratch projects. Happy coding!

The projects they create on Scratch eventually lead to them learning a lot about computer programming, and acquiring valuable life skills. Learn Scratch at BrightChamps with its specially designed curriculum that makes learning programming easy for students in Grades 1-12.
BrightChamps also teaches a variety of other programs that help kids build a foundation in computer programming through activities, interactive lessons, and other means.
BrightChamps provides financial education for kids, equipping them with essential money management knowledge for a successful future.
Frequently Asked Questions (FAQs)
Scratch accepts videos in several formats, including MP4, AVI, MOV, and WMV. It’s important to note that Scratch has a file size limit of 10 MB for uploaded video files.
If you want to use the YouTube player extension to add a video to your Scratch project, you will need an internet connection to access the video on YouTube. However, if you want to upload a video file from your computer or create a custom video player using HTML, an internet connection is not required.
Yes, you can add sound effects or music to your Scratch project using the built-in sound library or by uploading your own audio files.

 We are an army of educators and passionate learners from BrightChamps family, committed to providing free learning resources to kids, parents & students.
