📅 Published: September 30, 2023 🔄 Updated: August 27, 2024
Using Scratch for Arduino is an exciting way to bridge the gap between coding and electronics. It’s like bringing art and science together, allowing you to create interactive projects with ease. In this fascinating fusion, you’ll use Scratch, a block-based visual programming language, to control and program Arduino, a popular microcontroller platform.
This combination opens up a world of possibilities for creative tinkering and learning, making technology accessible to everyone, regardless of their coding experience. Let’s dive in and explore this dynamic duo of creativity and innovation!
Table of contents
Understanding the Basics
Scratch: Unleashing Creativity Through Code
Scratch is a programming language and online platform designed to introduce coding to beginners of all ages. Developed by MIT, Scratch offers a fun and interactive way to learn the basics of coding. Instead of typing lines of complex code for kids, users drag and snap together visual blocks, like building blocks, to create animations, games, stories, and more.
The beauty of Scratch lies in its accessibility. You don’t need prior coding experience to get started. It’s an excellent tool for kids and beginners, as it nurtures creativity, problem-solving, and logical thinking. Scratch coding for kids promotes collaboration, as users can share their projects in the Scratch community and even remix others’ creations.
Arduino: Empowering DIY Electronics
Arduino, on the other hand, is a hardware and software platform tailored to the world of electronics and physical computing. At its core, Arduino is a microcontroller, a small computer that can be programmed to perform various tasks, from reading sensors to controlling motors and lights.
What sets Arduino apart is its versatility. Whether you’re an experienced engineer or a hobbyist, Arduino provides a straightforward way to build interactive electronic projects. The Arduino software, equipped with its programming language, simplifies the process of writing code for your projects.
With Arduino, you can create things like a weather station that measures temperature and humidity, a robot that follows lines, or even an automated plant watering system. It’s a powerful tool for turning your ideas into tangible, interactive prototypes.
Getting Started with Scratch for Arduino
Downloading and Installing Scratch for Arduino
Before you can start creating Arduino projects using Scratch, you need to download and install Scratch for Arduino. Here’s a simple step-by-step guide:
1. Visit the Scratch for Arduino Website: Open your web browser and navigate to the official Scratch for Arduino website. You can find it by performing a quick online search.
2. Download the Software: Look for the download section on the website. Typically, you’ll find versions for Windows, macOS, and Linux. Choose the one that matches your operating system and click on the download link.
3. Install the Software: Once the download is complete, run the installer and follow the on-screen instructions. The installation process is usually straightforward, so you shouldn’t encounter any issues.
4. Launch Scratch for Arduino: After installation, you can launch Scratch for Arduino from your applications or programs folder.
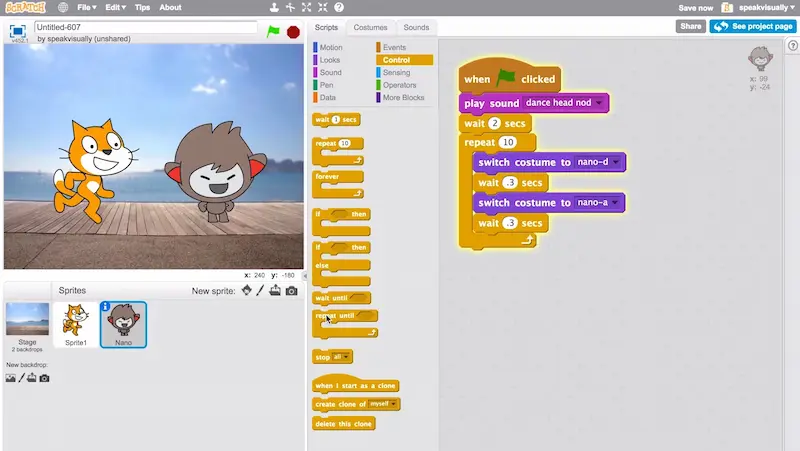
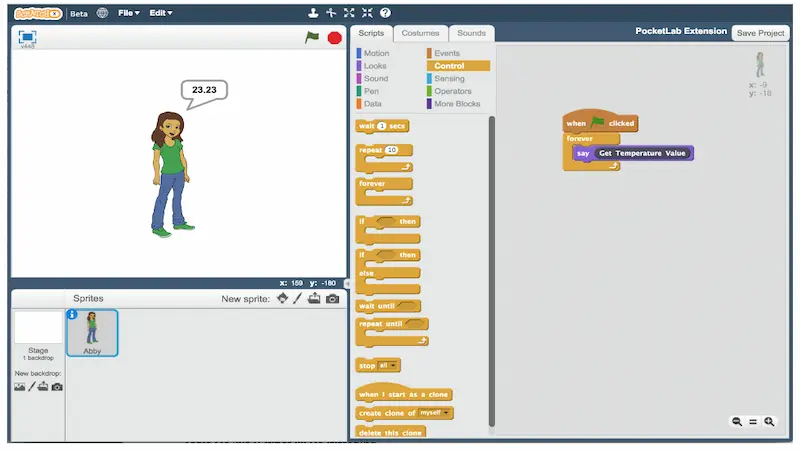
Overview of the Scratch Interface
Now that you have Scratch for Arduino up and running, let’s take a quick look at its user-friendly interface:
1. Stage Area: The main workspace is where you’ll create and control your Arduino projects. It’s called the “stage” and resembles a blank canvas where you’ll place and interact with different components.
2. Sprites: In Scratch for Arduino, “sprites” represent physical components like LEDs, sensors, and motors. You can choose from a wide range of predefined sprites or create custom ones to match your project’s needs.
3. Blocks Palette: On the left side of the screen, you’ll find the blocks palette. This is where you’ll find a variety of coding blocks that you can drag and drop onto your sprites to create scripts. These blocks simplify the learn coding for kids process by using a visual, puzzle-piece-like approach.
4. Scripts Area: The center of the screen is where you’ll assemble your code by snapping blocks together in a logical sequence. This area allows you to program your Arduino without writing traditional code.
5. Stage Monitor: At the bottom of the screen, you’ll find the stage monitor. It provides real-time feedback on the status of your Arduino, making it easier to debug and test your projects.
Sensors and Inputs
The Importance of Sensors in Robotics:
Sensors are the bridge between a robot and the world it operates in. Here’s why they’re indispensable:
1. Environment Awareness: Sensors provide vital data about the robot’s surroundings, helping it make informed decisions. For example, a distance sensor can prevent a robot from bumping into obstacles.
2. Adaptability: Robots equipped with sensors can adjust their actions based on changing conditions. Think of a robot vacuum cleaner that detects dirty spots and navigates around furniture.
3. Interaction: Sensors enable robots to respond to external stimuli, making them more interactive and engaging. Ever played with a robot that reacts to your voice or gestures? Sensors make it happen.
Scratch and Sensors:
Scratch is an excellent platform for beginners to dive into robotics for kids. It simplifies the process of connecting and programming sensors. Here’s how you can get started:
1. Choose Your Sensors: First, pick the sensors you want to use. Common options include light sensors, ultrasonic distance sensors, and touch sensors.
2. Connect the Hardware: Depending on your robot kit, connect the sensors to the appropriate ports. Follow the instructions provided with your kit for guidance.
3. Programming in Scratch: Scratch offers a user-friendly interface to program your robot. Use Scratch’s blocks to create code that reads data from the sensors and triggers actions. For instance, you can program your robot to move forward until it senses an obstacle, at which point it will stop and change direction.
4. Test and Refine: Once you’ve written your code, test it to see how your robot responds. Tweak the program as needed to fine-tune its behavior.
Outputs and Actuators
What Are Actuators?
Actuators are devices that convert electrical signals into mechanical movement or action. Think of them as the muscles of your electronic creations. They’re responsible for everything from opening and closing doors to moving the wheels of a robot, or even tilting a camera. The two primary types of actuators we’ll explore here are motors and servos.
Motors: The Powerhouses
Motors are like the workhorses of the actuator world. They come in various shapes and sizes and can spin in either a clockwise or counterclockwise direction. You’ll find motors in things like electric fans, cars, and countless other applications. Motors are ideal for tasks that require continuous rotation, such as driving wheels or powering conveyor belts.
Servos: The Precision Instruments
Servos, on the other hand, are more like the artists among actuators. They are incredibly precise and can rotate to specific angles with great accuracy. Servos are commonly found in remote-controlled toys, robotic arms, and even in steering mechanisms for model airplanes. They’re perfect for tasks that require controlled, precise movement.
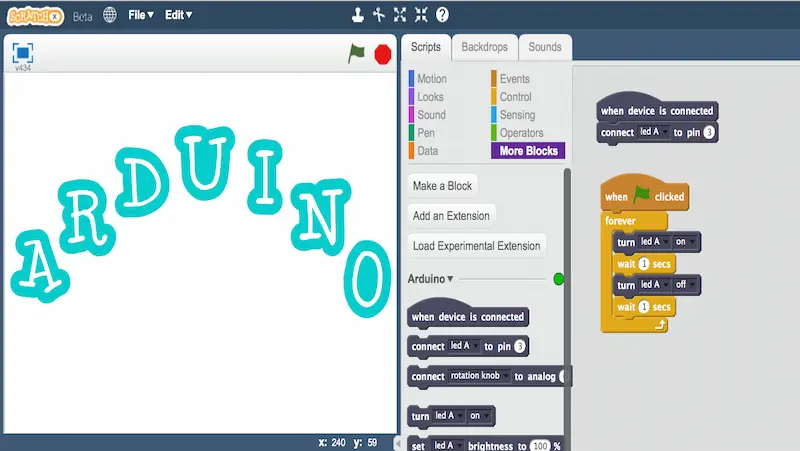
Controlling Actuators with Scratch
Now that we know a bit about actuators, let’s talk about how you can control them using Scratch. Scratch is a user-friendly, block-based programming language that’s perfect for beginners, especially kids, who want to dive into the exciting world of the best coding apps for kids and robotics.
In Scratch, you can create programs by snapping together colorful blocks, each representing a specific action or command. To control actuators like motors and servos, you’ll need the right hardware, such as a microcontroller (e.g., Arduino) that can communicate with Scratch.
Once you have the hardware set up, you can use Scratch to program your actuators to do all sorts of tasks. Want to build a robot that can move forward, turn, and avoid obstacles? Scratch can help you do that! You can create interactive games, art installations, or even automated pet feeders—all by coding your actuators in Scratch.
Advanced Projects
Exploring Advanced Scratch Features
Scratch is not just child’s play; it’s a powerful platform that offers advanced features for those willing to explore. Here are a few gems you should consider:
1. Custom Blocks
Custom blocks are like building your own LEGO pieces. They allow you to create your functions and simplify complex tasks. Imagine having a library of custom blocks tailored to your project’s needs—talk about efficiency!
2. Variables and Lists
These aren’t just for keeping score in games. Variables and lists can store and manipulate data, opening doors to more advanced simulations, calculators, and data-driven projects.
3. Broadcast and Messaging
Broadcasting messages between sprites can turn your project into a collaborative masterpiece. Create interactive storytelling experiences or simulate real-world communication between characters.
Building More Complex Robots and Projects
With the advanced features at your disposal, you can build more complex robots and projects that will leave people in awe. Here’s a glimpse of what’s possible:
1. Multi-Sprite Games
Why stop at one sprite? Create multiplayer games where multiple characters interact, compete, or cooperate. Think of it as your mini-gaming universe.
2. Animations and Storytelling
Scratch isn’t just about games. You can make animated shorts, interactive stories, or even your own mini-movies. The only limit is your imagination.
3. Simulations and Science Projects
Take on the role of a mad scientist and use Scratch to simulate experiments, model scientific concepts, or visualize data. It’s like having your own digital laboratory.
4. Robotics and Hardware Integration
Did you know Scratch can control real-world robots? Experiment with hardware like Arduino or Raspberry Pi to build robots that can sense and interact with their environment.
Troubleshooting and Tips
Common Issues and How to Solve Them
1. Connection Problems: One of the most common issues when working with Arduino is connectivity. If your Arduino board isn’t recognized, double-check your USB cable and ensure you’ve installed the necessary drivers.
2. Code Errors: Syntax errors are the bane of every programmer’s existence. To tackle this, take a close look at the error message. The line number and description will give you a clue about what went wrong. Don’t be afraid to ask for help from online robotics for kids communities or friends.
3. Sensor Troubles: When using sensors, they might not always provide the expected data. Make sure your connections are secure, and verify that you’ve chosen the correct sensor type in your code.
4. Memory Issues: Arduino boards have limited memory. If your code is too large, you might encounter memory-related problems. Consider optimizing your code or using a more powerful board if needed.
Best Practices for Coding with Scratch and Arduino
1. Plan Your Project: Before diving into coding, outline your project’s goals and design. Having a clear plan will help you avoid unnecessary complications later on.
2. Comment Your Code: Make your code readable by adding comments. This not only helps others understand your code but also aids you in troubleshooting when issues arise.
3. Keep It Simple: Simplicity is key, especially if you’re new to coding. Break down complex tasks into smaller, manageable parts. This makes debugging easier and ensures your project remains maintainable.
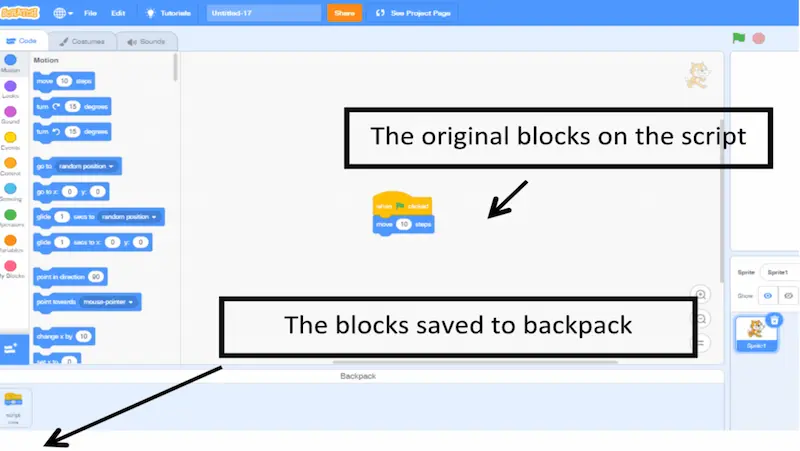
4. Regular Backups: Don’t forget to save copies of your code as you progress. This way, you can always revert to a working version if you encounter a major issue.
5. Learn from Others: Explore online forums, tutorials, and communities for insights and solutions. Sharing your experiences and learning programs for kids from others is a fantastic way to grow as a coder.
Conclusion:
In conclusion, Scratch for Arduino is a game-changer, bridging the gap between coding complexity and creativity. Its user-friendly interface empowers both beginners and experts to bring their innovative ideas to life effortlessly. By simplifying the programming for kids process, Scratch for Arduino not only enhances our understanding of electronics but also encourages a new generation of inventors to explore the limitless possibilities of technology. So, whether you’re a curious beginner or a seasoned maker, Scratch for Arduino is your passport to a world of endless imagination and invention.
To get your hands on more such articles, educational content, and free resources on coding for kids, robotics courses, game development, etc., check out the BrightCHAMPS Blog Page now!
Frequently Asked Questions
A1. Start by installing ScratchLink and Arduino IDE. Connect your Arduino board, open Scratch, and begin coding your robot’s actions.
A2. Scratch’s visual blocks simplify coding, making it beginner-friendly. It bridges coding and robotics seamlessly, offering an engaging learning experience.
A3. None! Scratch’s visual interface is designed for beginners. A basic understanding of Arduino hardware is helpful but not mandatory.
A4. Virtually anything! From simple motor-controlled bots to complex sensor-driven creations, Scratch for Arduino empowers diverse robot projects.
A5. Explore online tutorials, forums, and the Scratch and Arduino official websites for a wealth of guides, projects, and community support.
A6. No prerequisites. Scratch’s visual blocks eliminate the need for coding expertise, making it accessible for beginners.