Scratch is a high-level block-based visual programming language widely used as a tool for learning how to code.
One can make animations, make visuals like storytelling, basic games with audio and other effects, draw different patterns, add music components, etc on Scratch.
And today we will learn how we can make banners in Scratch.
As we know banners on the web are used for advertising. We can promote any brand by giving a web banner.
A web banner is a narrow horizontal or vertical image or text advertisement on a web page.
We’ll make something similar in Scratch programming as well. It wouldn’t have to be an advertisement banner.

However, when implementing this project, you can simply use the Scratch platform to create any type of banner for web pages, etc.
Creating banners in Scratch is a relatively simple process, so let’s get started.
Or, learn more about scratch coding for kids.
Table of contents
Let’s see how we can make banners in Scratch.
Here we will start with making basic banners in Scratch, a text banner.
For making a text banner we will first go to https://scratch.mit.edu, and sign in so that our project gets saved. And follow the steps given below:
Step 1: Click On ‘Create’ to start a new project.

Step 2: Before we go to the next step, we will first take a look at the page explained in the image below.
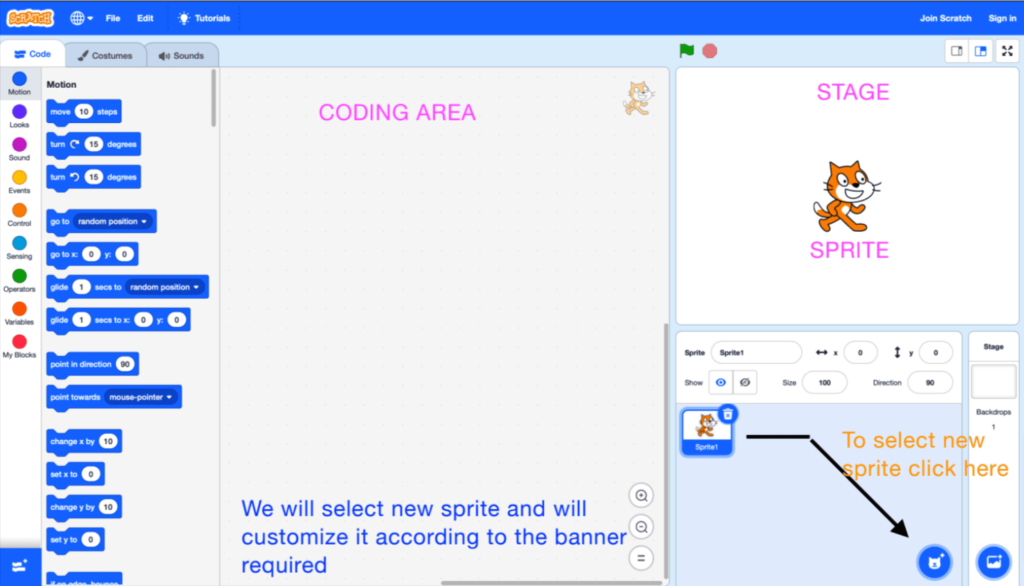
Step 3: Now for making the banner we will first remove the Sprite1 i.e. the cat as it is not required and instead add a new sprite by selecting the ‘Paint’ option.
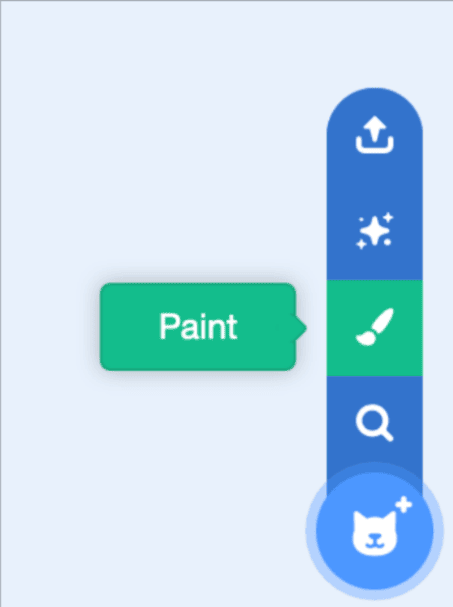
Step 4: Let’s say we want to make a banner for the game Minecraft. To do this we can add the Minecraft game’s logo or we can even just write the name. We will be adding text after selecting the ‘Paint’ option. Also explained in the picture below.
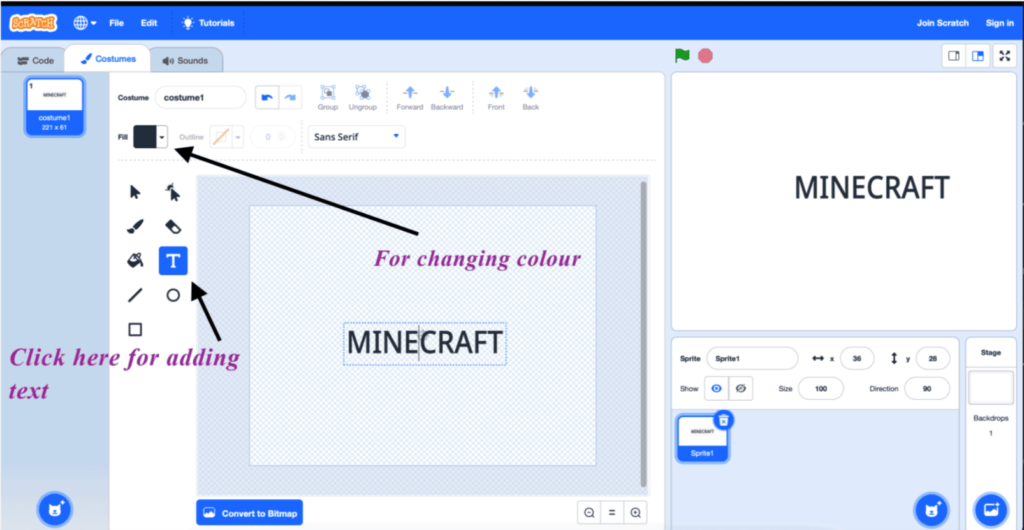
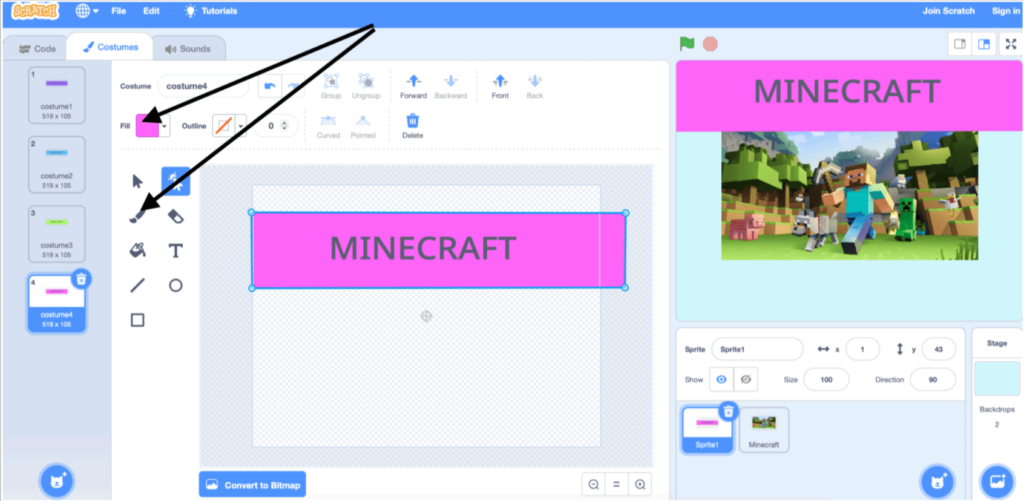
Step 5: We can also pick different hand-writing styles, colors, and font sizes. I picked different colors for my text background by first duplicating my sprite’s costumes three times.
For duplicating just right-click and choose duplicate.
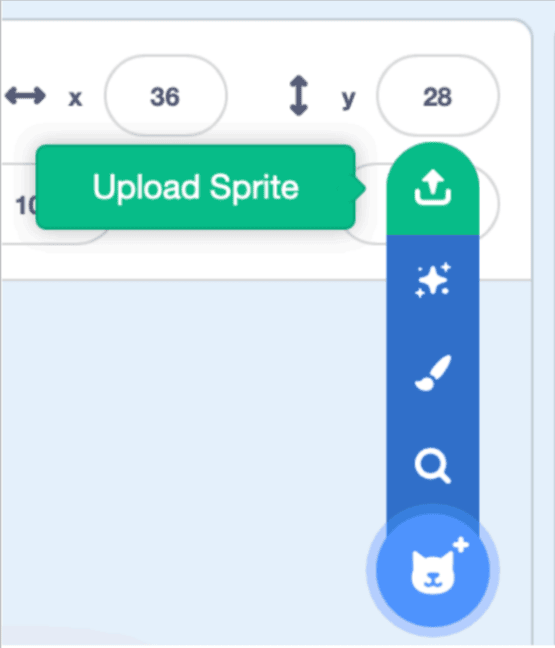
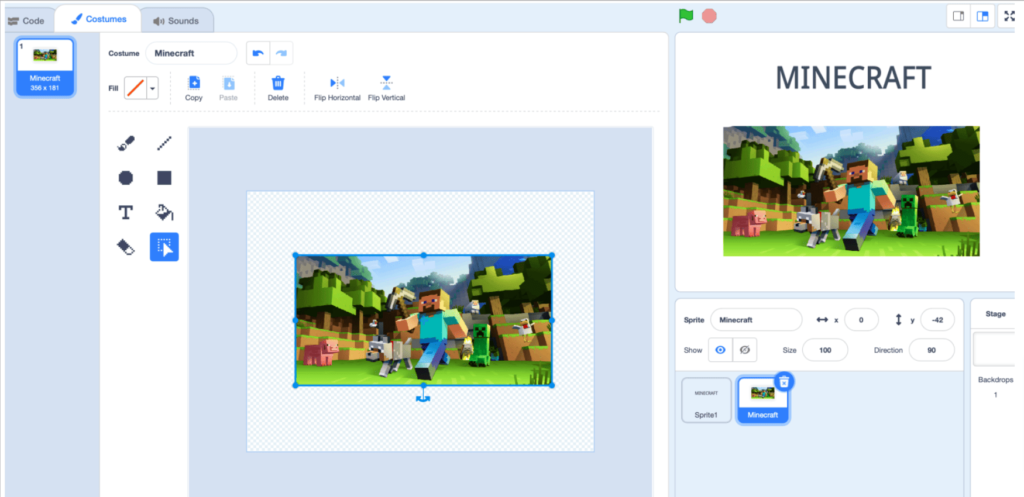
Step 6: And now we will pick one more sprite for the logo, which is optional, and for this, we will select ‘Upload Sprite’ and upload the picture from your device’s gallery.
Step 7: Edit the picture uploaded according to the requirement with the various tools available in Scratch.
You can even edit the picture beforehand as per requirement using third-party software.
Step 8. After completing the design of both the sprites, we will now move on to the coding part. For coding, we have an entire palette of blocks available and starting with an events block.
Let’s explore a few of them by using them in this project.
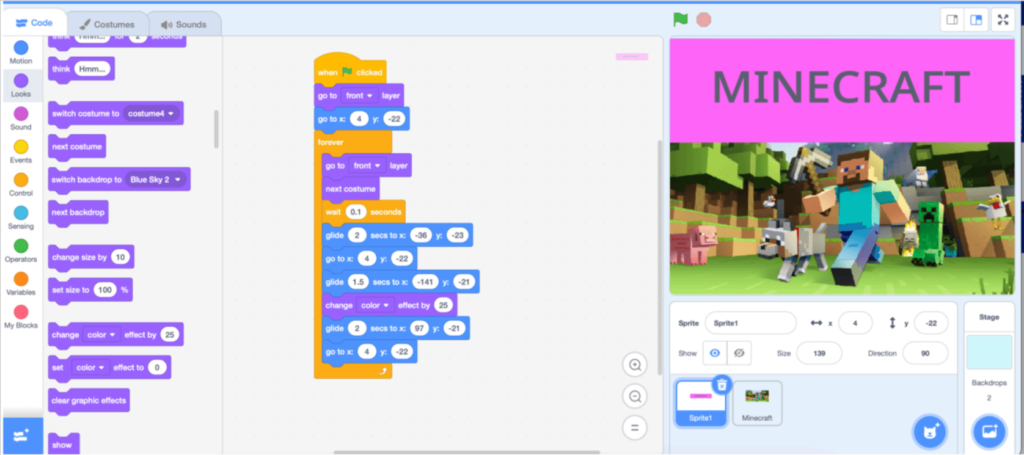
Step 9: Keeping the logo sprite unchanged, we will only do coding for the banner sprite i.e. Sprite 1.
The script for the entire project i.e. creating banners in Scratch is given below. Make sure you try to get yourself familiar with these code blocks as you work on this project.
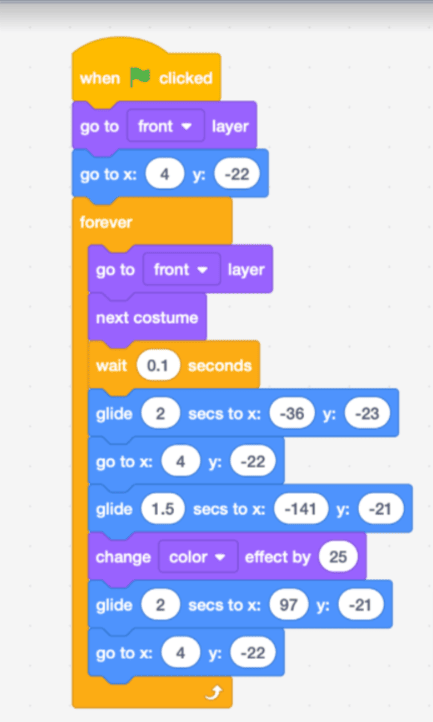
Step 10: Woohoo!! And our banner is ready. Click on the Green flag to see the final output.
Conclusion
With the introduction of the Scratch platform, even young children can now create games.
This platform teaches them coding for kids concepts, and game development logic, improves their math aptitude, and problem-solving skills, and many other advantages.
However, this platform’s creativity is not limited to games; one can also create animations, pictures, drawings, pixel art, and so on.
In this blog, we looked at one of these creative options and learned how to make banners in Scratch. Now go ahead and make some awesome banners for your web pages and wherever else you may need them.
Learn Scratch at BrightChamps with its specially designed curriculum that makes learning programming easy for students in Grade 1-12.
To get your hands on more such articles, educational content, and free resources on coding classes for kids, online robotics classes for kids, game development, etc., check out the BrightCHAMPS Page now!

