Welcome to our blog on “How to Create Mocap Animation in Roblox: 2023 Guide”! In recent years, Roblox has become an incredibly popular platform for game development and creation, with millions of users from all around the world. With its user-friendly interface and extensive features, it has become a go-to platform for game developers, animators, and designers alike. One of the most exciting aspects of Roblox is its ability to incorporate motion capture (mocap) animations, which can bring your game and characters to life like never before.
In this blog, we will explore the basics of mocap animation and how you can create and incorporate it into your Roblox game. Whether you are a seasoned Roblox developer or a complete beginner, this guide will provide you with all the tools and knowledge you need to create stunning mocap animations and take your game to the next level. So, let’s dive in and get started!
Table of contents
What is Mocap?
Basically, Mocap refers to the process of adding motion capture features to an animation. Mocap is a type of motion capture animation in which you can make an avatar do whatever you want.
You can even add clothes or make your avatar perform different gestures that you design. It aids in providing more detailed reactions and signs into your avatar.
These days Mocap animation is extremely famous among Roblox players and it’s also very easy to create using Roblox studio.
How to Create Mocap Animation in Roblox
So, today, we’re going to make our own mocap on Roblox. However, to do so you must first install Roblox Studio on your system.
To install Roblox Studio you can visit Create – Roblox, click on Create and it will give you the option to download.
Now, install Roblox after downloading the file.
Once you are done, it will ask you to sign in.
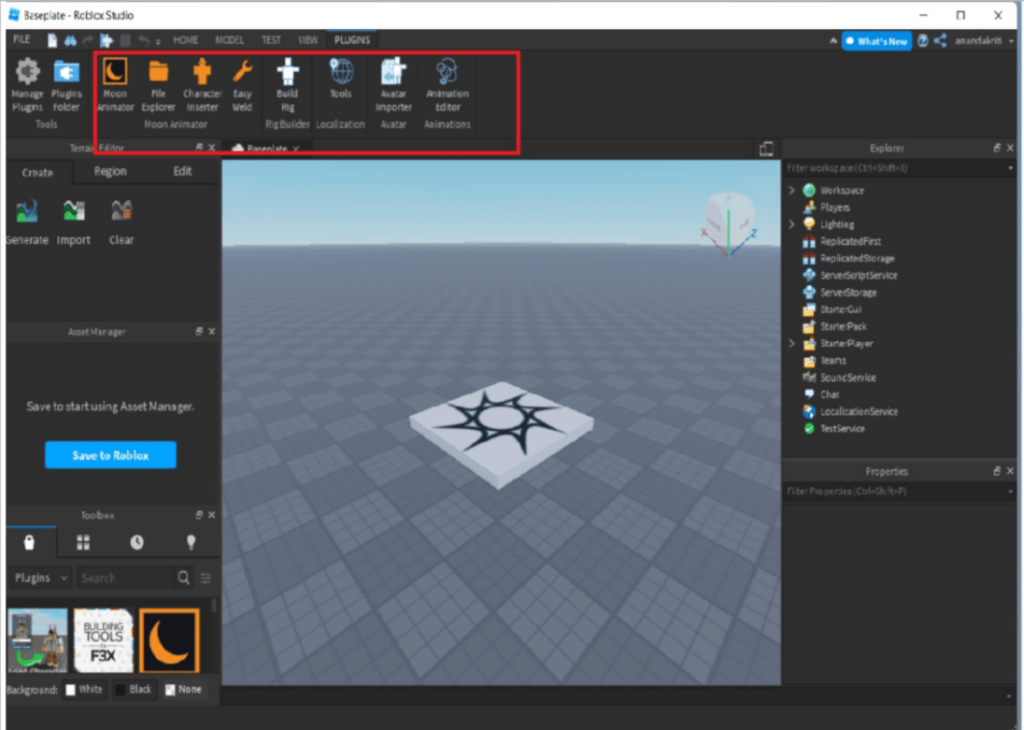
After all these steps you will see a screen just like the one shown in the image below:
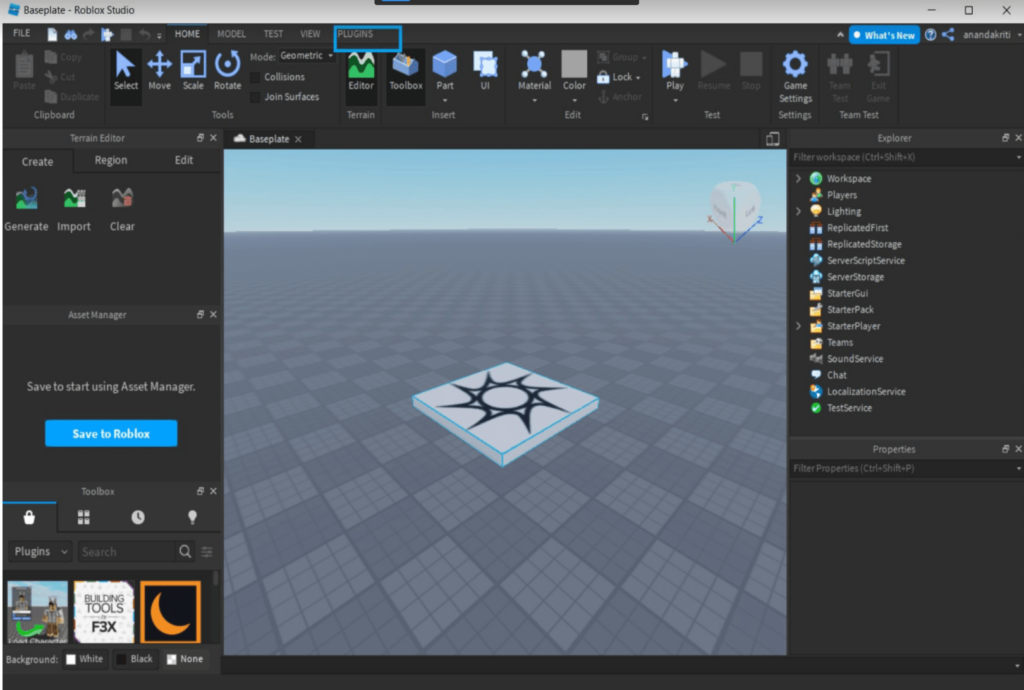
Now click on the plugins that you can see on top.
You’re good to go if you already have the moon animator plugin installed.
If you don’t have one, click on the search option in the upper left corner, as shown in the image below:
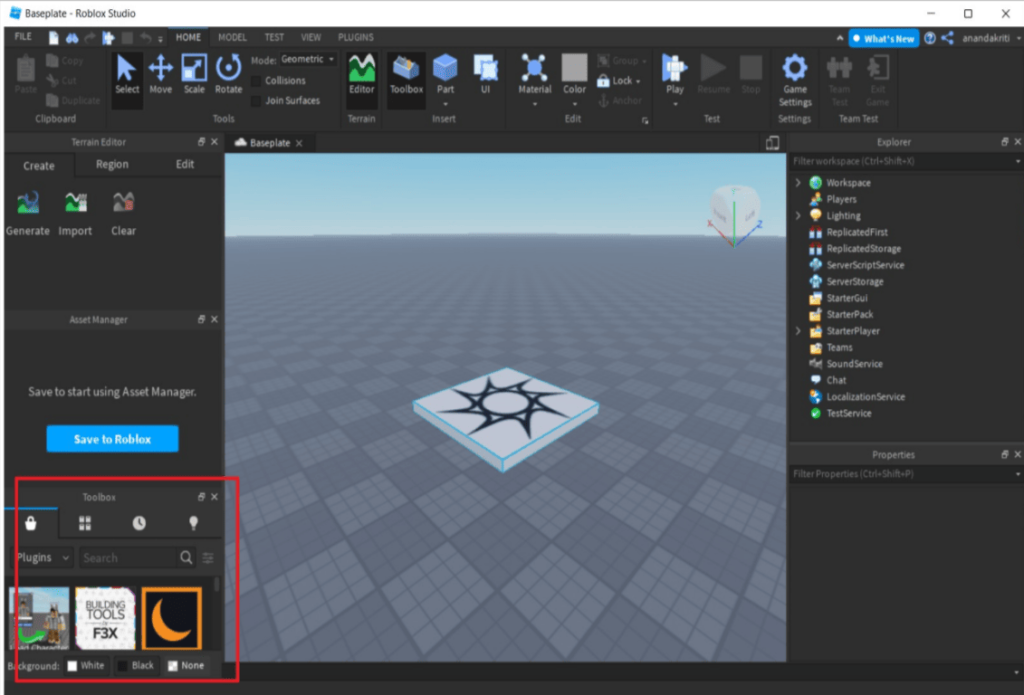
Type Moon Animator into the plugin search bar and you’ll see Moon Animator; click on it and add it to your Roblox studio plugins.
Moon Animator is a free Roblox default plugin. After installing the plugin you will be able to see it in the Plugins options just like what is shown in the image below:
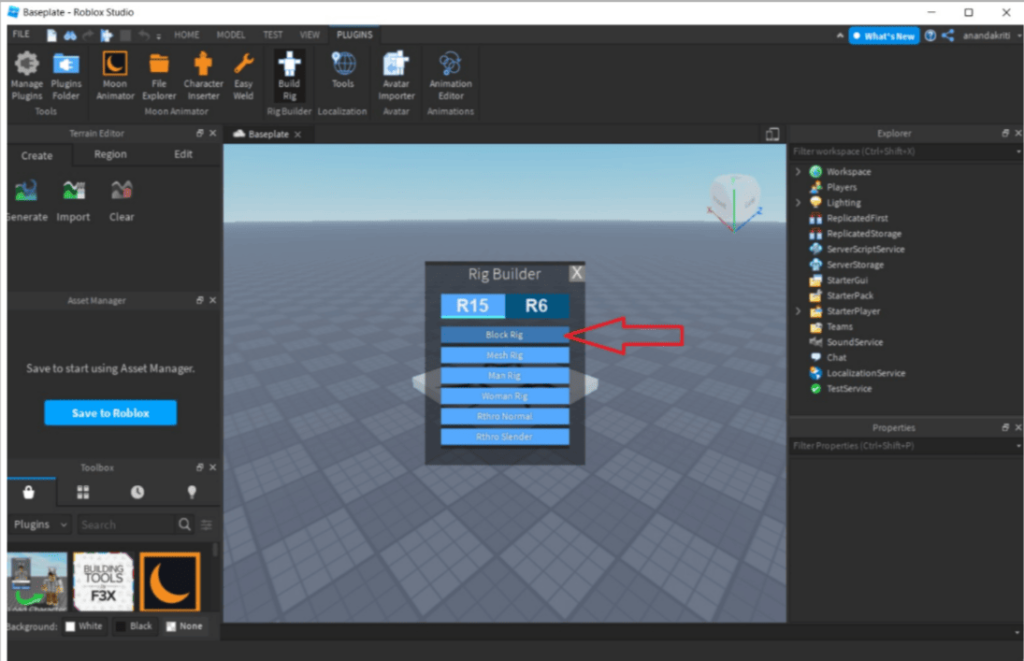
Now first we will add one avatar to create mocap. Click on Build Rig then select option Block Rig.
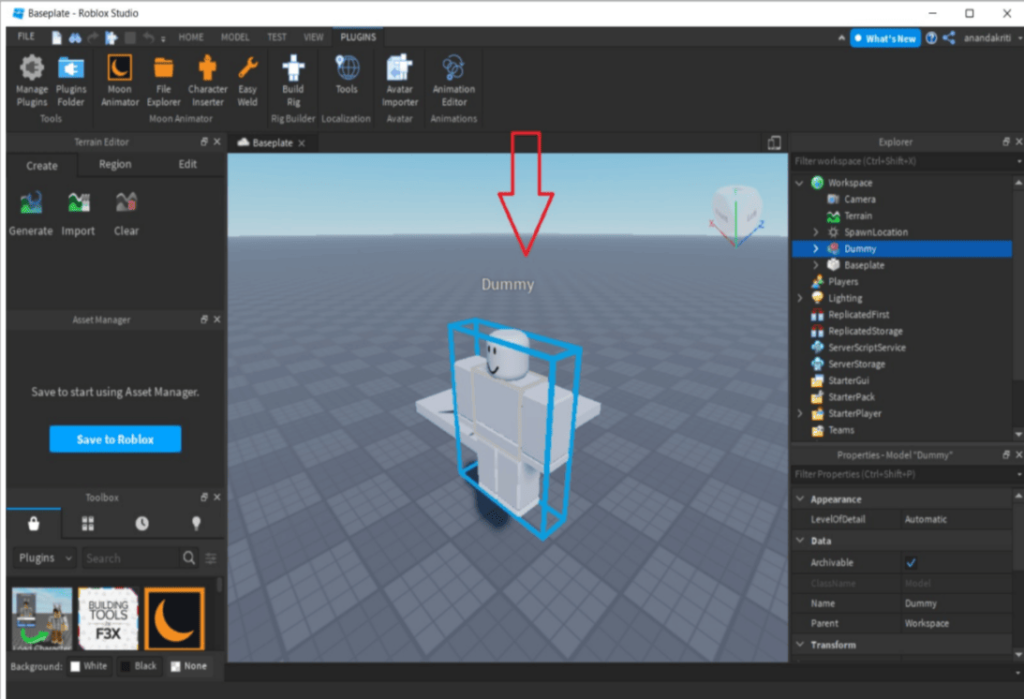
You should now see your dummy, as shown in the image below:
Now, finally, click on the Animation Editor option to start the Animation Editor for your mocap.
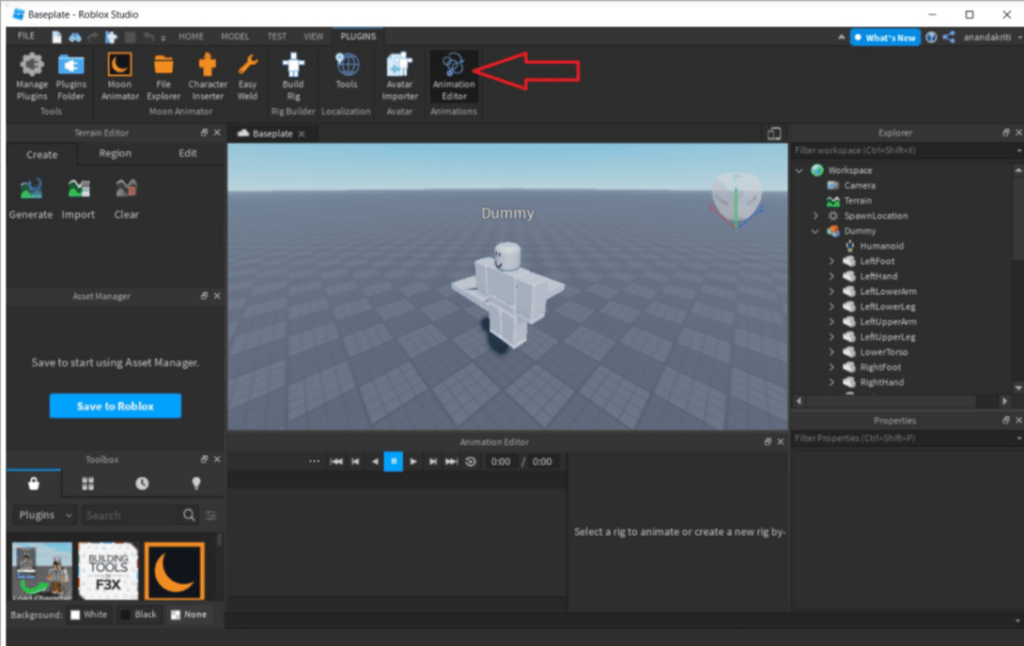
You will now see your Animation Editor; here, select your Dummy to create the motion that you want to create.
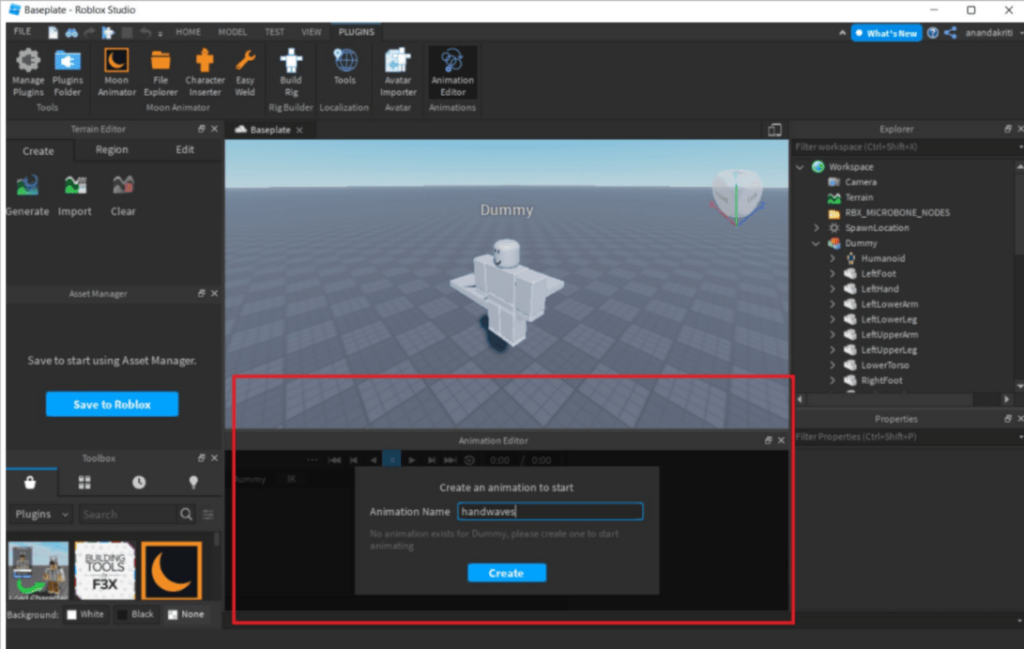
When you click on your Dummy, it will prompt you to enter an animation name, so do so.
For example, I’ll create a hand wave.
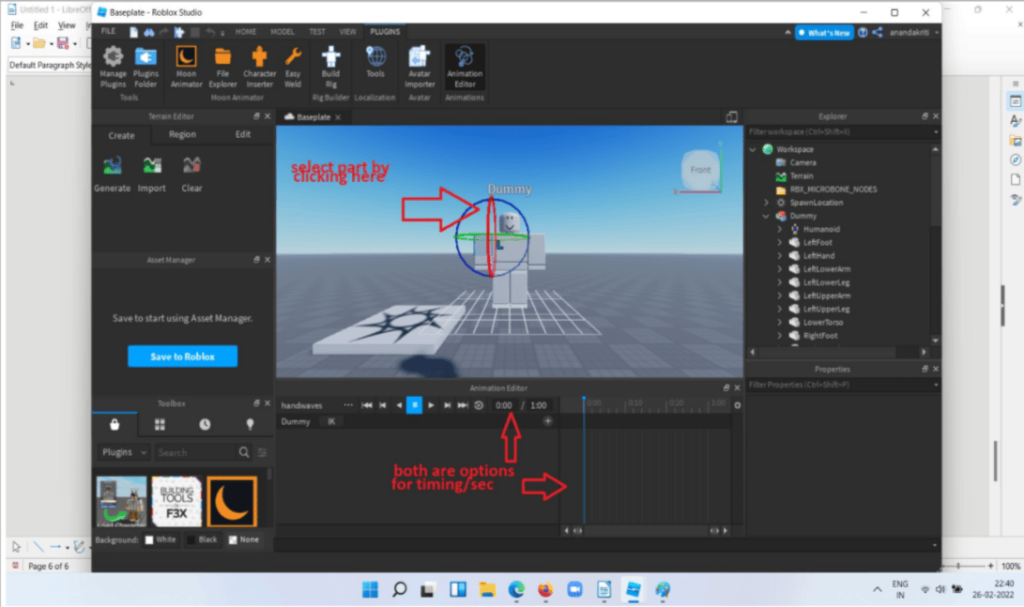
To make a hand wave, select the hand and then lift it with the red circle to move it upside down.
Also, remember to change the seconds so that the motion is created at the time you specify.
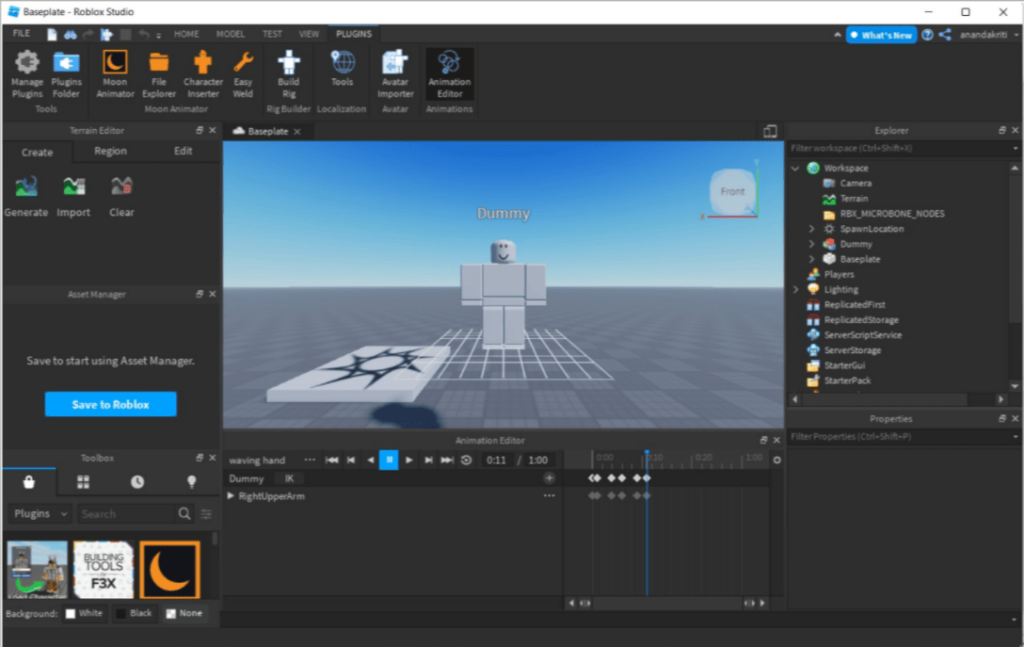
Now I’ll create for the right arm.
After moving the Dummy and changing the seconds at the same time, you should get the animation motion as shown in the image below.
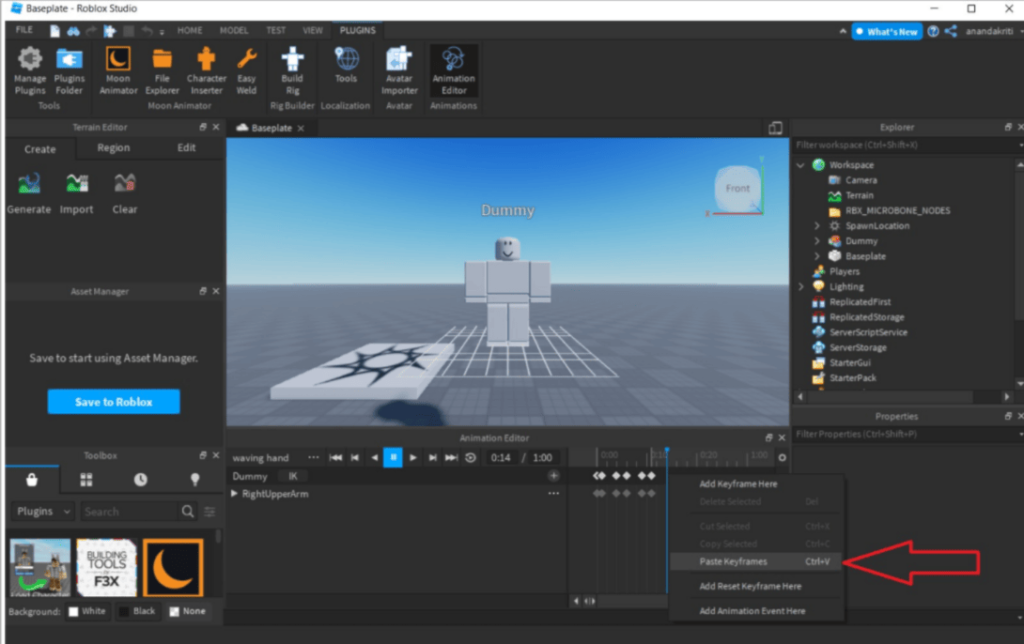
Note: If there is any step that you want to copy and create it multiple times in your mocap then just copy it by right-clicking on that timestamp as shown in the image below:
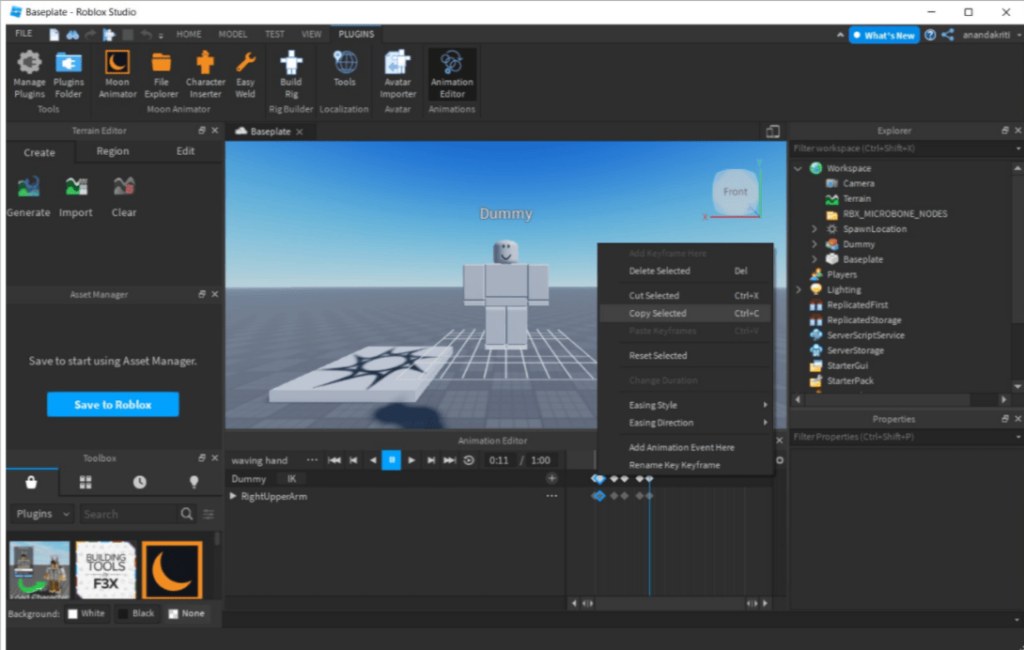
In the same way, to paste it, simply select the timestamp where you want to paste it. Then right-click and select the paste option.
You can now test it to see if all of the steps are in the correct motion.
Let’s save our mocap now that it’s finished.
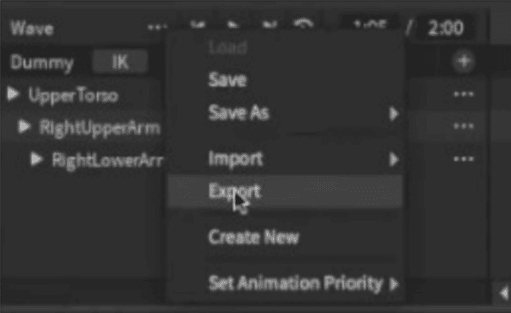
Now, click on the three dots beside the name to save it and give it a name.
Give your animation a title, write a brief description about it, and then submit it. It will state that it was successfully submitted.
Congratulations, you have completed your Roblox animation mocap.
Conclusion
In conclusion, creating mocap animation in Roblox can be a fun and exciting way to bring your game and characters to life. With the right tools and techniques, you can create high-quality animations that will enhance the player experience and make your game stand out from the crowd. In this guide, we have covered the basics of mocap animation, including how to record motion data, importing it into Roblox, and apply it to your characters. We have also explored some tips and tricks to help you fine-tune your animations and create a seamless, immersive experience for your players. Remember to always experiment, practice, and refine your skills, and don’t be afraid to ask for help or collaborate with others in the Roblox community.
With dedication and persistence, you can become a master of mocap animation in Roblox and create games that will delight and inspire players for years to come. Thank you for reading, and happy animating!
To get your hands on more educational and free resources on coding for kids, financial education for kids, and robotics for kids do check out the BrightCHAMPS Page now!
BrightChamps also teaches a variety of other programs that assist children in developing a foundation in computer programming through activities, interactive lessons, and other means.
Frequently Asked Questions (FAQs)
Mocap animation, short for motion capture animation, is a technique used to capture and record the movements of real-life objects or people and transfer them onto digital models, such as characters in a video game.
Yes, you will need motion capture equipment such as a motion capture suit, motion sensors, or a Kinect sensor to capture motion data. However, there are also other techniques such as keyframe animation that can be used to create animations without motion capture equipment.
Yes, there are many online libraries and motion capture studios that offer mocap animations that can be downloaded and used in your Roblox game. However, you may need to purchase or license the animations and ensure they are compatible with the Roblox platform.

 We are an army of educators and passionate learners from BrightChamps family, committed to providing free learning resources to kids, parents & students.


